
Changing the Serial Port Baud Rate
1.1. Introduction to Baud Rate
Baud rate is the number of symbols (modulation rate) transferred per second in data communication, and its unit is baud. In essence, it is an important indicator for measuring data transfer speed and reflects the frequency of signal changes in serial communication. Simply put, the baud rate determines the number of “signal units” that a serial port can transmit per second. Because each signal unit can carry one or more bits of data, the baud rate is closely related to the bit rate, but the two are not exactly the same (bit rate = baud rate × number of bits per symbol).
In serial communication for embedded devices, common baud rates include 9600, 19200, 38400, and 115200. When serial communication is performed between devices, the baud rates of the transmitter and receiver must match exactly. If they do not match, problems such as garbled characters during data transfer, data loss, or even communication failure may occur. This is a basic prerequisite for serial communication.
1.2. Changing the Baud Rate Setting
1.2.1 Changing the U-BOOT defconfig Setting
-
Refer to “Embedded Low-level Development/Ubuntu System SDK/Obtaining the Source Code” and obtain the SDK.
-
Enter the u-boot directory and modify the rv1126b_defconfig file.
vim u-boot/configs/rv1126b_defconfig
1.2.1 Changing the U-BOOT defconfig Setting Figure 1
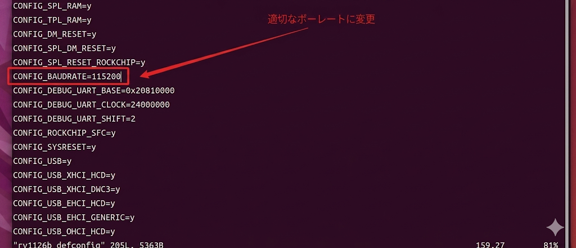
1.2.1 Changing the U-BOOT defconfig Setting Figure 2
1.2.2 Changing the U-BOOT DDR BIN Setting
DDR BIN is the initialization configuration file for DDR memory. On some devices, the serial port baud rate setting is associated with the DDR BIN. Therefore, if the setting here is not changed, the serial port may not function properly after the device starts. If you have other configuration requirements, read the ddrbin_tool_user_guide.txt guide. The modification procedure is as follows:
- Checking the RV1126BMINIALL.ini Setting
Open the rkbin/RKBOOT directory and check the RV1126BMINIALL.ini setting.
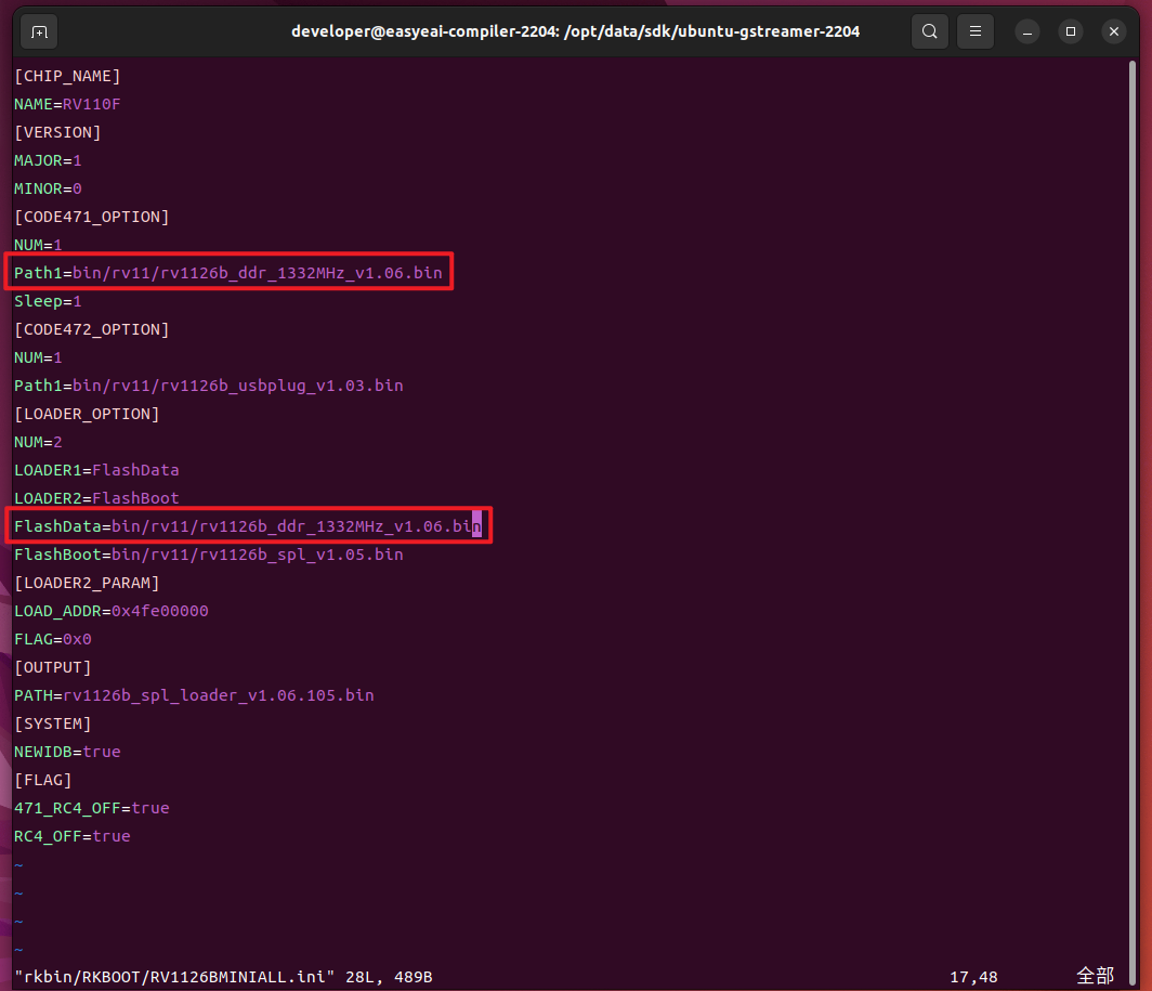
1.2.2 Changing the U-BOOT DDR BIN Setting Figure 3
Check the initial default .bin file name: rv1126b_ddr_1332MHz_v1.06.bin
- Copying a New .bin File
sudo cp rv1126b_ddr_1332MHz_v1.06.bin test.bin- Configuring with ddrbin_tool
Obtain the settings of the rv1126b_ddr_1332MHz_v1.06.bin file.
cd rkbin/tools./ddrbin_tool.py rv1126b -g gen_param.txt../bin/rv11/rv1126b_ddr_1332MHz_v1.06.bin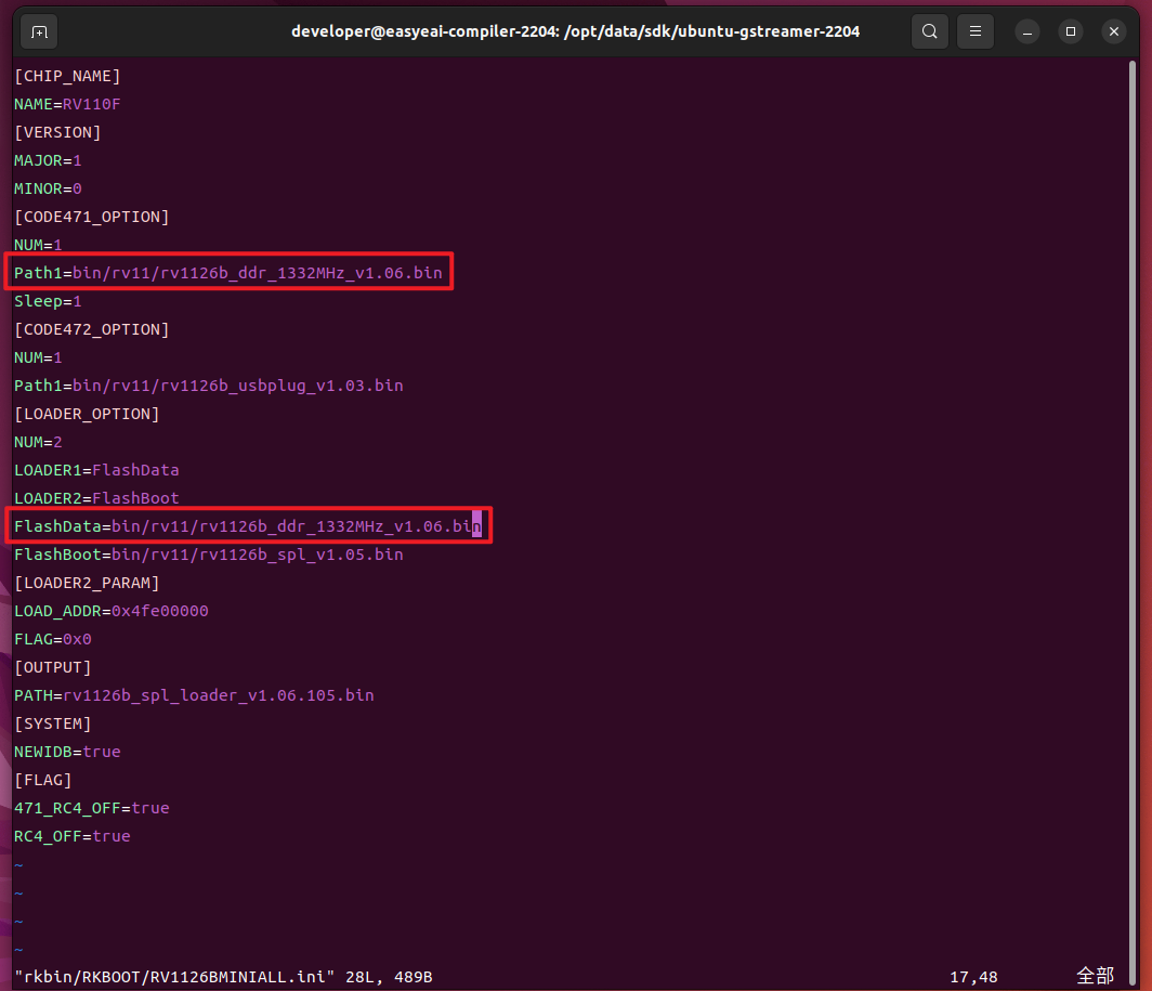
1.2.2 Changing the U-BOOT DDR BIN Setting Figure 4
Open gen_param.txt to view the detailed configuration parameters. In the following steps, make changes based on this default configuration.

1.2.2 Changing the U-BOOT DDR BIN Setting Figure 5
Modify the .bin file settings by configuring ddrbin_param.txt.
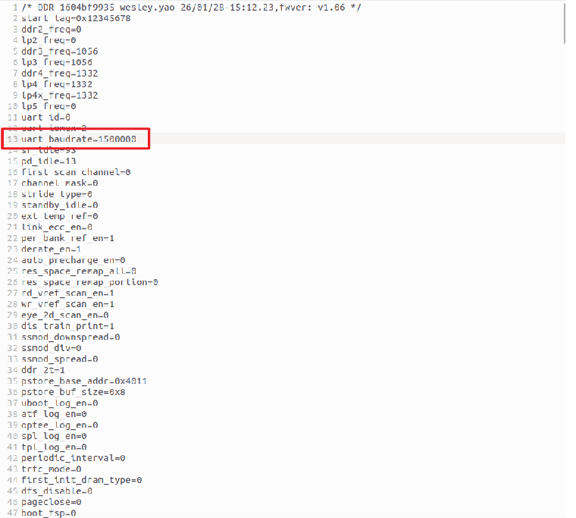
1.2.2 Changing the U-BOOT DDR BIN Setting Figure 6
./ddrbin_tool.py rv1126b ddrbin_param.txt ../bin/rv11/test.bin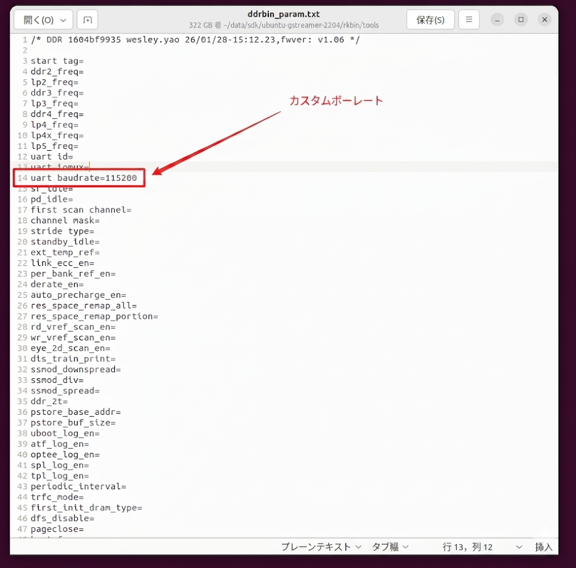
1.2.2 Changing the U-BOOT DDR BIN Setting Figure 7
💡 Note: Normally, the parameter values in ddrbin_param.txt are empty (blank). Empty values indicate the default values of the corresponding .bin file. You can use a command to check whether the settings of the test.bin file are correct.
Changing the RV1126BMINIALL.ini Setting
vim rkbin/RKBOOT/RV1126BMINIALL.ini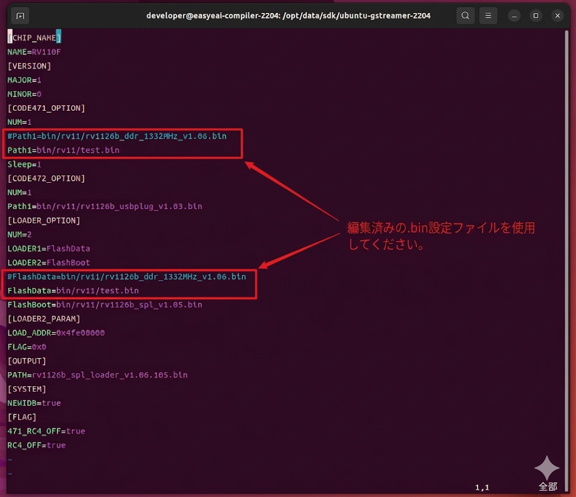
1.2.2 Changing the U-BOOT DDR BIN Setting Figure 8
1.2.3 Compiling the U-BOOT Configuration
- Compile the U-BOOT configuration.
./build.sh uboot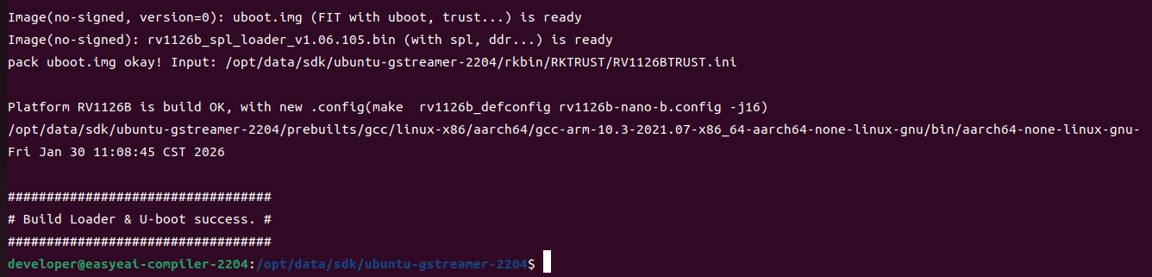
1.2.3 Compiling the U-BOOT Configuration Figure 9
- Update the compiled U-BOOT configuration to the firmware tool.
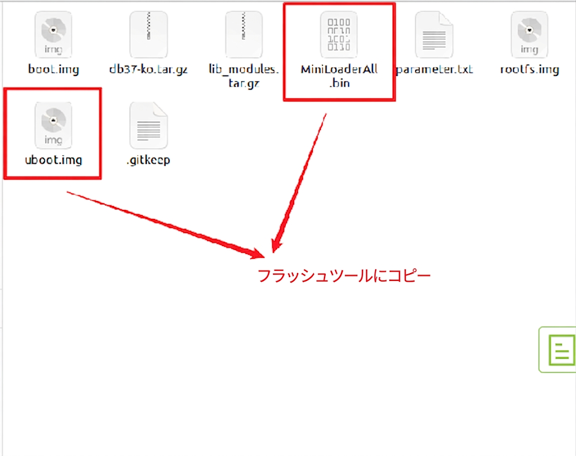
1.2.3 Compiling the U-BOOT Configuration Figure 10
At this point, if only these two configuration files are reflashed, the output of the U-BOOT part of the serial console will be displayed normally, but the output of the kernel part will still be garbled.
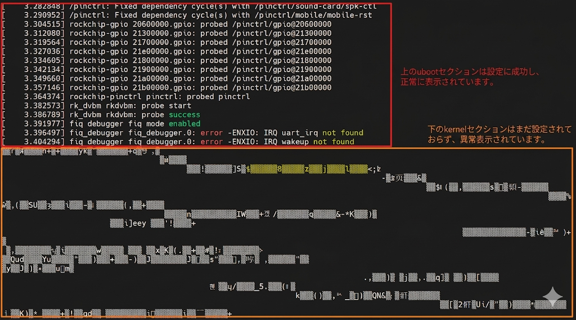
1.2.3 Compiling the U-BOOT Configuration Figure 11
Therefore, to make everything display normally, you need to continue configuring the kernel.
1.2.4 Changing the Kernel Configuration
- Change the rv1126b-nano.dts setting.
vim kernel_dev/arch/arm64/boot/dts/rockchip/rv1126b-nano.dts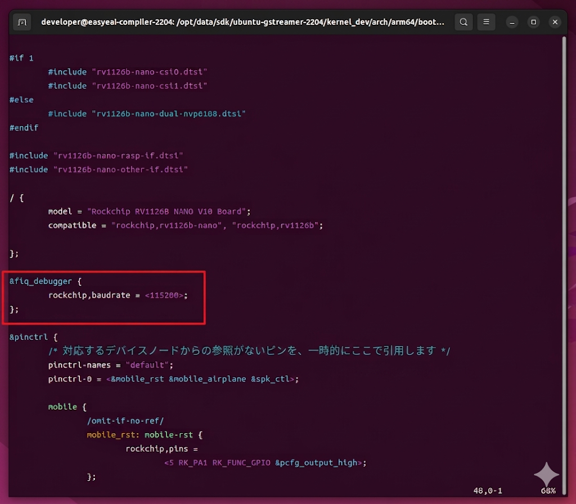
1.2.4 Changing the Kernel Configuration Figure 12
- Compile the kernel configuration.
./build.sh kernel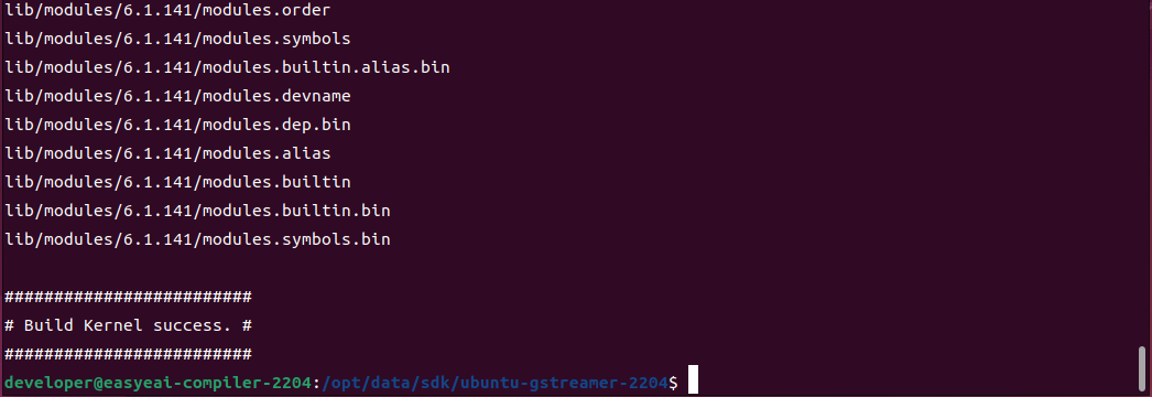
1.2.4 Changing the Kernel Configuration Figure 13
If you are not familiar with the kernel compilation process, refer to the article “Embedded Low-level Development/Ubuntu System SDK/kernel”.
- Update the compiled kernel configuration to the firmware tool.
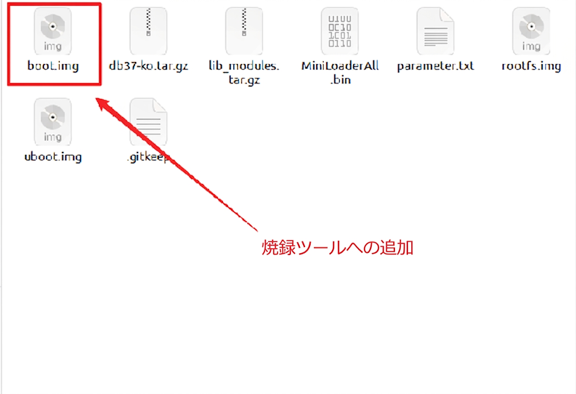
1.2.4 Changing the Kernel Configuration Figure 14
1.2.5 Reflashing
- Reflash all updated settings to the board.
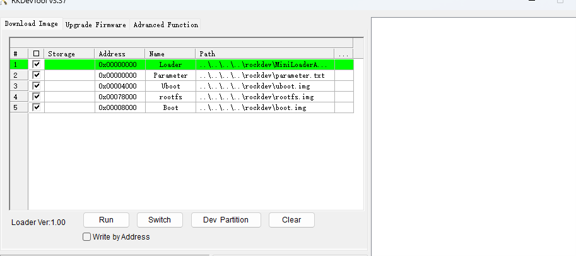
1.2.5 Reflashing Figure 15
- Finally, all serial console output will be displayed normally.
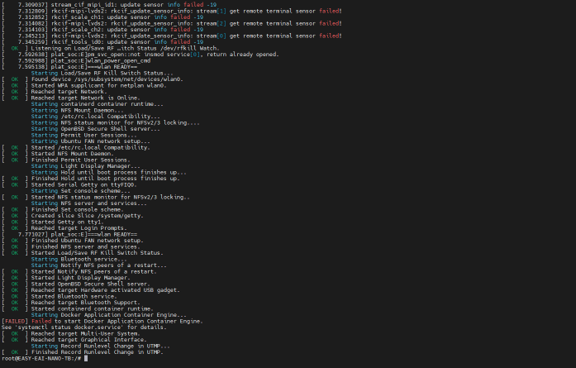
1.2.5 Reflashing Figure 16