
Introduction to Using GStreamer
1.1. Introduction to GStreamer
GStreamer is an open-source multimedia framework for building streaming media applications. It is designed to simplify the development of audio/video applications.
1.1.1 Basic Concepts
- Pipeline (pipeline): A complete GStreamer workflow. It is the basic unit for multimedia task processing (it must start with a source-class 【element】 and end with a sink-class 【element】).
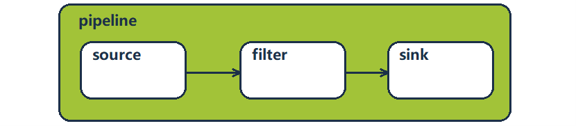
1.1.1 Basic Concepts Figure 1
- Element (element): Each node in the workflow (such as source, filter, and sink). Data is transferred between elements through a 【pipe】.
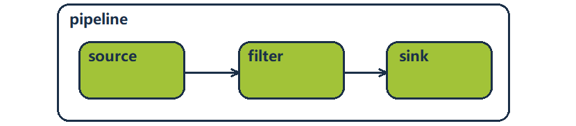
1.1.1 Basic Concepts Figure 2
- Pad (Pad): An interface for data to enter and leave elements. Input pads are called sinkPads, and output pads are called srcPads.
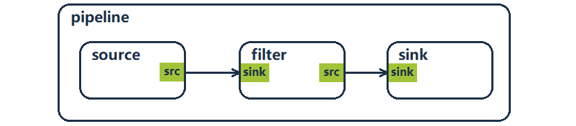
1.1.1 Basic Concepts Figure 3
Some elements have multiple pads, such as demuxers and tees.
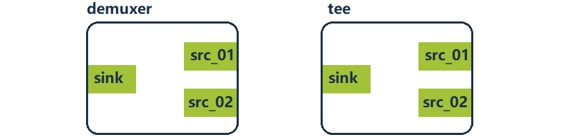
1.1.1 Basic Concepts Figure 4
1.1.2 GStreamer Tools
-
gst-launch-1.0: A powerful tool for building and starting pipelines.
-
gst-inspect-1.0: Displays information about available plugins and elements.
1.1.3 GStreamer Debug Information
You can use the GST_DEBUG environment variable to display debug information.
export GST_DEBUG=21.2. Encoding
Check the video nodes related to MIPI-CSI or USB Camera in the relevant manual.
1.2.1 Recording and Saving
Enter the development board environment through serial debugging or SSH debugging.

1.2.1 Recording and Saving Figure 5
Assume that the device node of cam0 is video23. Enter the following command to record video.
gst-launch-1.0 v4l2src device=/dev/video23 ! mpph264enc ! mpegtsmux ! filesink location=./1.ts -e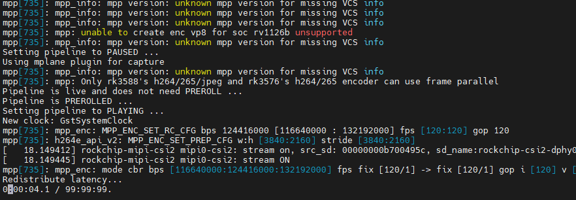
1.2.1 Recording and Saving Figure 6
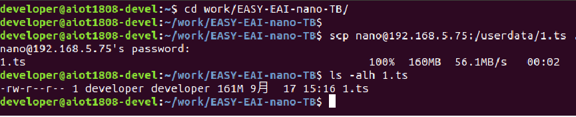
Press 【Ctrl+C】 to stop recording, and a ts file will be generated.
You can also adjust the frame rate and resolution for recording:
1.2.1 Recording and Saving Figure 7
# Frame Rate Adjustment
gst-launch-1.0 v4l2src device=/dev/video23 ! video/x-raw,framerate=30/1 ! videoconvert ! mpph264enc ! mpegtsmux ! filesink location=./1.ts -e# Resolution and Frame Rate Adjustment
gst-launch-1.0 v4l2src device=/dev/video23 ! video/x-raw,width=1280,height=800,framerate=30/1 ! videoconvert ! mpph264enc ! mpegtsmux ! filesink location=./1.ts -eRecording in FLV format or as an H.264 raw stream is also supported.
gst-launch-1.0 v4l2src device=/dev/video23 ! mpph264enc ! h264parse ! flvmux ! filesink location=./1.flv -eElementary stream
gst-launch-1.0 v4l2src device=/dev/video23 ! mpph264enc ! filesink location=./1.h264 -e1.2.2 UDP Streaming
First, create a file named gst_test.sdp.
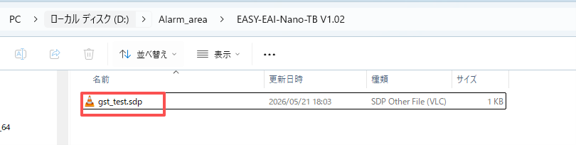
1.2.2 UDP Streaming Figure 8
Open this file with a text editor (such as Notepad) and add the following content (Note: change both IP addresses to the IP address of the user’s PC).
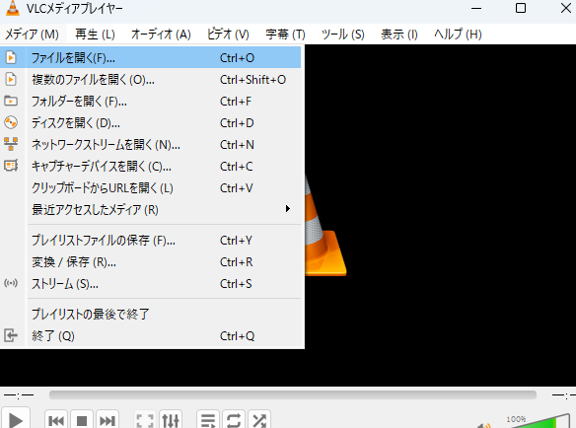
Plaintextv=0o=- 0 0 IN IP4 192.168.10.111s=H.264 Stream from RV1126c=IN IP4 192.168.10.111t=0 0m=video 8554 RTP/AVP 96a=rtpmap:96 H264/90000Next, open the created file with VLC media player (see the figure below).
1.2.2 UDP Streaming Figure 9
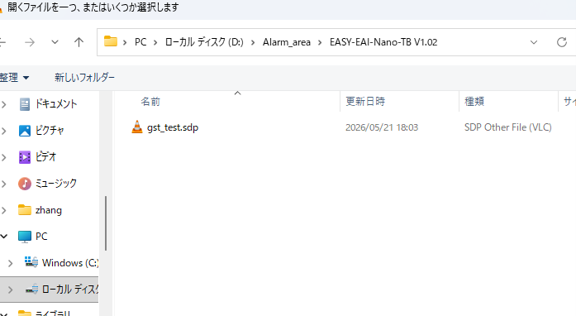
1.2.2 UDP Streaming Figure 10
adb shellUse the command to log in to the 【development board environment】, and then enter the following command (Note: change the IP address in the command to the IP address of the user’s PC). This encodes the video from the video node and streams it to VLC on the PC via UDP.
gst-launch-1.0 v4l2src device=/dev/video23 ! video/x-raw,framerate=30/1 ! mpph264enc ! h264parse ! rtph264pay config-interval=1 ! queue max-size-buffers=100 leaky=downstream ! udpsink host=192.168.10.111 port=8554 sync=falseThe execution result (operation) is as follows:
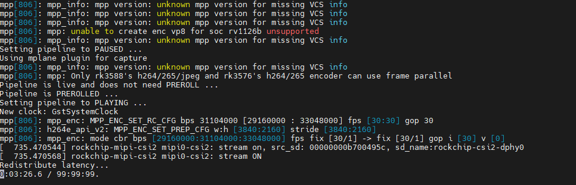
1.2.2 UDP Streaming Figure 11
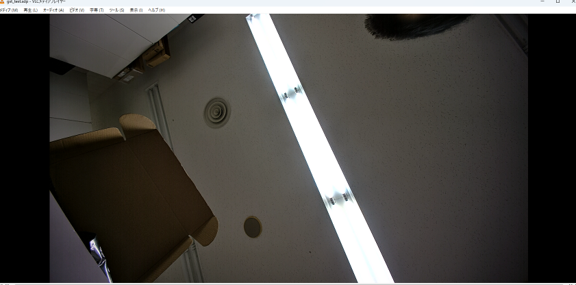
1.2.2 UDP Streaming Figure 12
1.2.3 RTSP Server
Install the rtspServer-related libraries, then obtain and compile the source code.
sudo apt-get install libgstrtspserver-1.0-devAfter the installation is 【successful】, run the following command to obtain the source code of the rtspServer application:
wget https://raw.githubusercontent.com/GStreamer/gst-rtsp-server/1.14/examples/test-launch.cThen compile this source code with the following command:
gcc test-launch.c -o test-launch \$(pkg-config --cflags --libs gstreamer-1.0 gstreamer-rtsp-server-1.0)After test-launch is generated successfully, run this rtspServer with the following command:
./test-launch "v4l2src device=/dev/video23 ! mpph264enc ! rtph264pay name=pay0 pt=96"Finally, use VLC to receive (pull) the RTSP stream through port 8554.
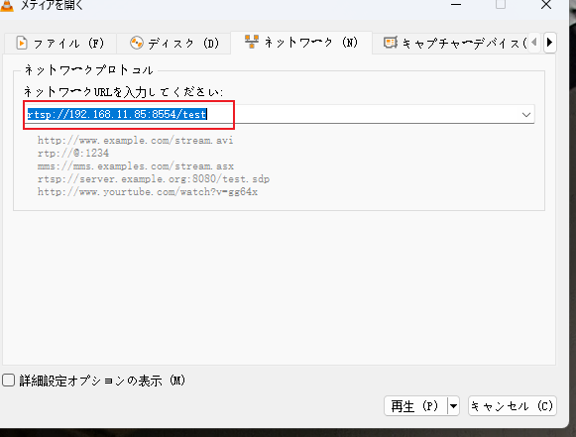
1.2.3 RTSP Server Figure 13
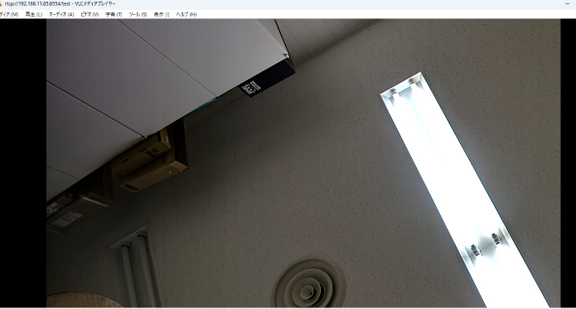
1.2.3 RTSP Server Figure 14
To specify the resolution and frame rate, refer to the following example:
./test-launch "v4l2src device=/dev/video23 ! video/x-raw,width=1920,height=1080,framerate=30/1 ! videoconvert ! mpph264enc ! rtph264pay name=pay0 pt=96"1.3 Notes
During encoding, do not set a frame rate that exceeds the maximum capability of the encoding format.
1.4. Decoding
1.4.1 Decoding Recorded Files
Run the following command to decode and play back the file.
gst-launch-1.0 filesrc location=/userdata/1.ts ! tsdemux ! queue ! h264parse ! mppvideodec ! videoflip method=1 ! autovideosink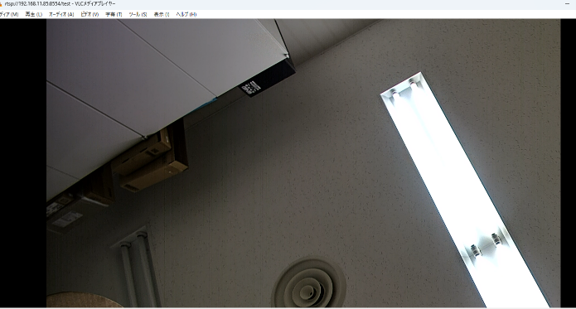
1.4.1 Decoding Recorded Files Figure 15
Playback of an FLV-format video when the same file is in the /userdata/ directory:
gst-launch-1.0 filesrc location=./1.flv ! flvdemux ! h264parse ! mppvideodec ! videoconvert ! videoflip method=1 ! autovideosinkPlayback of an H.264 raw stream (Raw stream) video:
gst-launch-1.0 filesrc location=/userdata/1.h264 ! h264parse ! mppvideodec ! videoflip method=1 ! autovideosink sync=false1.4.2 Receiving and Decoding an RTSP Stream
Receive and display the stream from the IPCamera.
gst-launch-1.0 rtspsrc location=rtsp://admin:a12345678@192.168.5.68 ! rtph264depay ! h264parse ! mppvideodec ! videoflip method=1 ! autovideosink sync=false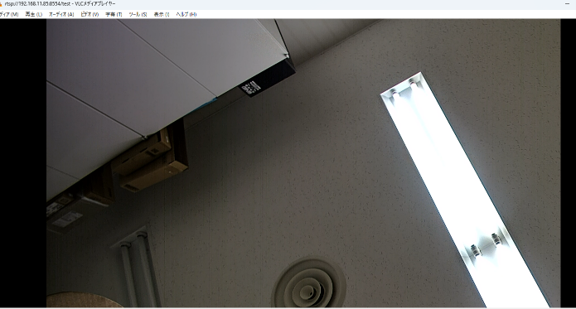
1.4.2 Receiving and Decoding an RTSP Stream Figure 16
1.5. Using the Splitter (tee)
Use the splitter (tee), for example, when displaying video on the screen while recording it at the same time.
gst-launch-1.0 v4l2src device=/dev/video23 ! video/x-raw,framerate=30/1 ! tee name=t t. ! queue ! videoflip method=1 ! autovideosink sync=false t. ! queue ! mpph264enc ! mpegtsmux ! filesink location=./1.tsNode diagram:
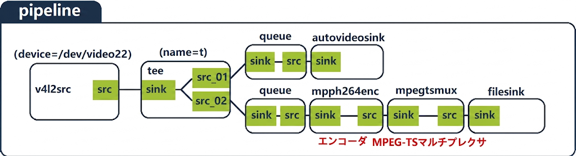
1.5. Using the Splitter (tee) Figure 17
The command can be understood by dividing it into the following three parts:
Part 1: obtaining the video stream:
gst-launch-1.0 v4l2src device=/dev/video23 ! video/x-raw,framerate=30/1 ! tee name=tPart 2: duplicating the video stream and outputting it to the display window (autovideosink):
t\. ! queue ! videoflip method=1 ! autovideosink sync=falsePart 3: duplicating the video stream, sending it to the encoder, and finally packaging it as a TS file:
t\. ! queue ! mpph264enc ! mpegtsmux ! filesink location=./1.ts1.5.1 Notes
The implementation principle of the splitter (tee) is to copy data through the CPU and send it to the pipeline. Therefore, when it is used to process data in raw formats (such as YUV/RGB), CPU and memory load (overhead) will increase.
1.6. Using gst-inspect-1.0
List all elements
gst-inspect-1.0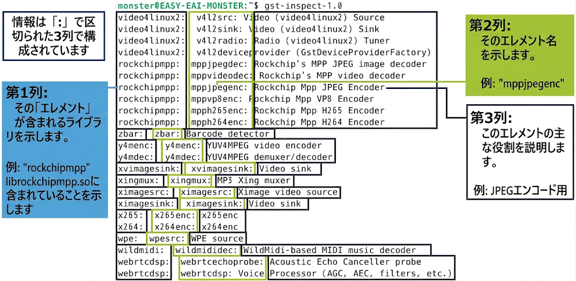
1.6. Using gst-inspect-1.0 Figure 18
Check information about a specific element
gst-inspect-1.0 v4l2src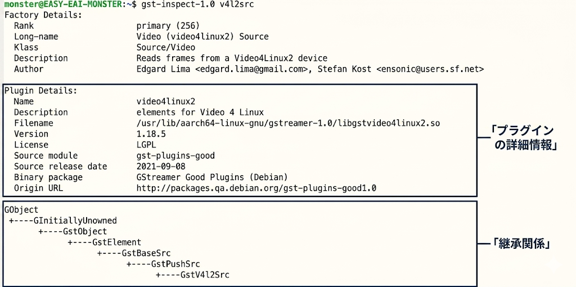
1.6. Using gst-inspect-1.0 Figure 19
1.7. GStreamer Documentation
Official website: GStreamer Official Documentation