
Face Detection Algorithm Execution Guide
1. Face Detection Overview
Face detection is an essential preprocessing step for tasks such as face recognition, face attribute classification, face editing, and face tracking. Its performance directly affects downstream tasks such as face recognition. Although face detection in unconstrained environments has improved significantly over the past decades, detecting faces accurately and efficiently in real-world environments remains an important challenge. This is caused by factors such as pose variation, expression, scale, illumination, image distortion, and face occlusion. Compared with general object detection, face detection has relatively small aspect-ratio variation, while its scale variation is very large, ranging from only a few pixels to thousands of pixels.
The performance of this face detection algorithm on the dataset is as follows.
| Face detection algorithm | performance |
|---|---|
| FDDB | 98.64% |
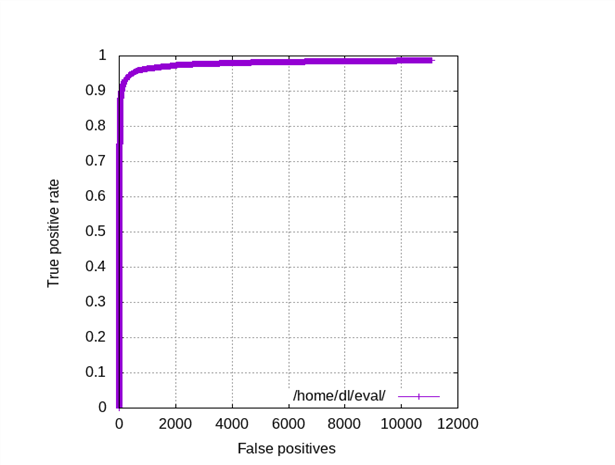
Figure 1-1
The execution efficiency on the CSUN RV1126B board is as follows.
| Algorithm type | Execution efficiency |
|---|---|
| face_detect | 24ms |
2. Quick Start
2.1 Preparing the Development Environment
If you are reading this document for the first time, refer to the Getting Started Guide / Preparing and Updating the Development Environment, and follow the related steps to deploy the compilation environment. Run the run script on the Ubuntu system on the PC side to enter the Docker development environment.
cd ~/linuxshare/work/rv1126b/jp/embedded/images/develop_environment./run.sh 2204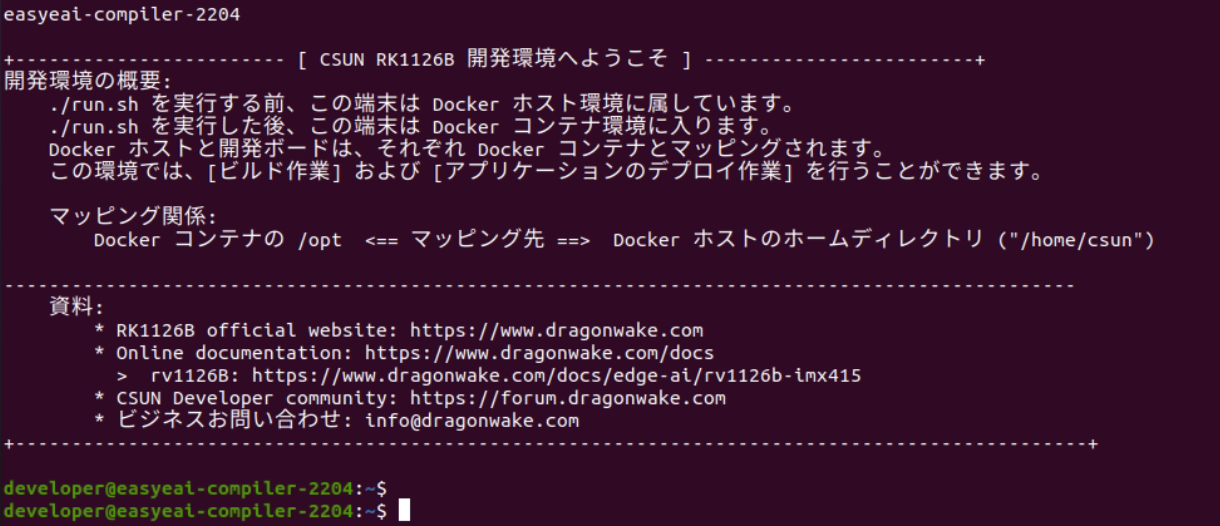
Figure 1-2
2.2 Downloading the Source Code
In the Docker development environment, create a management directory for storing the source code repository. Use git to clone the remote repository into the management directory. Even when downloading from the GitHub web page, download the entire repository. Do not download only the directory corresponding to this sample.
cd /opt/linuxshare/work/rv1126b/jp/AI/demo/ai-algorithmgit clone https://github.com/csunltd/rv1126b-ai-toolkit.git2.3 Model Deployment
To run the algorithm demo, first download the face detection algorithm model. Extract the downloaded file and copy the face detection algorithm model to the Release/ directory.
https://dl.dragonwake.com/download/rv1126b/AI/demo/01_face-detect.zip
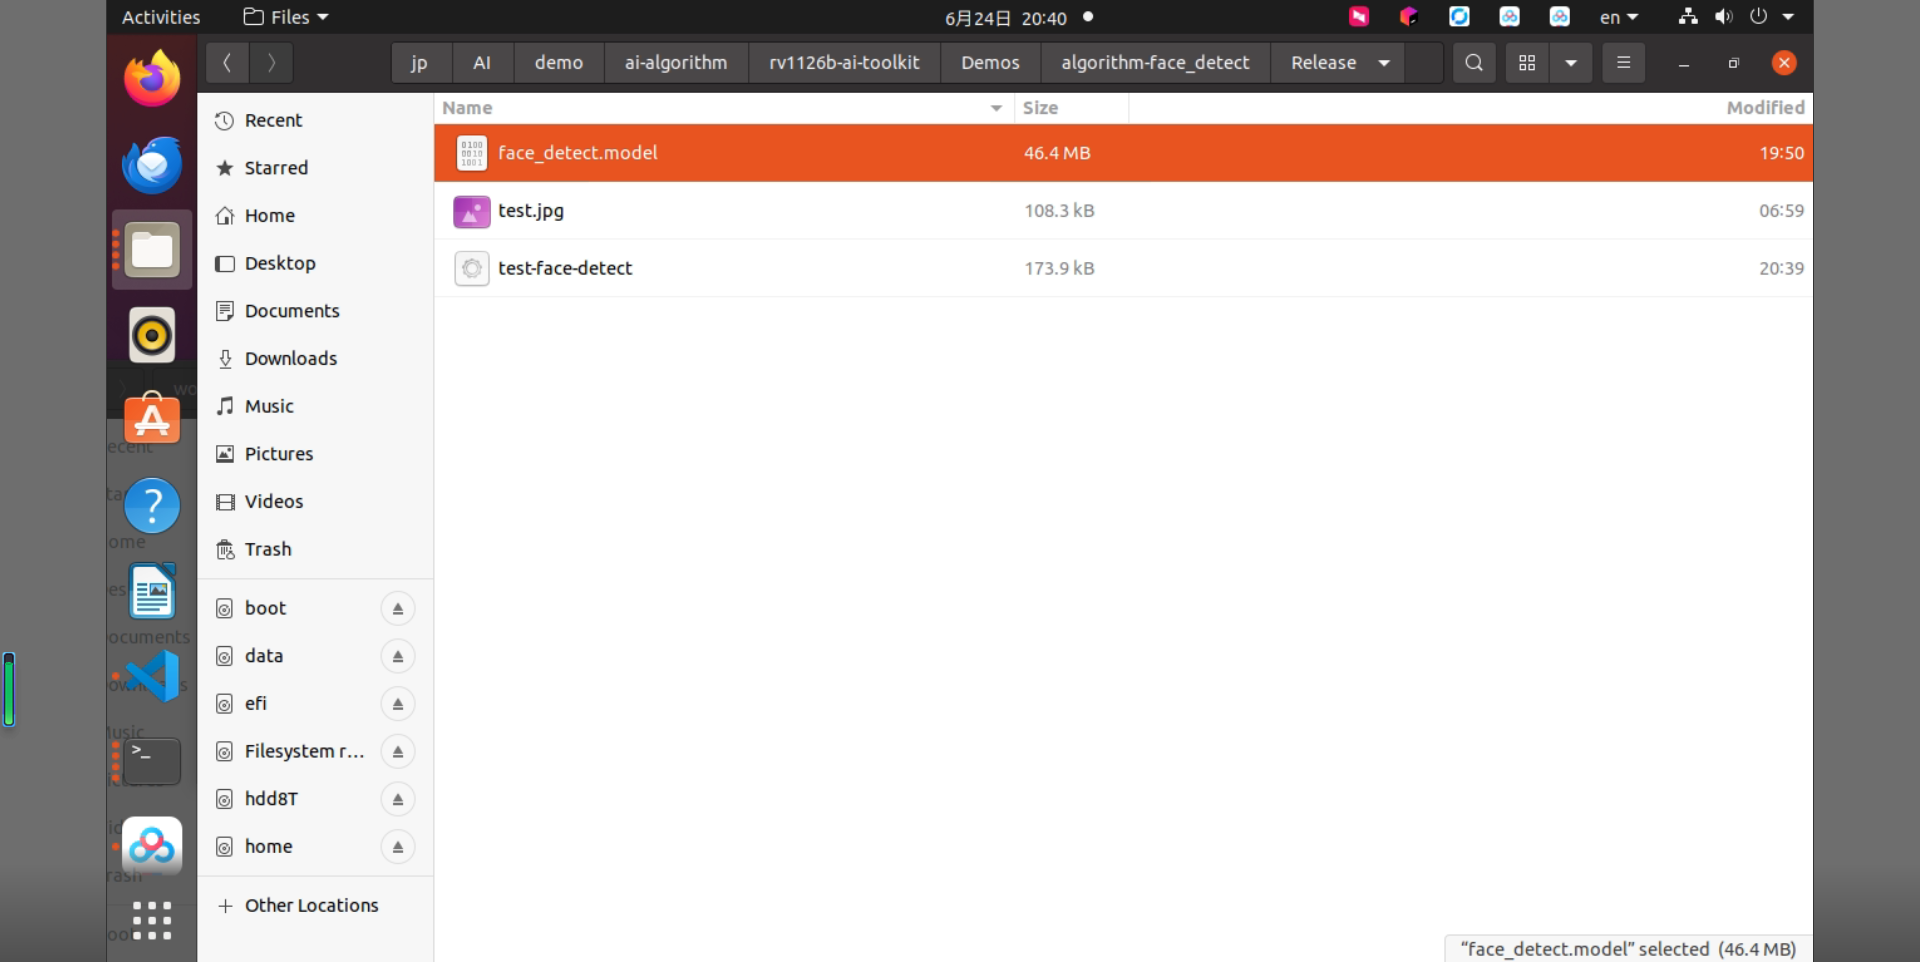
Figure 2-1
2.4 Building the Sample
Move to the sample directory and run the build. Because the dependent libraries are placed on the development board, keep /mnt mounted during cross-compilation. When build.sh cpres is specified, resources under Release/ are copied to the development board.
cd rv1126b-ai-toolkit/Demos/algorithm-face_detect./build.sh cpressudo mount -t nfs -o vers=3,proto=tcp,mountproto=tcp,nolock,retrans=5,timeo=5 192.168.10.85:/ /mnt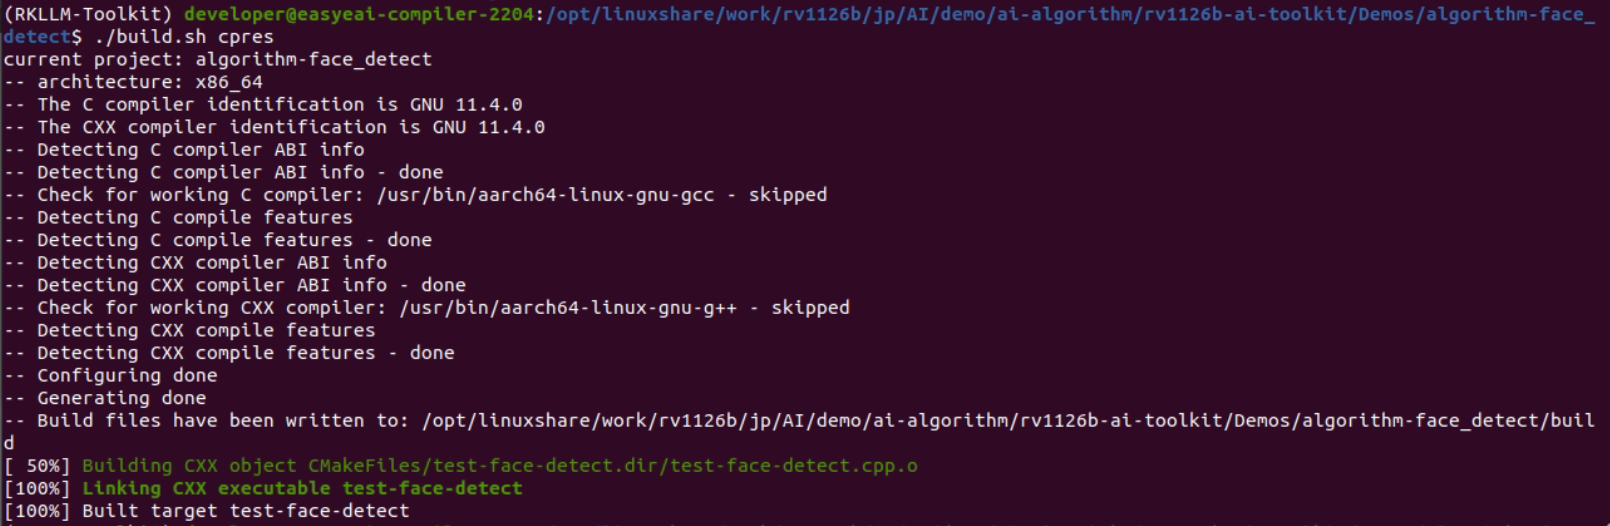
Figure 2-2
2.5 Running the Sample and Checking Results
Copy the compiled files to the board, log in to the development board through serial debugging or SSH debugging, and run the sample. The result image can be copied back in the Docker compilation environment.
cp Release/* /mnt/userdata/Demo/algorithm-face_detect/cd /userdata/Demo/algorithm-face_detect/./test-face-detect test.jpg
Figure 2-3

cp /mnt/userdata/Demo/algorithm-face_detect/result.jpg .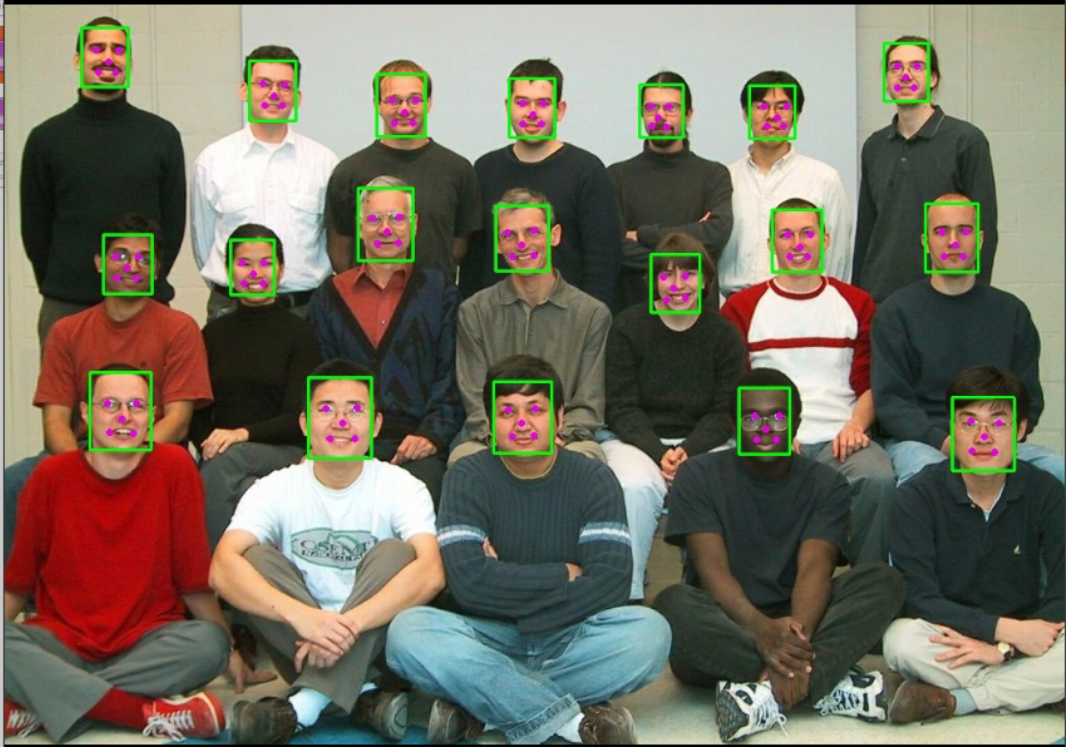
Figure 2-4
3. Face Detection API Description
3.1 Reference Method
To call the EASY EAI API library directly from a local project, add the following header file directory, library directory, and link parameter.
| Item | Description |
|---|---|
| Header file directory | easyeai-api/algorithm/face_detect |
| Library file directory | easyeai-api/algorithm/face_detect |
| Library link parameter | -lface_detect |
3.2 Face Detection Initialization Function
The function prototype is as follows.
int face_detect_init(rknn_context *ctx, const char *path);The details are as follows.
| Item | Description |
|---|---|
| Function name | face_detect_init() |
| Header file | face_detect.h |
| Input parameter | ctx: rknn_context handle |
| Input parameter | path: algorithm model path |
| Return value | Return value on success: 0 / Return value on failure: -1 |
| Description | None |
3.3 Face Detection Execution Function
The function prototype is as follows.
int face_detect_run(rknn_context ctx, cv::Mat &input_image, std::vector<det> &result);| Item | Description |
|---|---|
| Function name | face_detect_run() |
| Header file | face_detect.h |
| Input parameter | ctx: rknn_context handle |
| Input parameter | input_image: cv::Mat input image |
| Output parameter | result: face detection result |
| Return value | Return value on success: 0 / Return value on failure: -1 |
| Description | None |
3.4 Face Detection Release Function
The function prototype is as follows.
int face_detect_release(rknn_context ctx);| Item | Description |
|---|---|
| Function name | face_detect_release() |
| Header file | face_detect.h |
| Input parameter | ctx: rknn_context handle |
| Return value | Return value on success: 0 / Return value on failure: -1 |
| Description | None |
4. Face Detection Algorithm Sample
The sample directory is Demos/algorithm-face_detect/test-face-detect.cpp. The operation flow is as follows.
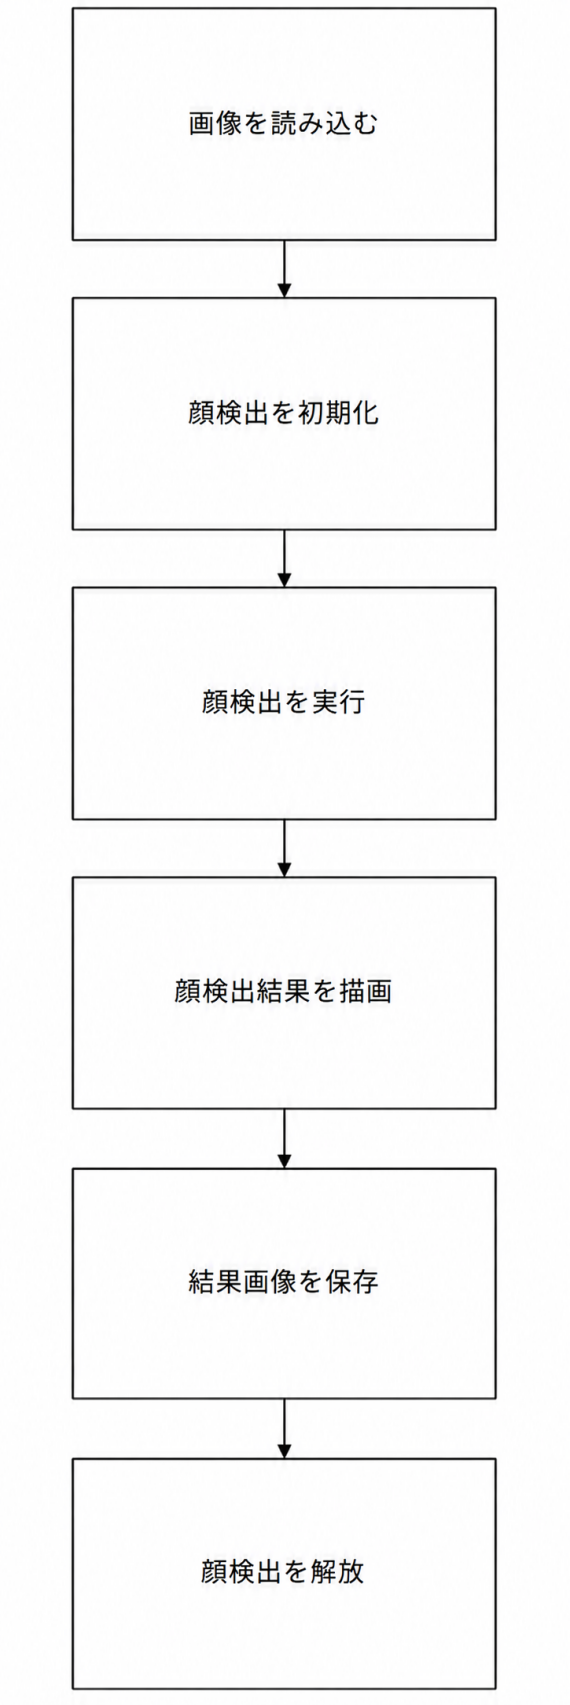
Figure 3-1
The reference sample is as follows.
#include <opencv2/opencv.hpp>#include <stdio.h>#include <sys/time.h>#include "face_detect.h"
using namespace cv;

int main(int argc, char **argv){  if( argc != 2)  {    printf("./test-face-detect xxx\n");    return -1;  }
  struct timeval start;  struct timeval end;  float time_use=0;
  rknn_context ctx;  std::vector<det> result;
  Mat image;  image = cv::imread(argv[1], 1);
  face_detect_init(&ctx, "face_detect.model");
  gettimeofday(&start,NULL);  face_detect_run(ctx, image, result);
  gettimeofday(&end,NULL);  time_use=(end.tv_sec-start.tv_sec)*1000000+(end.tv_usec-start.tv_usec);//マイクロ秒  printf("time_use is %f\n",time_use/1000);
  printf("face num:%d\n", (int)result.size());
  for (int i = 0; i < (int)result.size(); i++)  {    int x = (int)(result[i].box.x);    int y = (int)(result[i].box.y);    int w = (int)(result[i].box.width);    int h = (int)(result[i].box.height);    rectangle(image, Rect(x, y, w, h), Scalar(0, 255, 0), 2, 8, 0);

    for (int j = 0; j < (int)result[i].landmarks.size(); ++j)    {      cv::circle(image, cv::Point((int)result[i].landmarks[j].x, (int)result[i].landmarks[j].y), 2, cv::Scalar(225, 0, 225), 2, 8);    }  }
  imwrite("result.jpg", image);
  face_detect_release(ctx);
  return 0;}