
YOLOv5 Training and Deployment Guide
Document Information
This tutorial explains how to train a YOLOv5 object detection model and deploy it to a CSUN RV1126B development board.
| Item | Description |
|---|---|
| Document name | YOLOv5 Training and Deployment Guide |
| Company | Nissho Technology Co., Ltd. |
| URL | http://www.dragonwake.com |
| info@dragonwake.com | |
| Created | 2026/06/04 |
| Version | Ver1.0 |
| Revision | Initial release |
1. YOLOv5 Overview
YOLOv5 is an object detection model released by Ultralytics on June 9, 2020. It is improved based on YOLOv3 and provides four model variants: YOLOv5s, YOLOv5m, YOLOv5l, and YOLOv5x.
Compared with YOLOv4, YOLOv5 keeps detection accuracy at a similar level while reducing the average weight file size, training time, and inference time. The YOLOv5 network consists of four main parts: input, Backbone, Neck, and Head.
This tutorial describes how to train the YOLOv5 object detection algorithm and deploy it to a CSUN RV1126B board. For data annotation methods, refer to the separately published annotation guide.
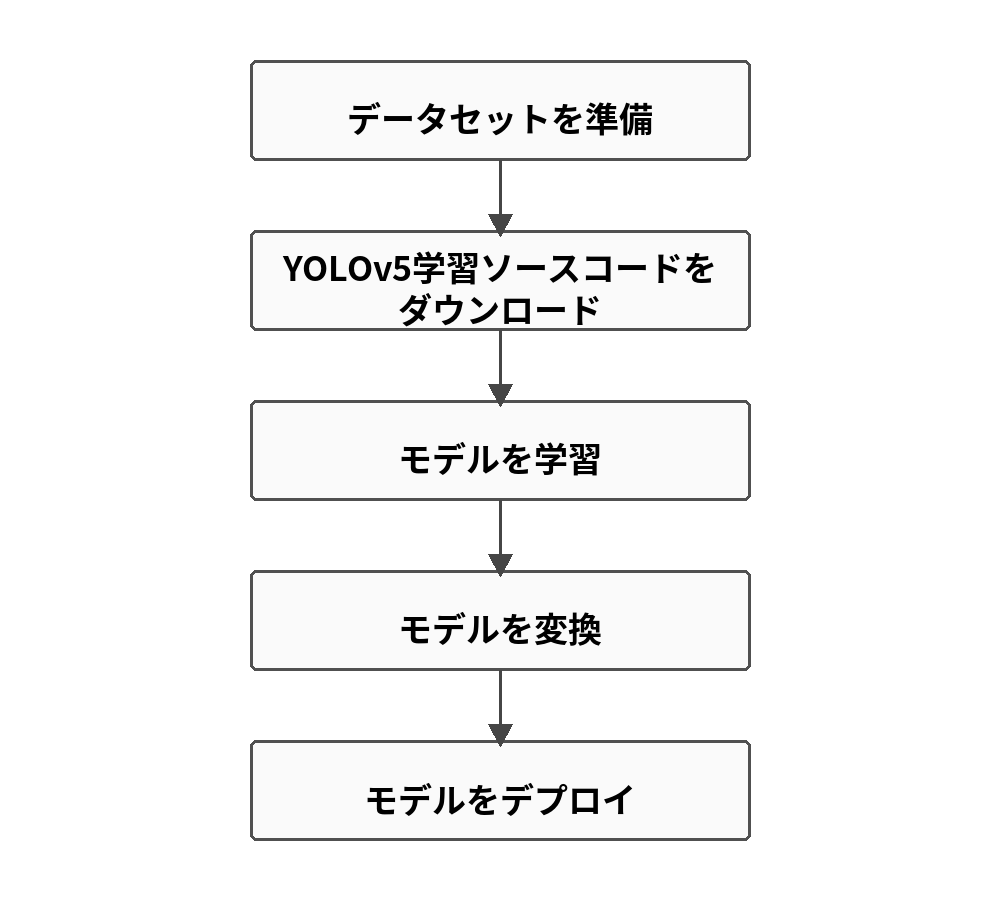
Figure 1-1 YOLOv5 training and deployment workflow
2. Download Resources
Download the resources and source code required for this manual from the following link.
https://dl.dragonwake.com/download/rv1126b/AI/demo/yolov5/AIDemo_yolov5_All.zip
After extraction, the directory structure is as follows.
|-- 01-data Dataset|-- 02-training Training source code|-- 03-model_convert AI model conversion source code|-- 04-AI_deploy AI model deployment source code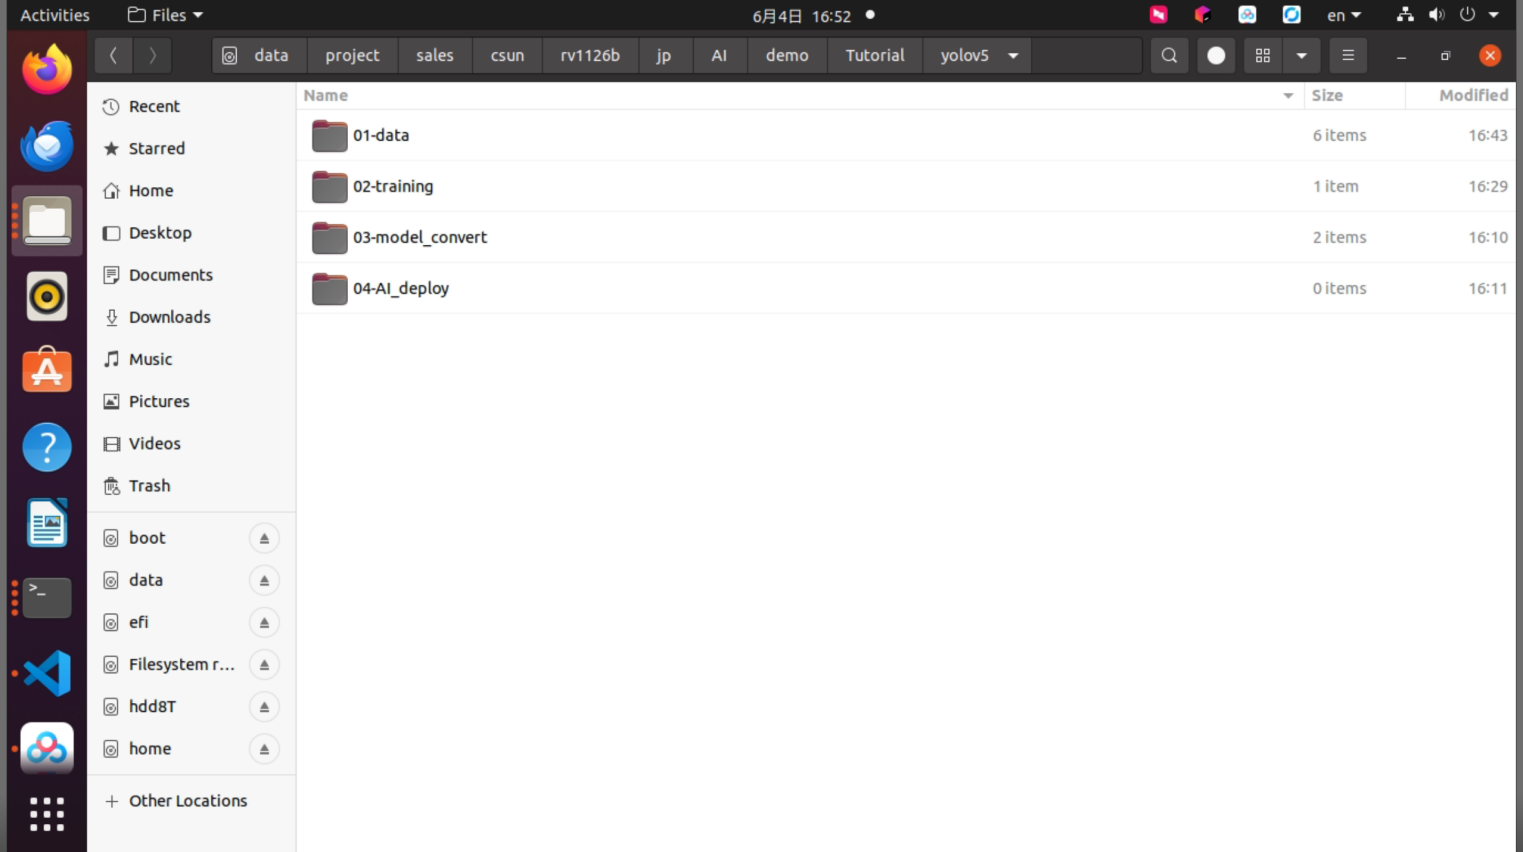
Figure 2-1 Directory structure after extracting AIDemo_yolov5_All.zip
3. Prepare the Dataset
3.1. Download the Dataset
After downloading the package from “2. Download Resources”, run the following command in the 01-data directory to extract the dataset.
unzip mask.zipAfter extraction, the following files or folders are available.
images: image files used for training and validationlabels: YOLO-format label files corresponding to each imagelist_dataset_file.py: script for generating training and validation image path lists
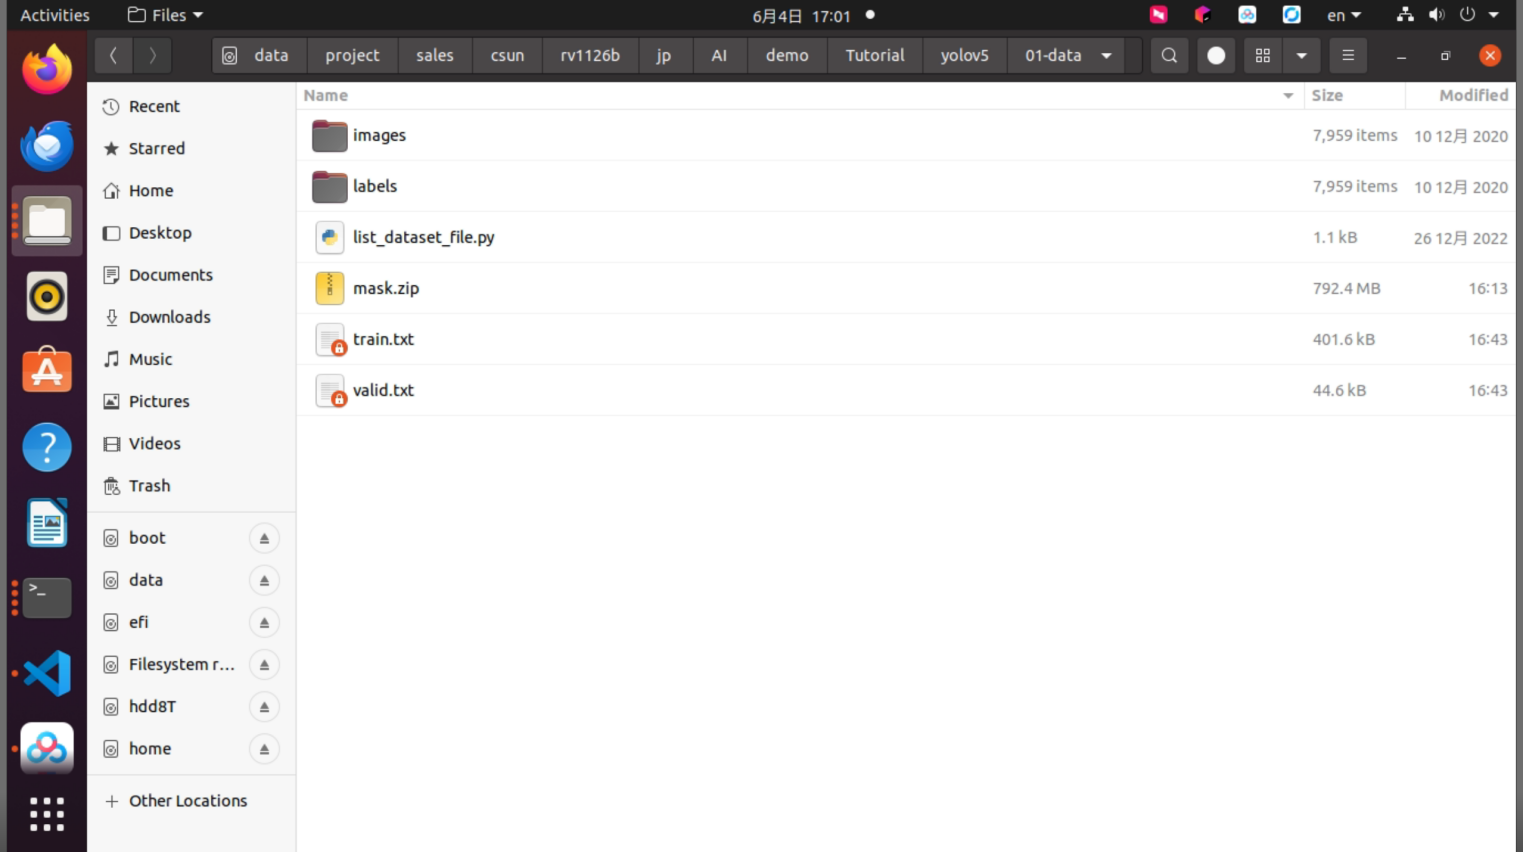
Figure 3-1 Dataset files after extraction
3.2. Generate Path Lists
Enter the RV1126B Docker development environment, then run list_dataset_file.py in the dataset directory.
cd ~/linuxshare/work/rv1126b/jp/embedded/images/develop_environment./run.sh 2204cd /opt/linuxshare/work/rv1126b/jp/AI/demo/Tutorial/yolov5/01-data/python list_dataset_file.pyAfter execution, the training sample list train.txt and validation sample list valid.txt are generated.

Figure 3-2 Output of list_dataset_file.py
These list files are referenced by the training configuration file in later steps.
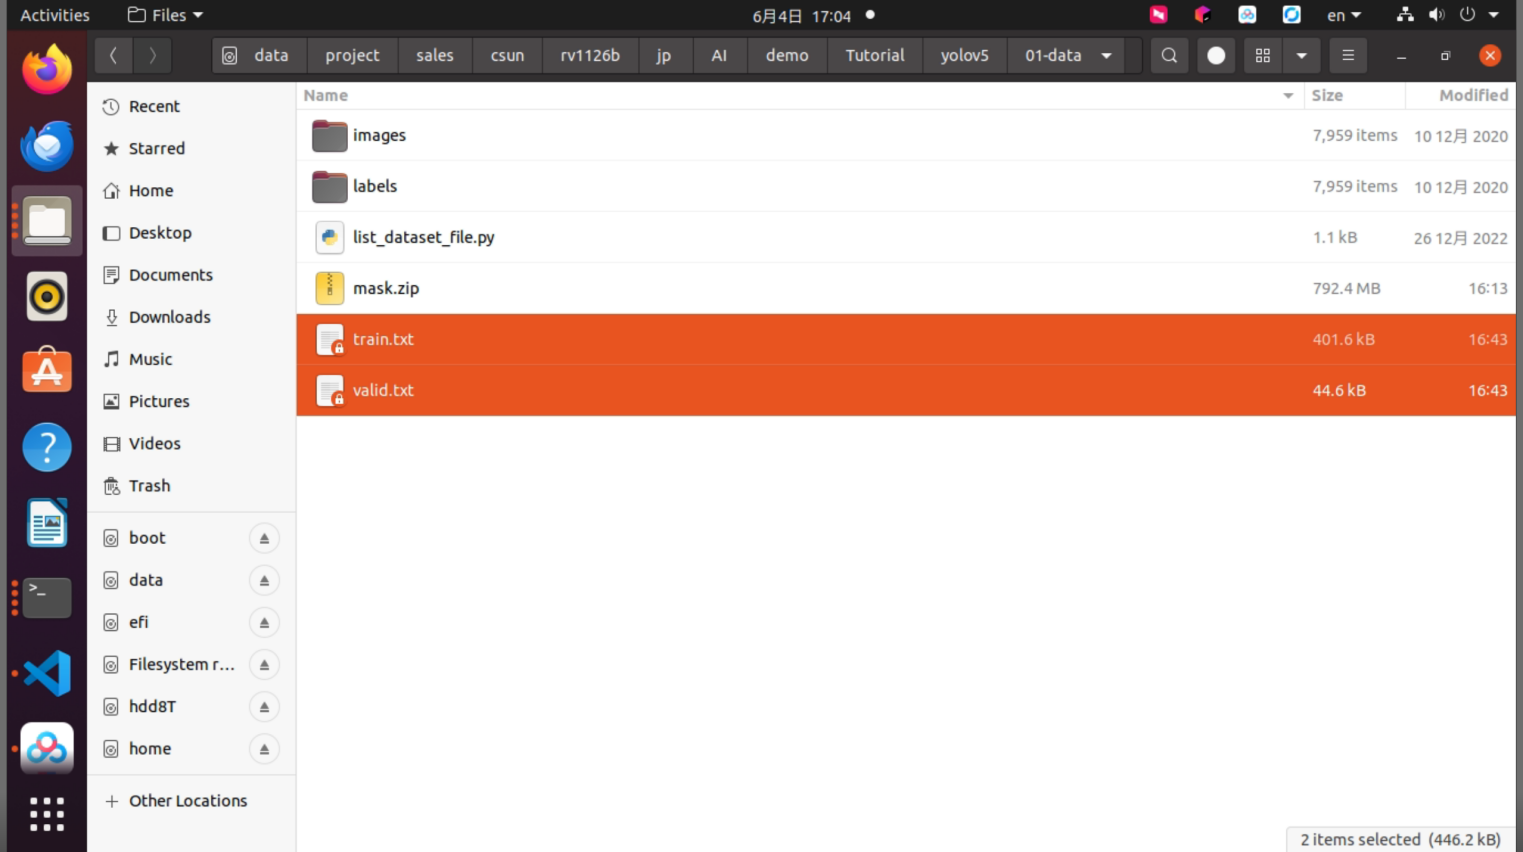
Figure 3-3 Generated train.txt and valid.txt
4. Train the YOLOv5 Object Detection Algorithm
4.1. Download the Training Source Code
Use Git on the PC to clone the company GitHub repository. Depending on the network, cloning may take some time.
git clone https://github.com/csunltd/rv1126b-yolov5.git
Figure 4-1 Cloning the YOLOv5 repository
After cloning, the source directory is shown below.
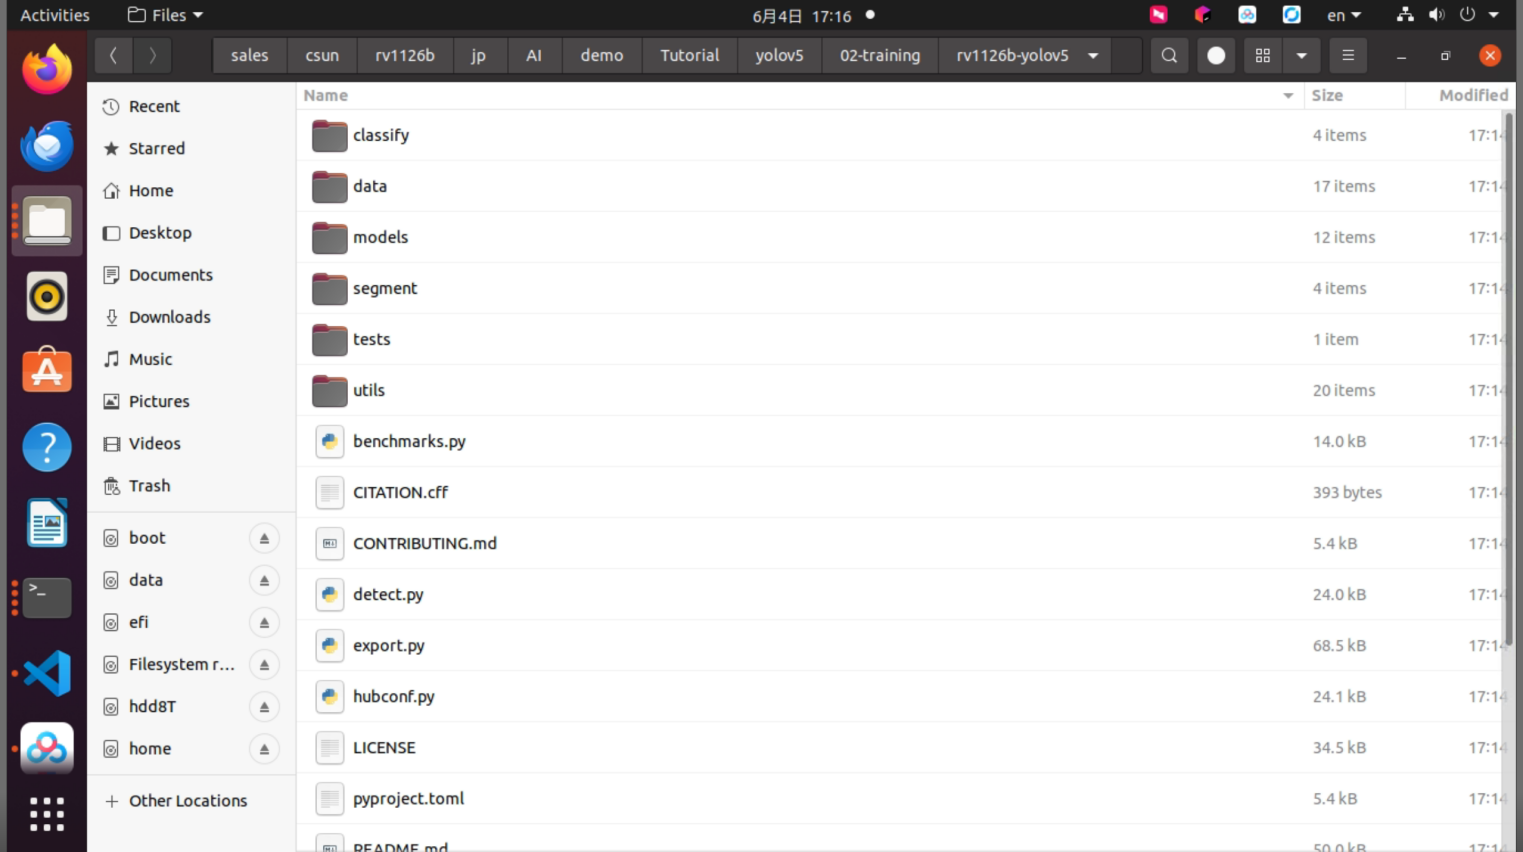
Figure 4-2 YOLOv5 training source directory
4.2. Train the Model
Go to the YOLOv5 working directory. The following example trains a mask detection model. Before training, update the train.txt and valid.txt paths in data/mask.yaml according to the actual dataset location.
# Train/val/test setspath: ../../01-data
train: train.txtval: valid.txttest: valid.txt
# Classesnc: 2names: ['head', 'mask']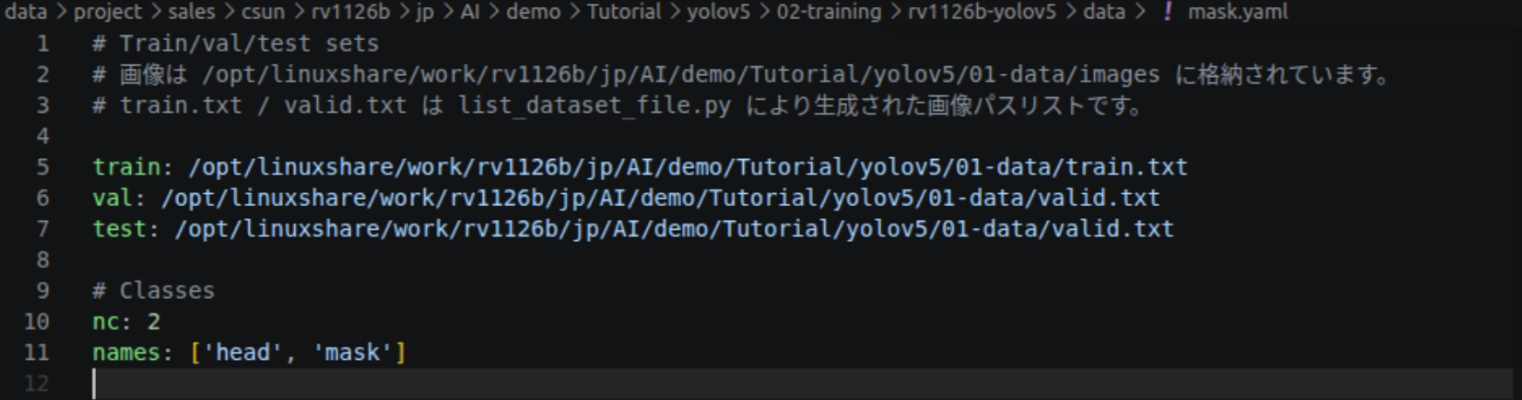
Figure 4-3 mask.yaml configuration example
Install the required Python modules.
pip install PyYAML tqdm ultralytics pandas seabornStart training with the following command.
python train.py --data mask.yaml --cfg yolov5s.yaml --weights "" --batch-size 64When training starts, the terminal displays information such as epoch, loss, and accuracy. The training result is saved under ./runs/train/exp*/, and accuracy metrics can be checked in results.csv.
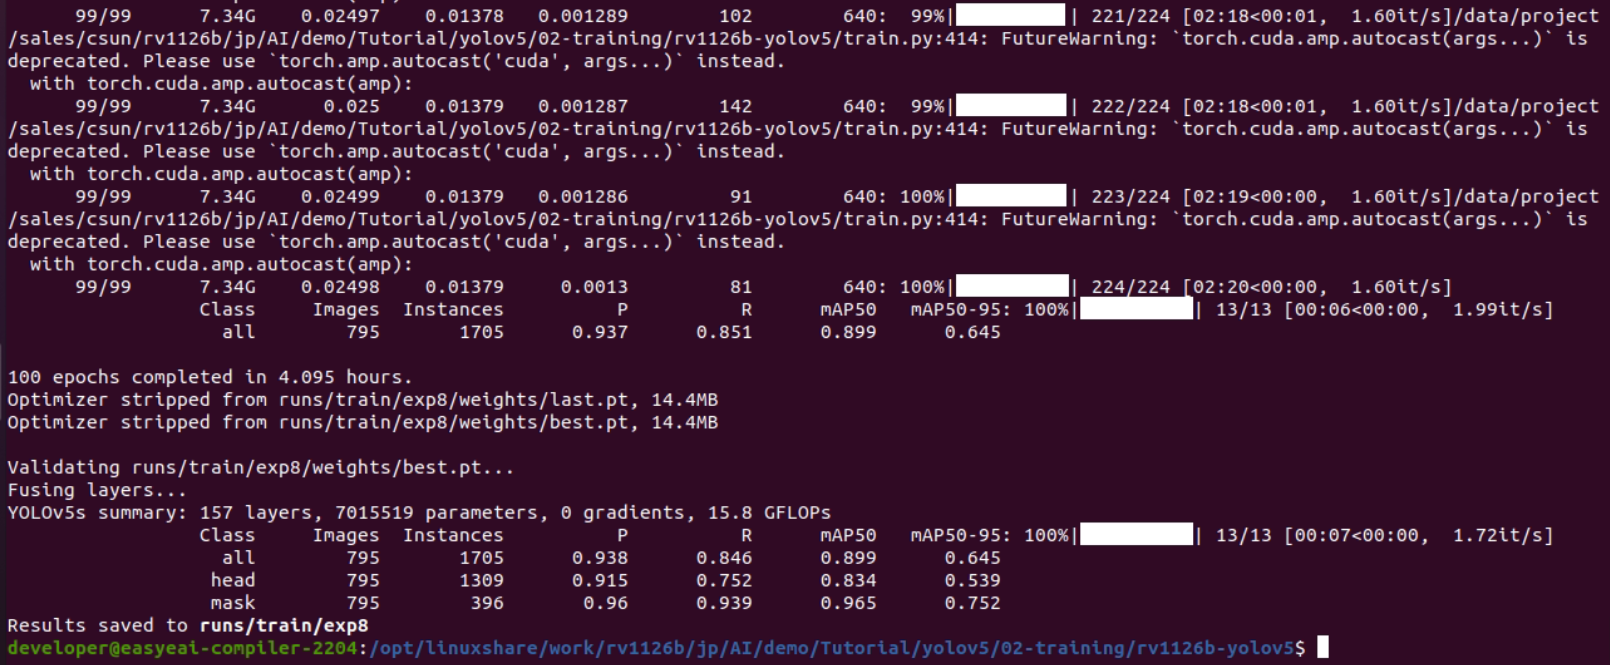
Figure 4-4 YOLOv5 training terminal output
4.3. Run Model Inference on the PC
After training, the model with the best validation result is usually generated as ./runs/train/exp*/weights/best.pt. Run the following command to perform inference and quickly evaluate detection results.
python detect.py --source data/images --weights ./runs/train/exp8/weights/best.pt --conf 0.5Inference results are saved under ./runs/detect/exp*/.
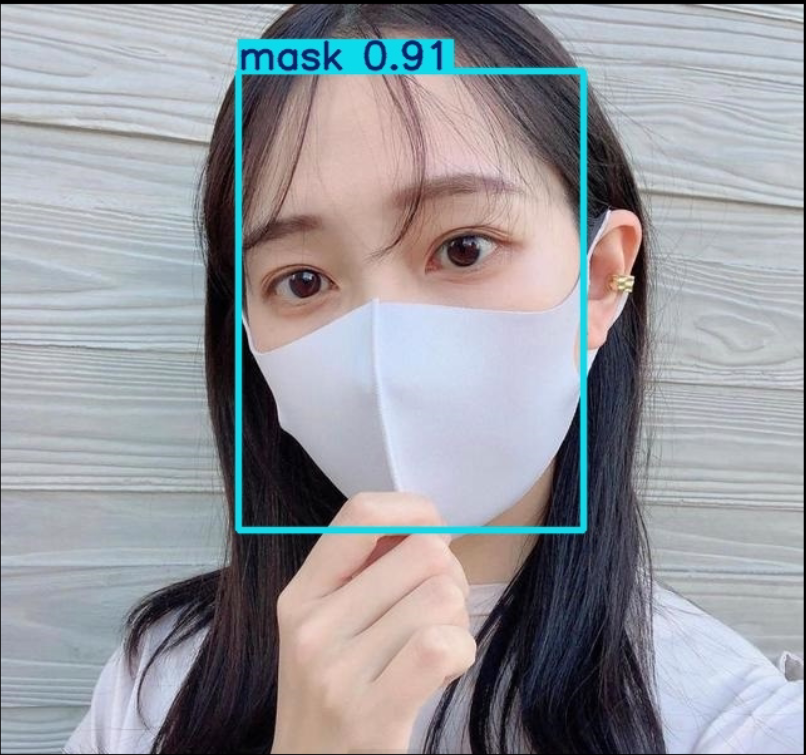
Figure 4-5 YOLOv5 mask detection result on the PC
4.4. Convert the pt Model to an ONNX Model
To deploy the algorithm to the CSUN RV1126B board, the model must eventually be converted to RKNN format. Before RKNN conversion, convert the PyTorch pt model to ONNX. The file best.anchors.txt is generated at the same time.
python export.py --include onnx --rknpu RV1126 --weights ./runs/train/exp8/weights/best.ptFor better compatibility with RV1126B and RKNN conversion tools, explicitly specifying --opset 12 is recommended.
python export.py --include onnx --rknpu RV1126 --opset 12 --weights ./runs/train/exp8/weights/best.ptThe ONNX model file is generated in the same directory as best.pt.
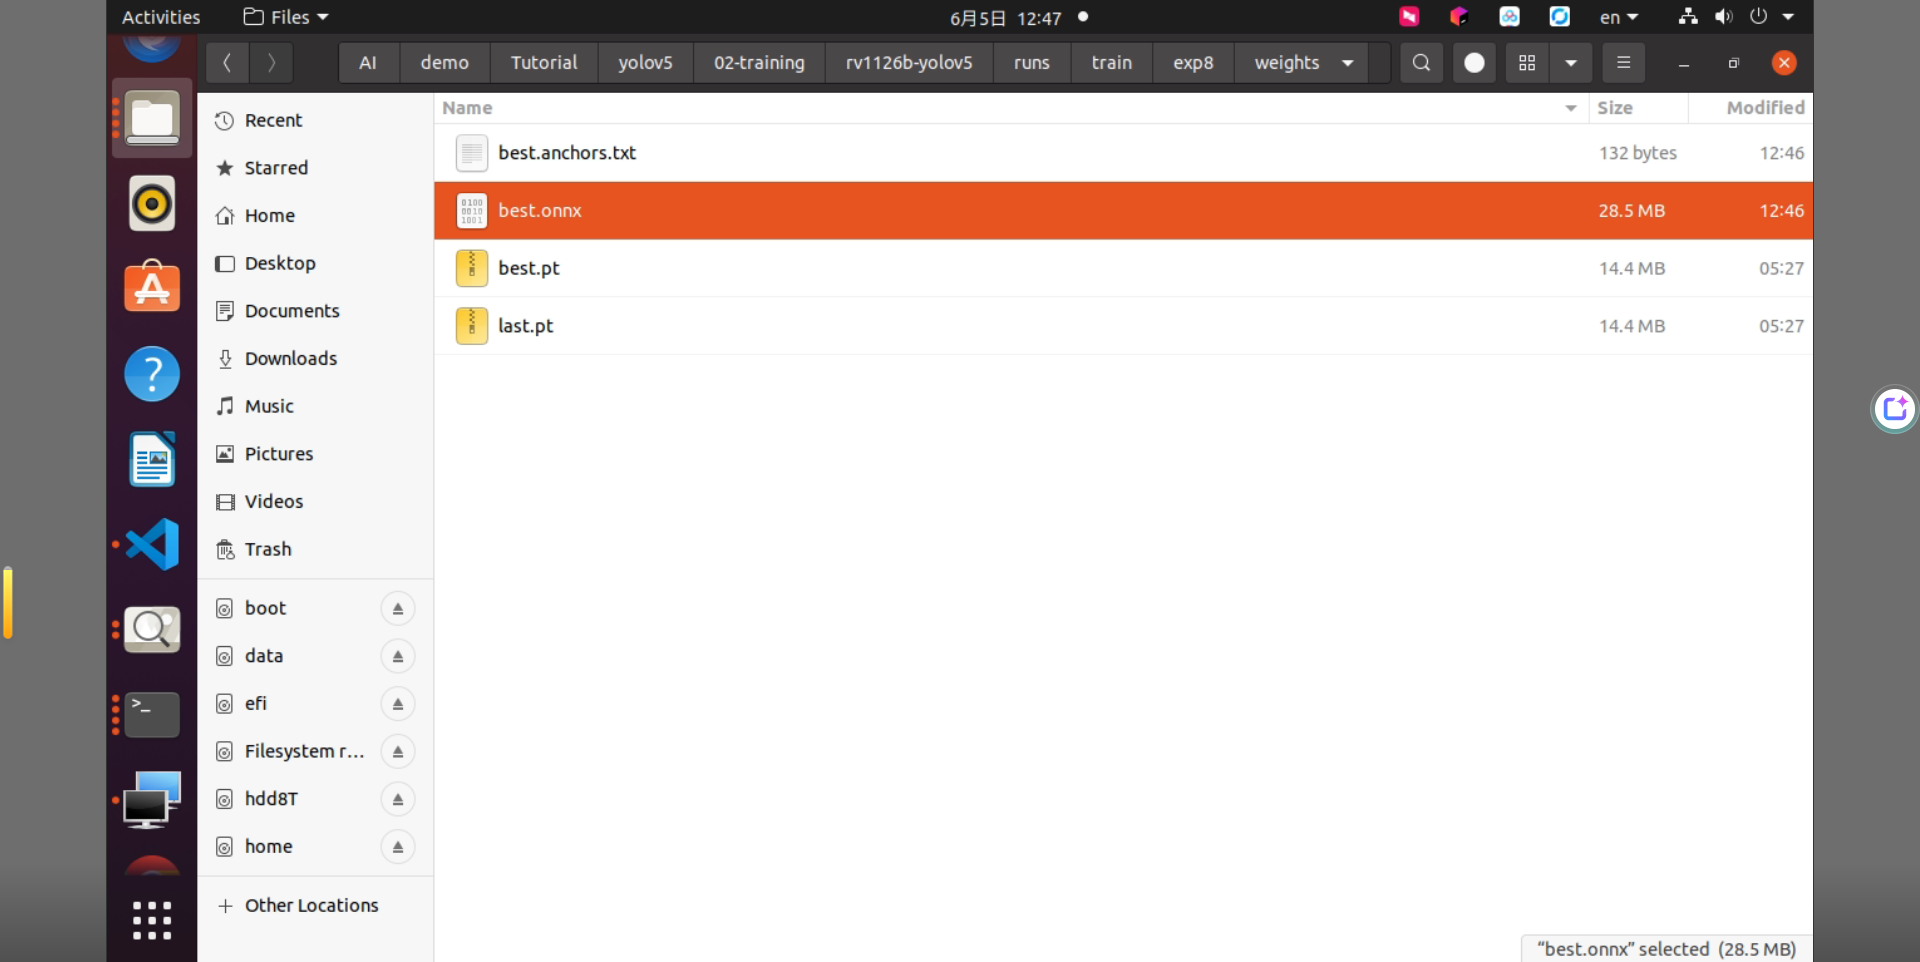
Figure 4-6 Files generated after ONNX export
5. rknn-toolkit Model Conversion
5.1. Build the rknn-toolkit Conversion Environment
The ONNX model must be converted to an RKNN model before it can run on the CSUN RV1126B board. Therefore, prepare the rknn-toolkit model conversion environment first. TensorFlow, TensorFlow Lite, Caffe, Darknet, and other models can be converted in a similar way, but this tutorial uses an ONNX model as the example.
For environment setup, refer to the “AI Model Conversion Environment Setup Guide”.
5.2. Convert the ONNX Model to an RKNN Model
Models with the .rknn extension can be evaluated and executed on the CSUN RV1126B board. Common trained models from TensorFlow, TensorFlow Lite, Caffe, Darknet, ONNX, PyTorch, and other frameworks can be converted to RKNN with RKNN-Toolkit2. Models trained by other frameworks can also be converted to ONNX first and then converted to RKNN.
For detailed conversion procedures, refer to the “RKNN Model Conversion Tutorial Example”.
5.2.1. Extract the Model Conversion Demo
Download and extract the model conversion demo from “2. Download Resources”.
cd /data/project/sales/csun/rv1126b/jp/AI/demo/Tutorial/yolov5/03-model_convertunzip quant_dataset.ziptar -xJf yolov5_model_convert.tar.xz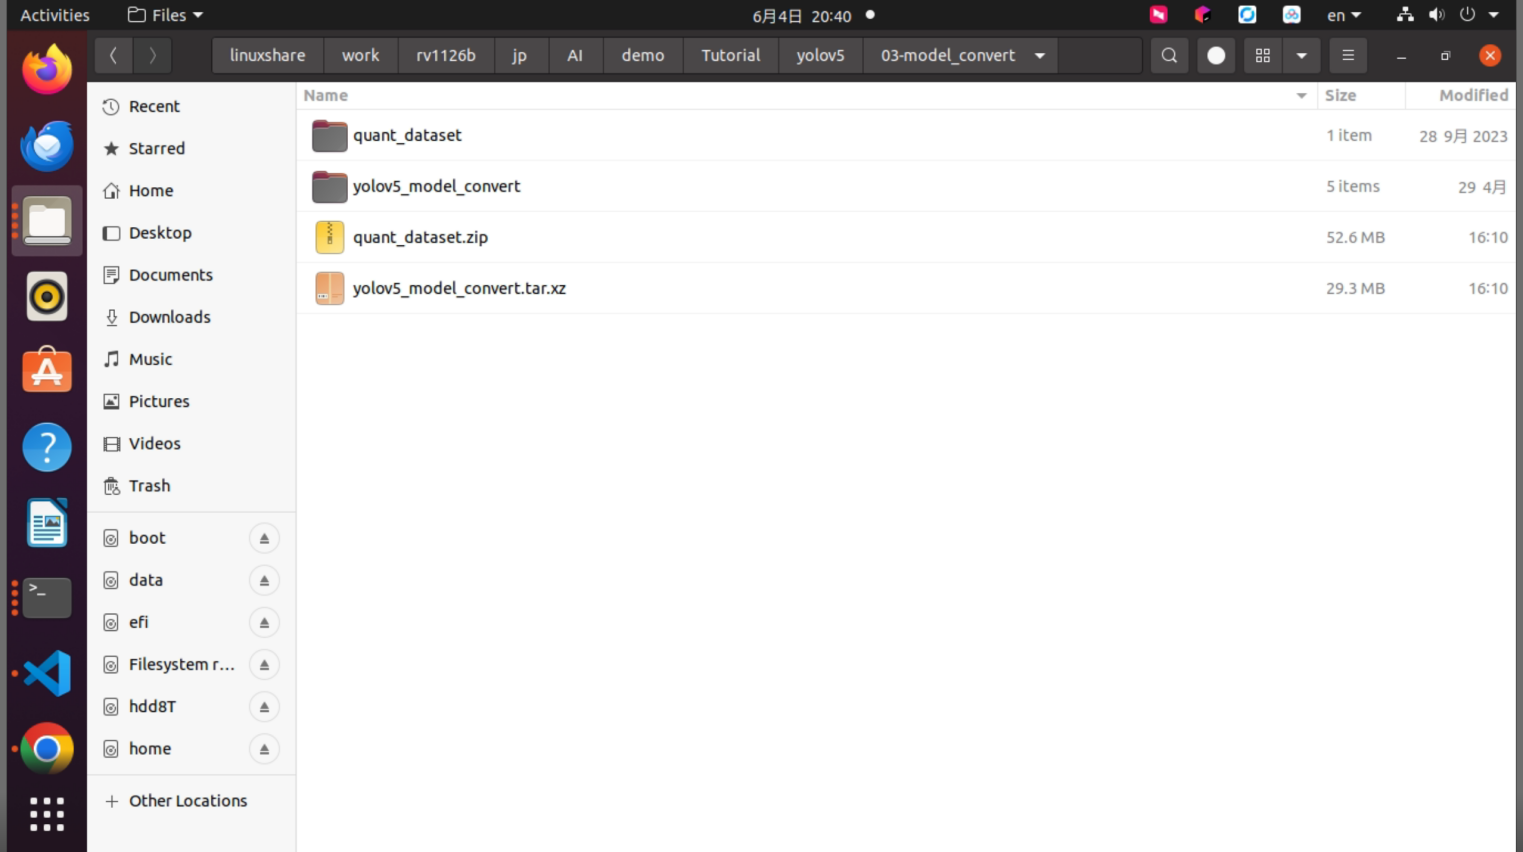
Figure 5-1 Model conversion demo directory after extraction
5.2.2. Enter the Model Conversion Docker Environment
Use the following command to mount the working directory into the Docker container. /data/project/sales/csun/rv1126b/jp/AI/demo/Tutorial is used as the working area and is mapped to /test inside the container. USB devices are mounted with /dev/bus/usb:/dev/bus/usb.
docker run -t -i --privileged \ -v /dev/bus/usb:/dev/bus/usb \ -v /data/project/sales/csun/rv1126b/jp/AI/demo/Tutorial:/test \ rknn-toolkit2:2.3.2-cp38 /bin/bash
Figure 5-2 Entering the rknn-toolkit2 Docker environment
5.2.3. Generate the Quantization Image List
In the Docker environment, go to the model conversion working directory.
cd /test/yolov5/03-model_convert/yolov5_model_convertRun gen_list.py to generate the quantization image list.
python gen_list.py
Figure 5-3 Terminal output for generating the quantization image list
The generated quantization image list is saved as pic_path.txt.
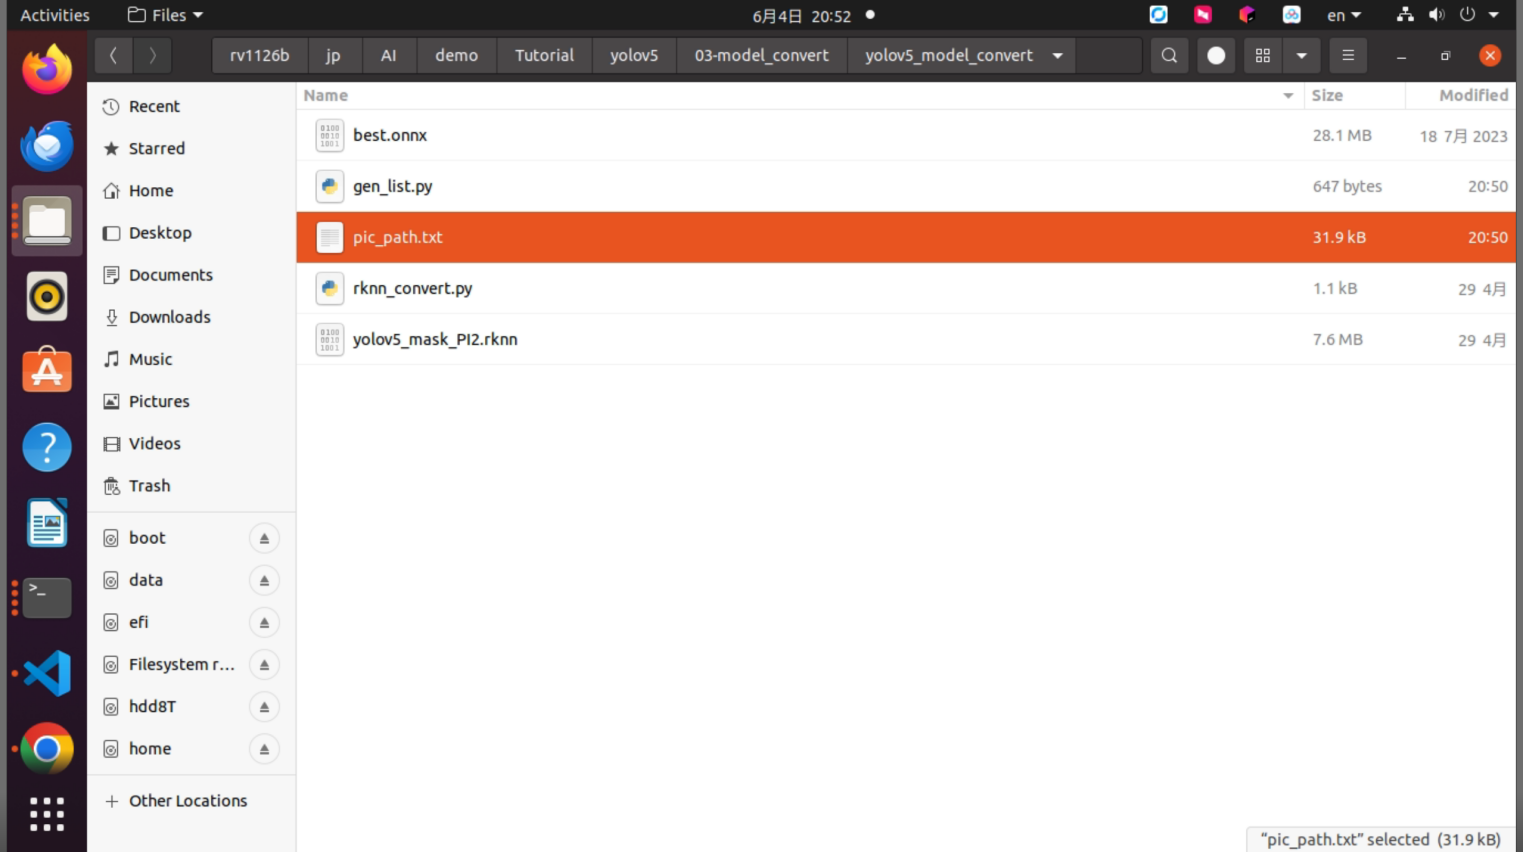
Figure 5-4 Generated pic_path.txt
5.2.4. Convert the ONNX Model to an RKNN Model
rknn_convert.py performs int8 quantization by default. The main script content is shown below.
import osimport urllibimport tracebackimport timeimport sysimport numpy as npimport cv2from rknn.api import RKNN
ONNX_MODEL = 'best.onnx'RKNN_MODEL = './yolov5_mask_rv1126b.rknn'DATASET = './pic_path.txt'QUANTIZE_ON = True
if __name__ == '__main__':    rknn = RKNN(verbose=True)
    if not os.path.exists(ONNX_MODEL):        print('model not exist')        exit(-1)
    print('--> Config model')    rknn.config(        mean_values=[[0, 0, 0]],        std_values=[[255, 255, 255]],        target_platform='rv1126b'    )    print('done')
    print('--> Loading model')    ret = rknn.load_onnx(model=ONNX_MODEL)    if ret != 0:        print('Load yolov5 failed!')        exit(ret)    print('done')
    print('--> Building model')    ret = rknn.build(do_quantization=QUANTIZE_ON, dataset=DATASET)    if ret != 0:        print('Build yolov5 failed!')        exit(ret)    print('done')
    print('--> Export RKNN model')    ret = rknn.export_rknn(RKNN_MODEL)    if ret != 0:        print('Export yolov5 rknn failed!')        exit(ret)    print('done')
Place best.onnx in the yolov5_model_convert directory and run the following command to start conversion.
python rknn_convert.py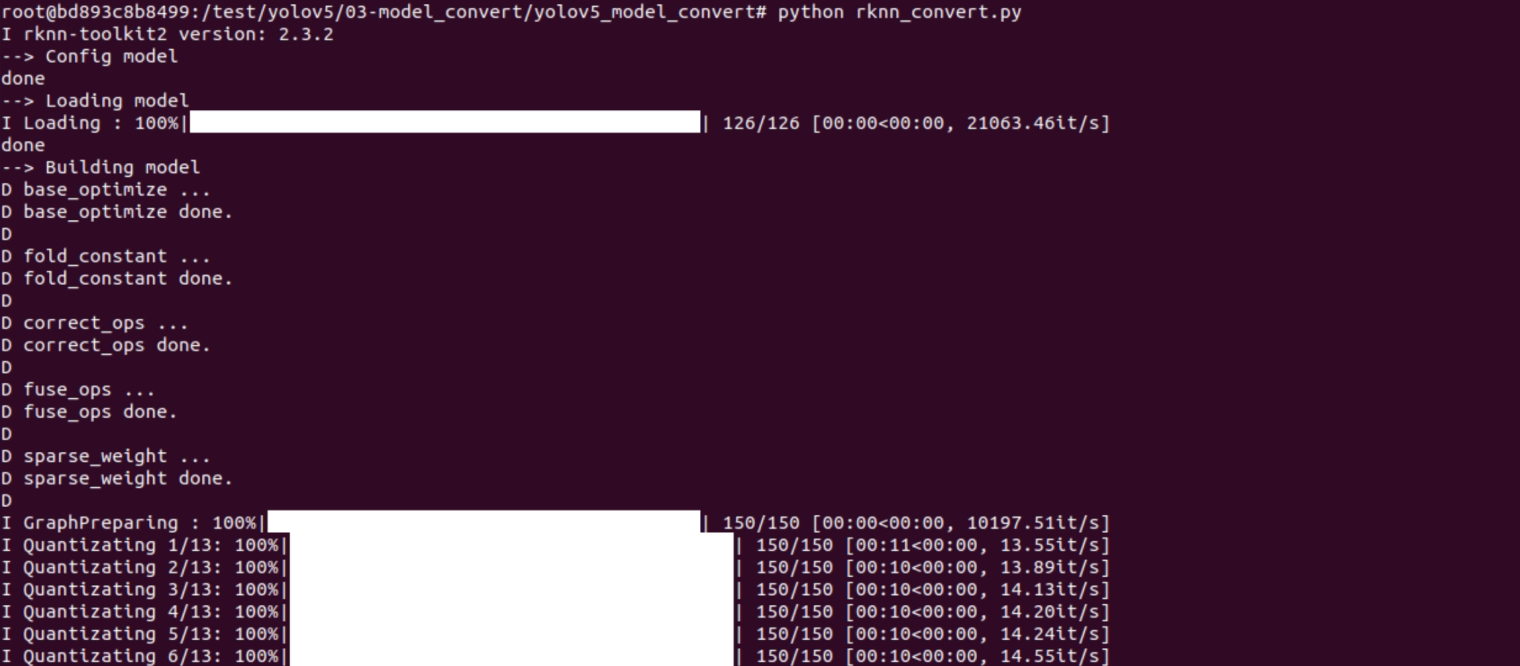
Figure 5-5 RKNN model conversion terminal output
After successful conversion, an RKNN model that can run on the CSUN RV1126B board is generated.
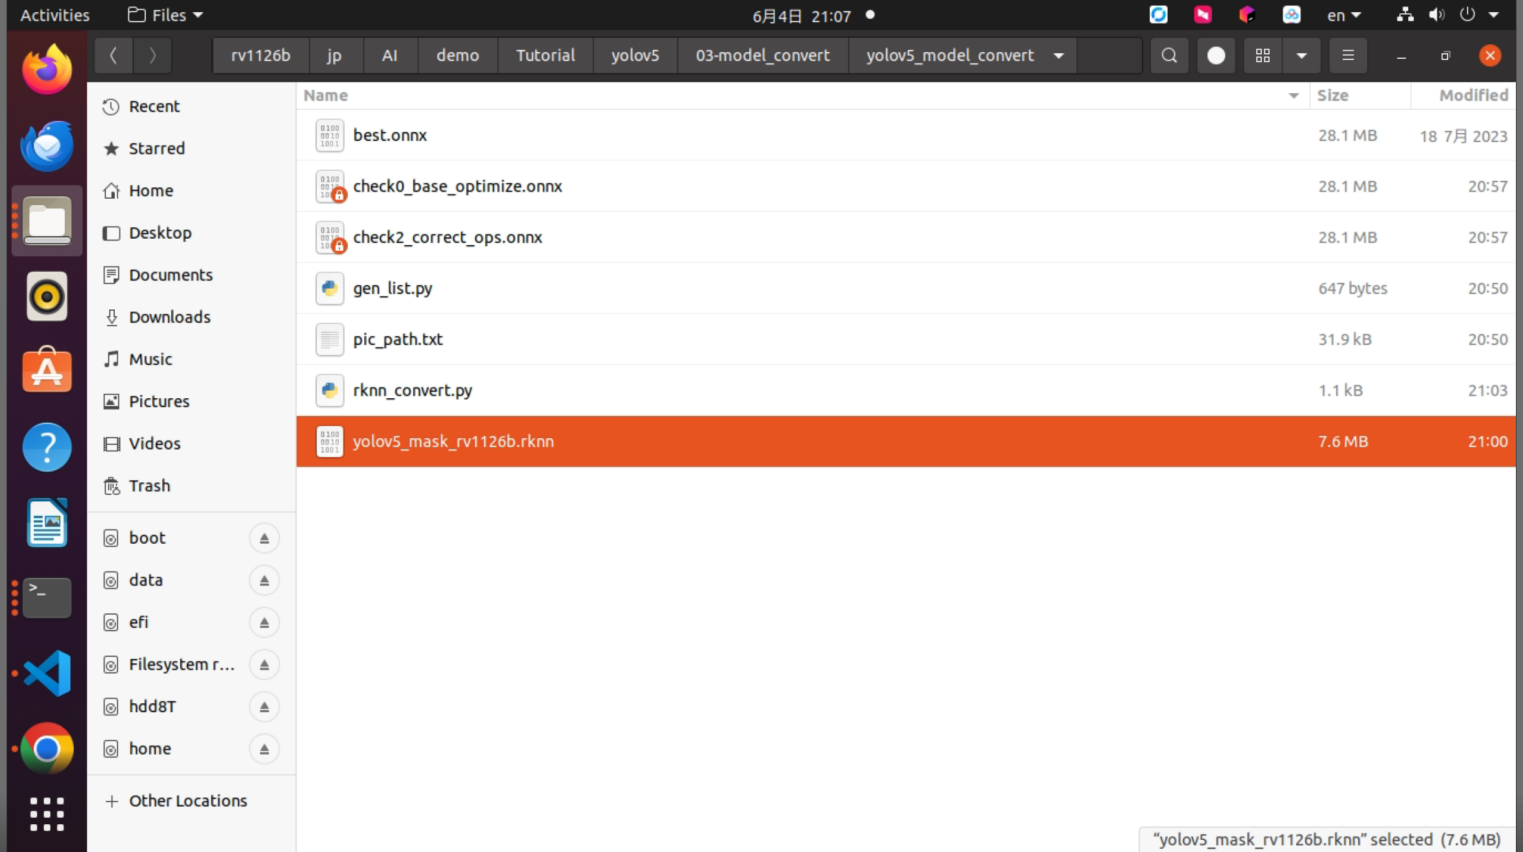
Figure 5-6 Generated RKNN model file
6. YOLOv5 Model Deployment
6.1. Deployment Example Overview
This section describes how to deploy the YOLOv5 model to the RV1126B board. This model is only a sample trained with a simple training process, and its accuracy is not guaranteed.
6.2. Preparation
6.2.1. Hardware Preparation
Prepare an RV1126B board, a Type-C data cable, and a LAN cable. You can use tools such as MobaXterm to log in to the RV1126B board over SSH. For details, refer to the Getting Started Guide.
Connect with a LAN cable.
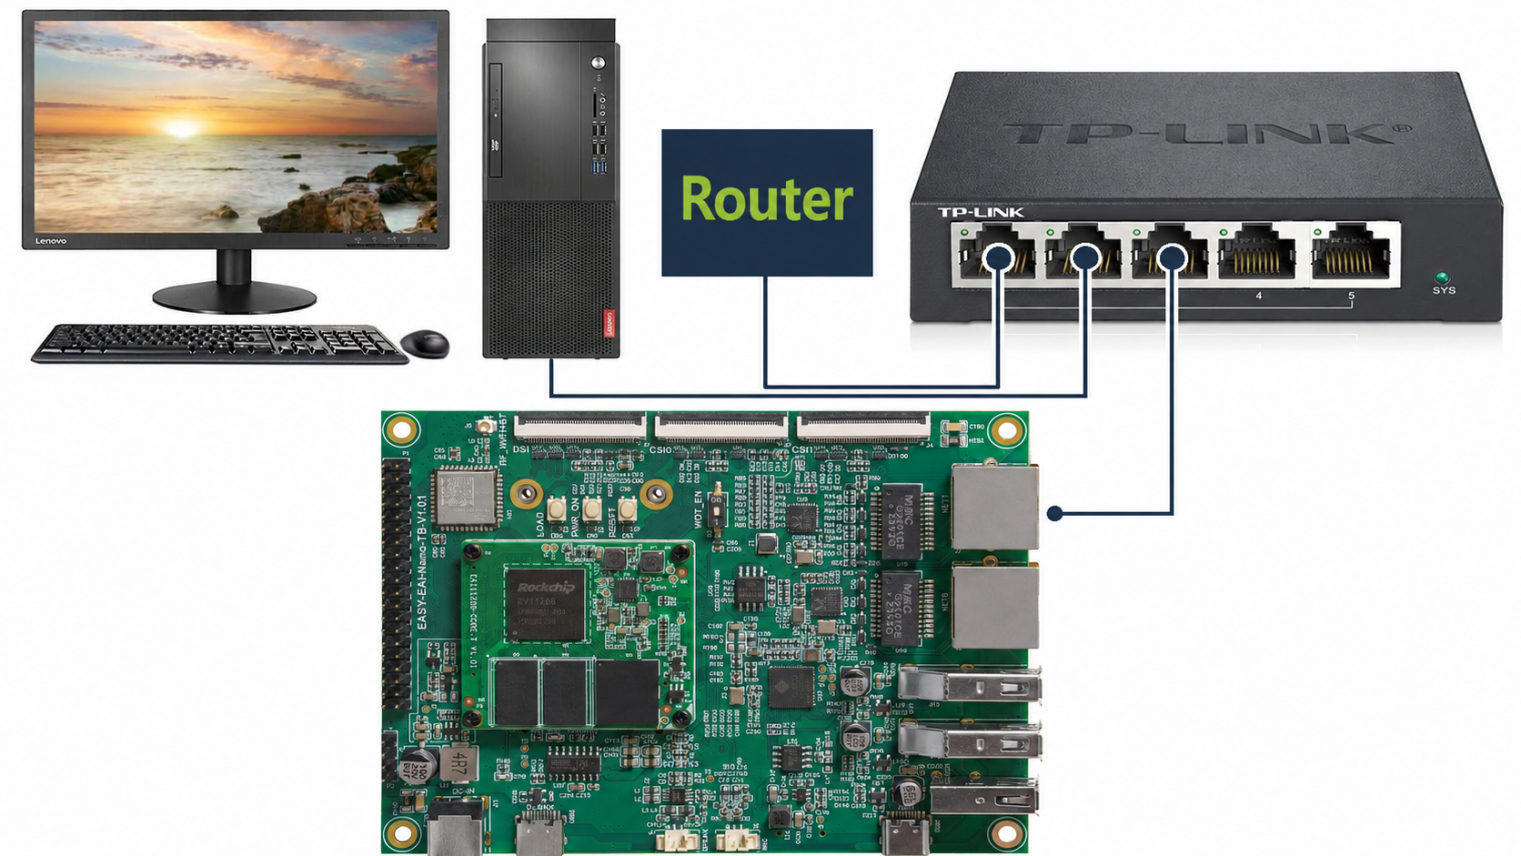
Figure 6-1 RV1126B board LAN connection example
Connect with a Type-C serial cable.
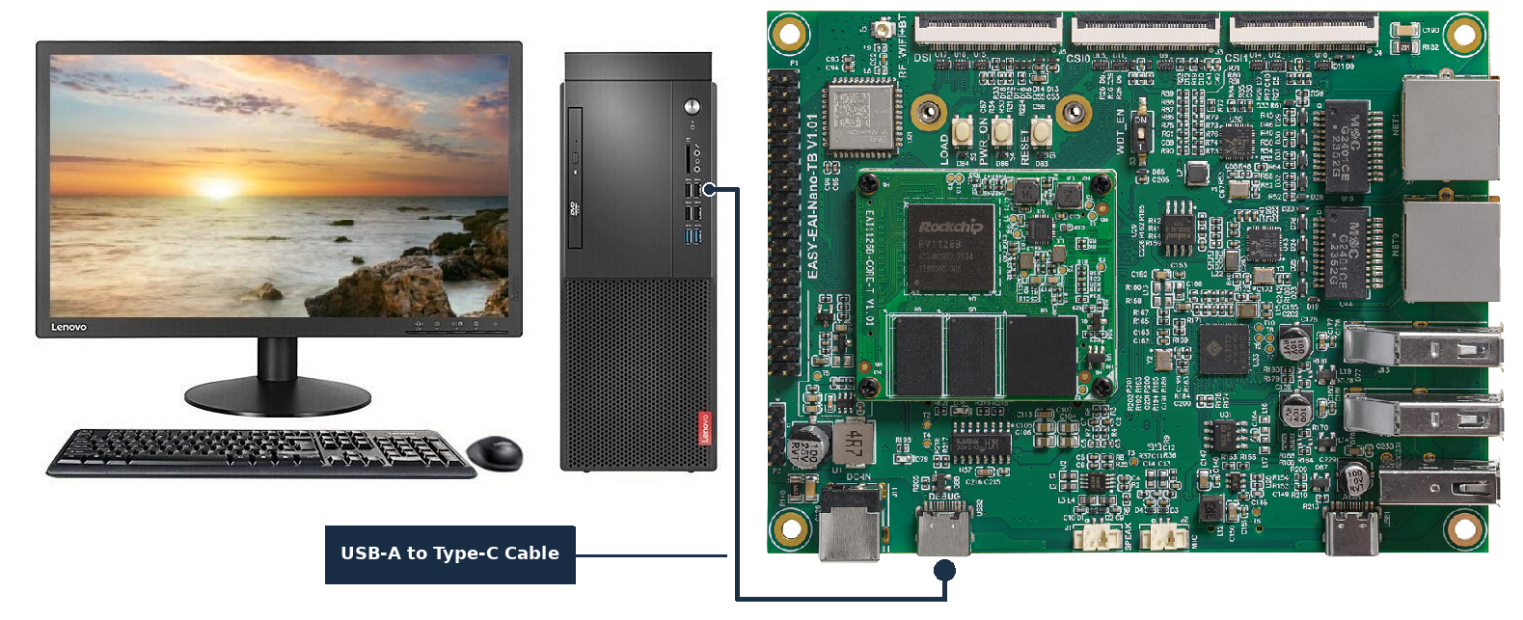
Figure 6-2 RV1126B board Type-C serial connection example
6.2.2. Prepare the Development Environment
If this is your first time reading this document, refer to the Getting Started Guide and follow the described steps to prepare the compile environment.
On the PC-side Ubuntu system, run run.sh to enter the RV1126B compile environment.
cd ~/develop_environment./run.sh 2204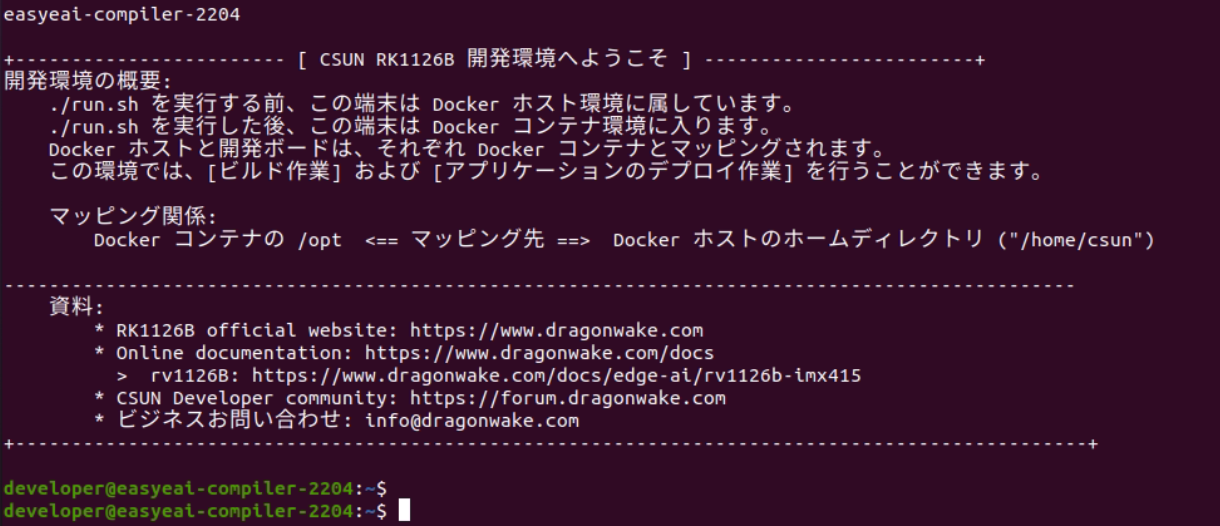
Figure 6-3 Entering the RV1126B Docker development environment
6.3. Build the Sample Program
After moving the downloaded package into the RV1126B Docker development environment, run the following commands to extract it.
cd /opt/linuxshare/work/rv1126b/jp/AI/demo/Tutorial/yolov5/04-AI_deploytar -xvf yolov5_detect_C_demo.tar.bz2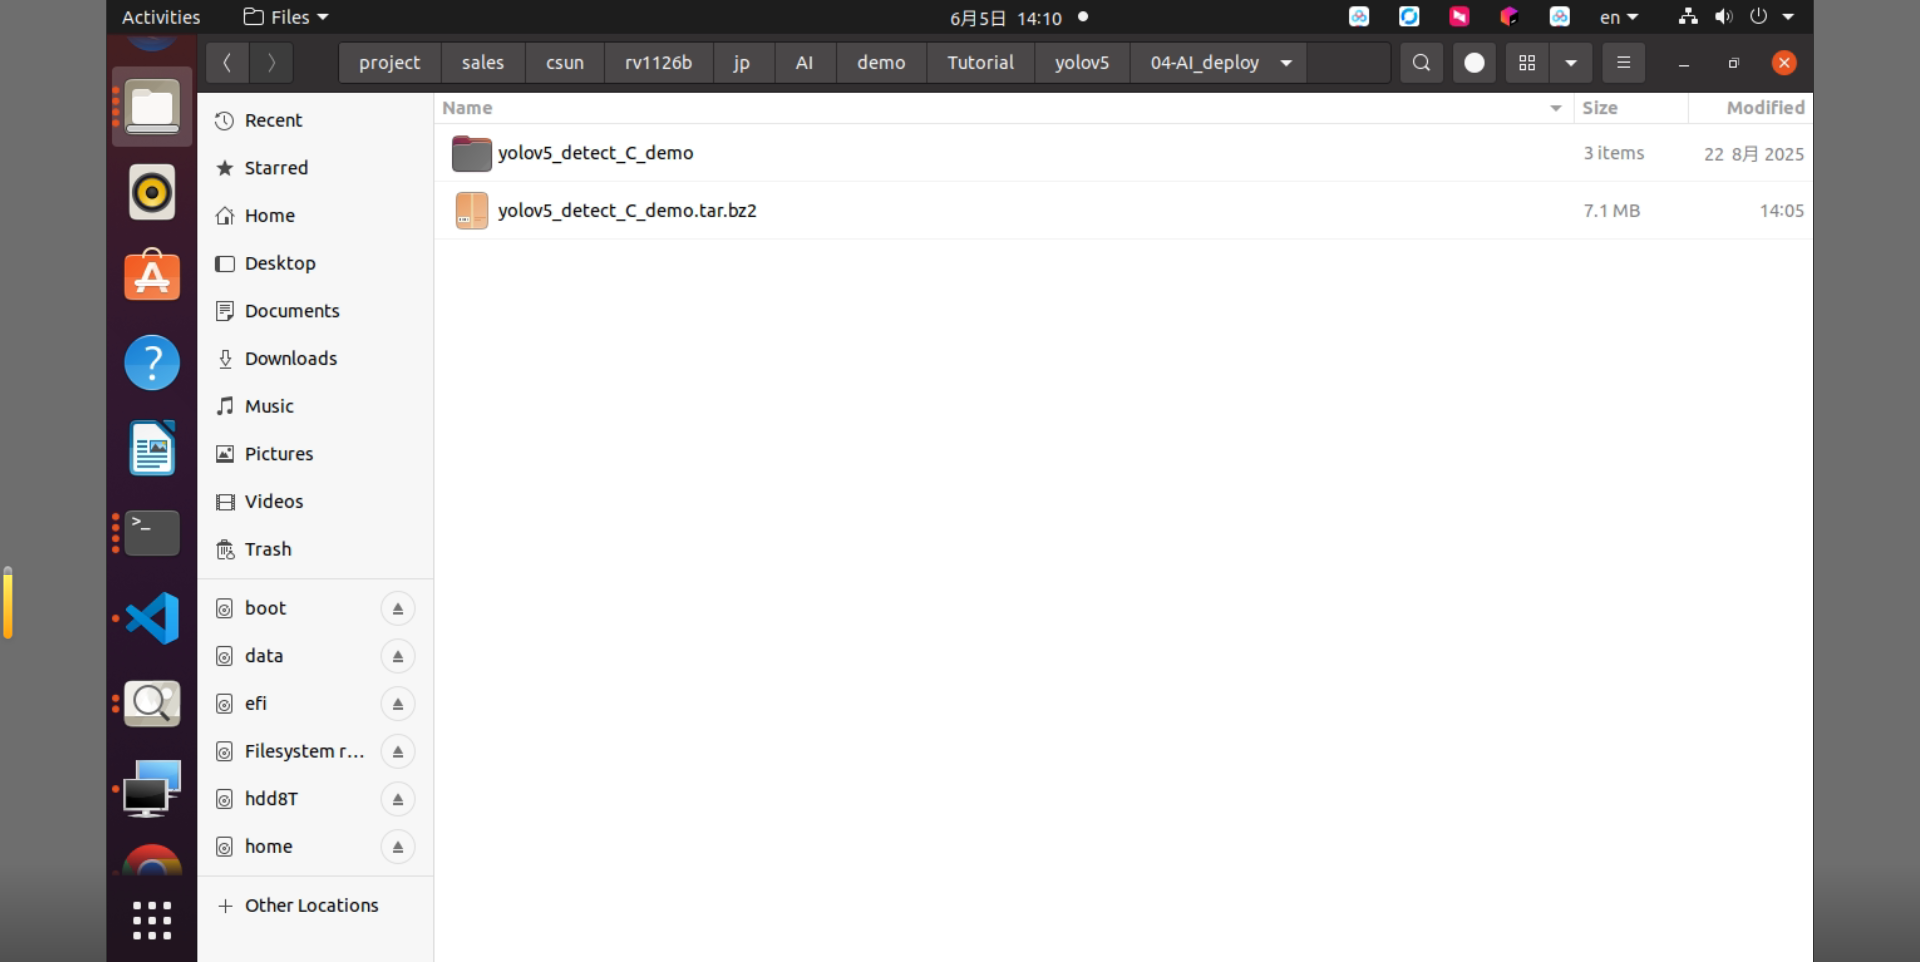
Figure 6-4 YOLOv5 detection demo directory after extraction
In the RV1126B Docker development environment, enter the sample program directory and build the demo.
sudo mount -t nfs -o vers=3,proto=tcp,mountproto=tcp,nolock,retrans=5,timeo=5 192.168.11.85:/ /mntcd /opt/linuxshare/work/rv1126b/jp/AI/demo/Tutorial/yolov5/04-AI_deploy/yolov5_detect_C_demo/./build.sh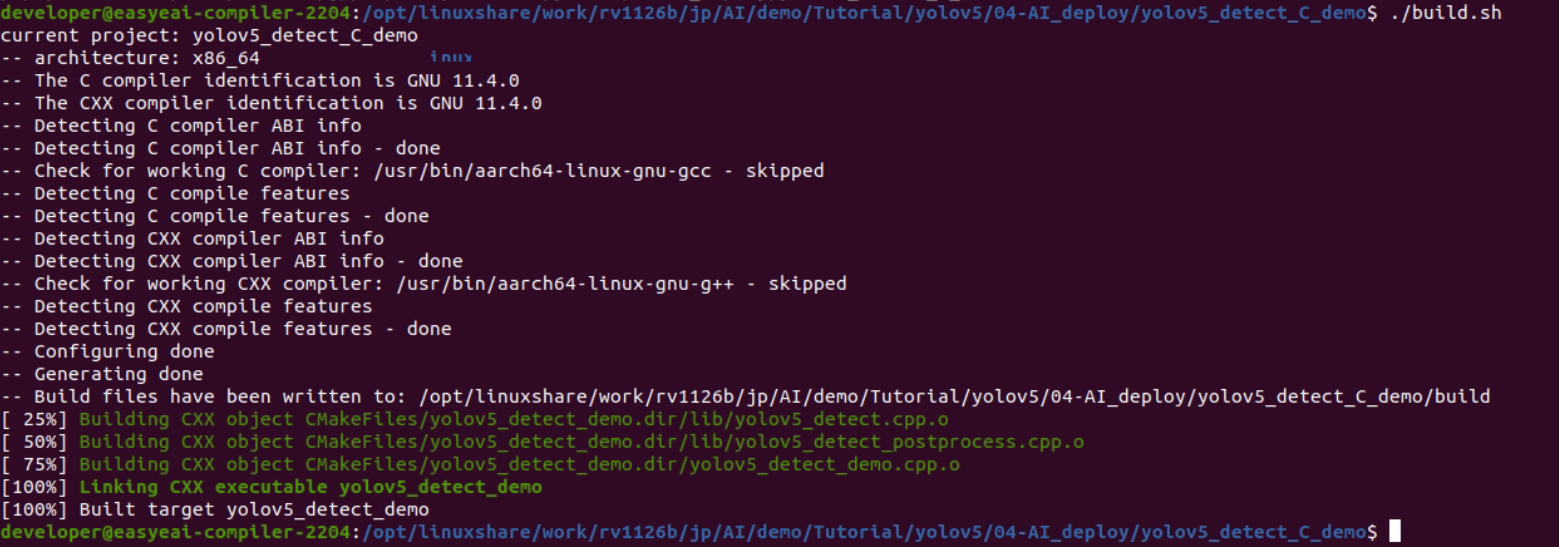
Figure 6-5 YOLOv5 detection demo build result
After successful compilation, copy the executable program directory yolov5_detect_demo_release/ to the /userdata directory on the RV1126B board.
cp yolov5_detect_demo_release/ /mnt/userdata/ -rf
Figure 6-6 Copy the YOLOv5 detection demo to the development board
6.4. Run the YOLOv5 Model on the Development Board
Enter the board shell via serial debugging or SSH, then go to the sample program deployment directory.
cd /userdata/yolov5_detect_demo_release/Run the sample program.
chmod 777 yolov5_detect_demosudo ./yolov5_detect_demoThe execution result is shown below. The algorithm execution time is about 48 ms.

Figure 6-7 Run the YOLOv5 detection demo on the RV1126B board
From the RV1126B compile environment, retrieve the test result image with the following command.
cp /mnt/userdata/yolov5_detect_demo_release/result.jpg .
Figure 6-8 Copy the detection result image from the board
The test result is shown below.
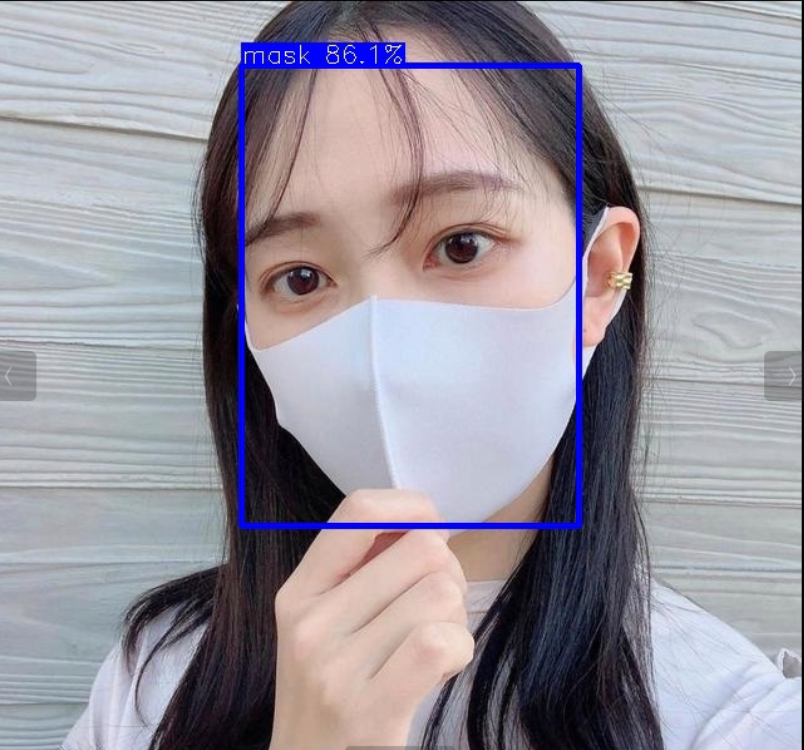
Figure 6-9 YOLOv5 mask detection result on the RV1126B board
The YOLOv5 object detection sample has now been successfully executed on the board.