
Remote Operation Tutorial for RV1126B Development Board Using OpenClaw + Lark
Nissho Technology Co., Ltd.
http://www.dragonwake.com
info@dragonwake.com
Created: 2026/06/10
This document explains how to install OpenClaw, complete the quick start flow, and configure Lark integration.
copyright@2026 Nissho Technology Co., Ltd.
Revision History
| No. | Version | Description | Date |
|---|---|---|---|
| 1 | Ver1.0 | Initial release | 2026/06/10 |
The information in this document may be changed without prior notice for document improvement. Please refer to our website for the latest version.
https://www.dragonwake.com
Reproduction of this document in any form is strictly prohibited without the written permission of Nissho Technology Co., Ltd.
1. Document Overview
1.1 What is OpenClaw?
OpenClaw is an open-source autonomous AI private assistant developed by Peter Steinberger. It runs on your own PC, including Mac, Windows, and Linux, and can perform real tasks such as file management, browser operations, and message sending. It can also automate workflows across applications such as WhatsApp, Telegram, Discord, Slack, Signal, and iMessage.
Official website: https://openclaw.ai/
GitHub: https://github.com/openclaw/openclaw

Figure 1-1. OpenClaw overview image
2. Downloading and Installing OpenClaw
2.1 Installing node.js
Run the following commands to prepare the node.js installation.
sudo apt updatecurl https://raw.githubusercontent.com/nvm-sh/nvm/v0.40.3/install.sh | bash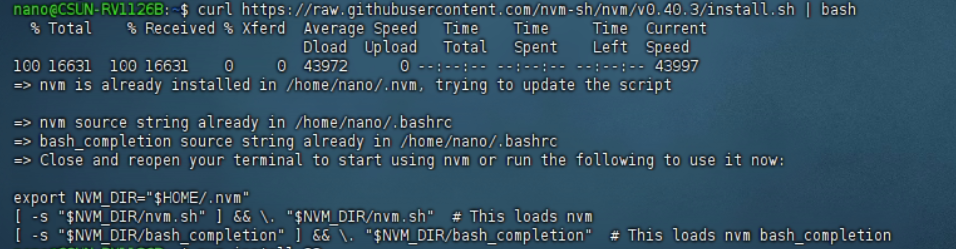
Figure 2-1. Terminal output after running the nvm installation command
Set the environment variables and install Node.js 22. Version 22 or later is required.
# Rebootsudo reboot
# Install version 22nvm install 22
# Switch to version 22nvm use 22
Figure 2-2. Installing and switching to Node.js 22
After installation, check the Node.js and npm versions.
node -vnpm -v
Figure 2-3. Checking the node and npm versions
Initialize npm.
npm init -y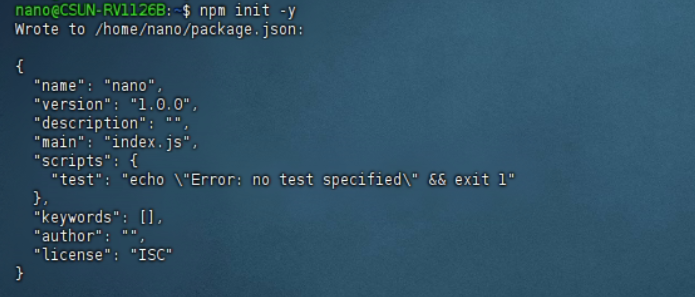
Figure 2-4. package.json generated after npm initialization
2.2 Installing Required Tools
Install git.
sudo apt install gitInstall OpenClaw.
npm install -g openclaw@latest
Figure 2-5. OpenClaw global installation result via npm
3. OpenClaw Quick Start
To start OpenClaw temporarily, run the following command.
openclaw onboardTo install OpenClaw as a system daemon and run it persistently in the background, run the following command.
openclaw onboard --install-daemon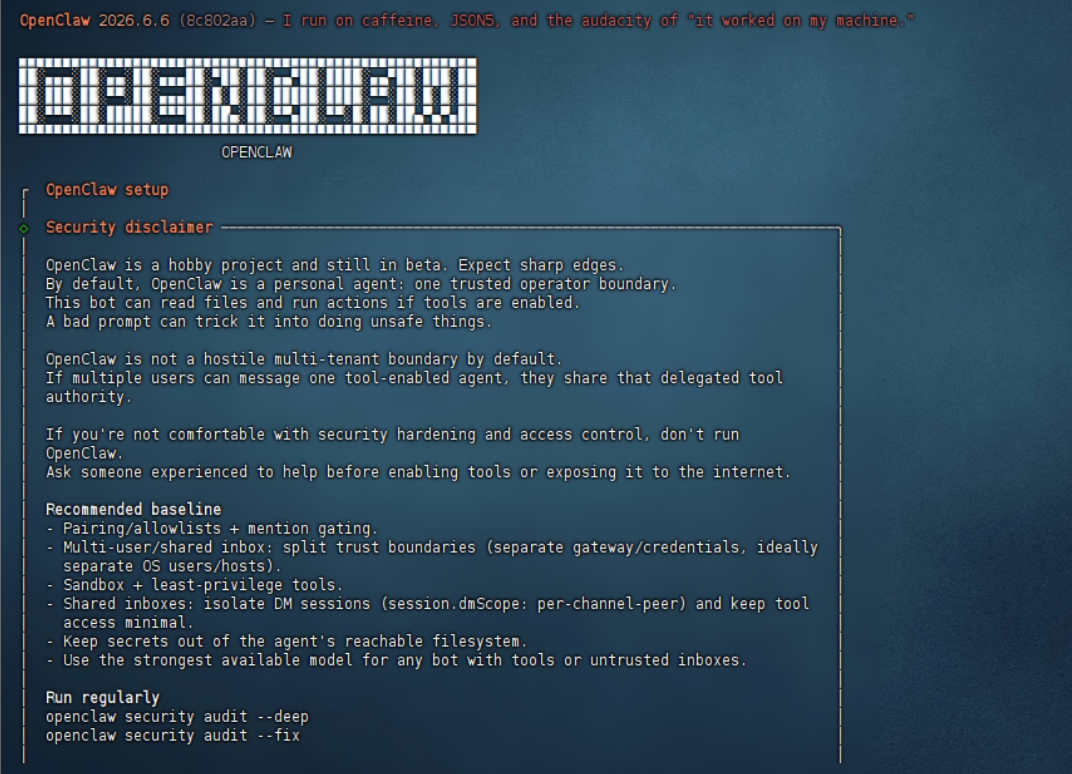
Figure 3-1. Security confirmation screen when starting OpenClaw onboard
Select QuickStart.

Figure 3-2. Selecting OpenClaw QuickStart mode
For this test, select the free NVIDIA option. You may also select another paid model.
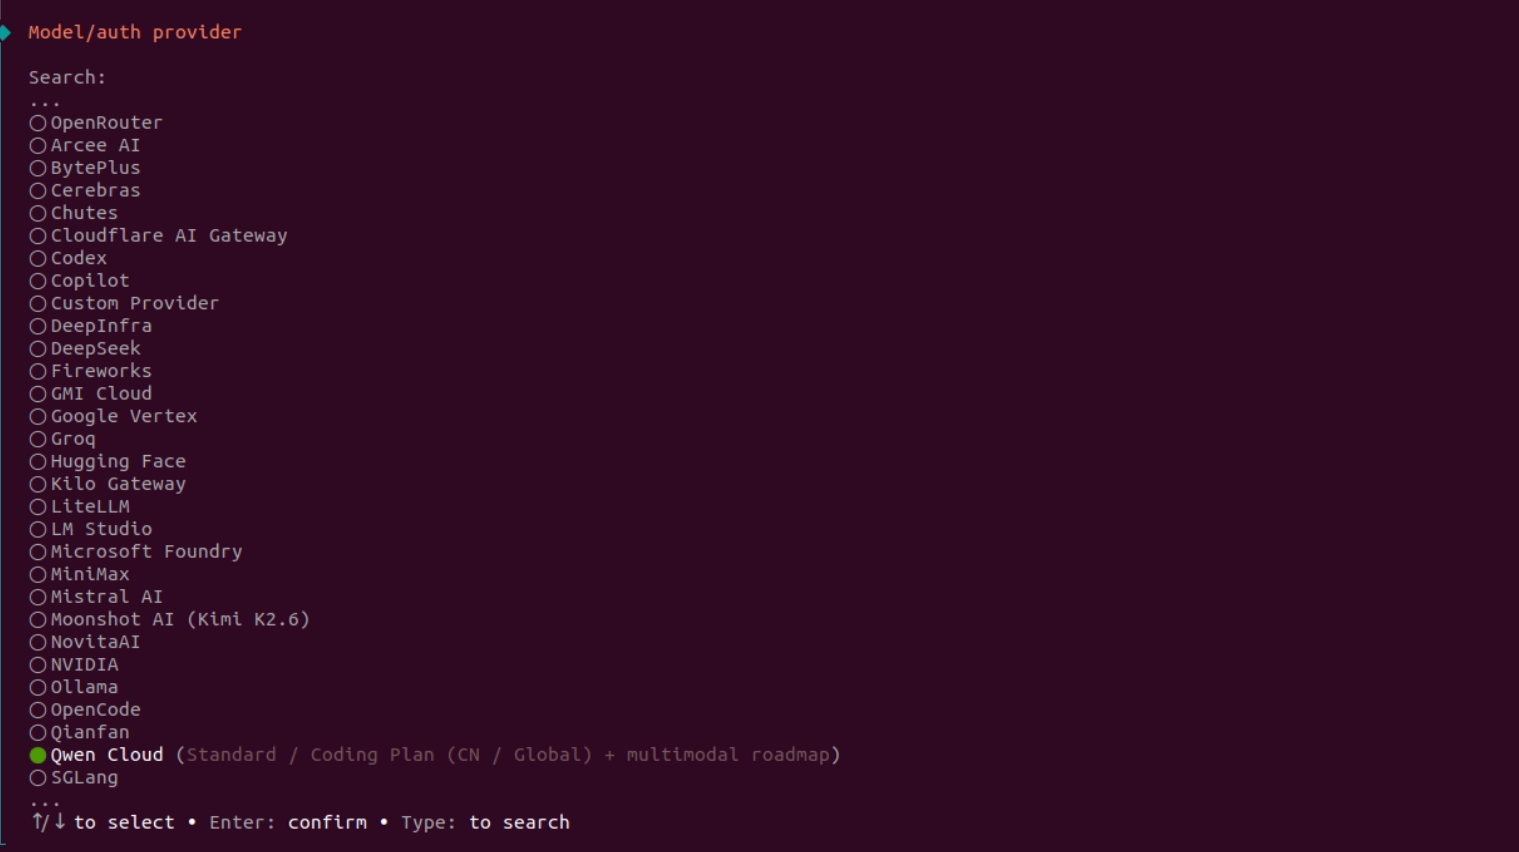
Figure 3-3. Selecting NVIDIA as the model provider
Obtain an NVIDIA API Key. Register an NVIDIA account at https://build.nvidia.com/ and obtain an API Key.
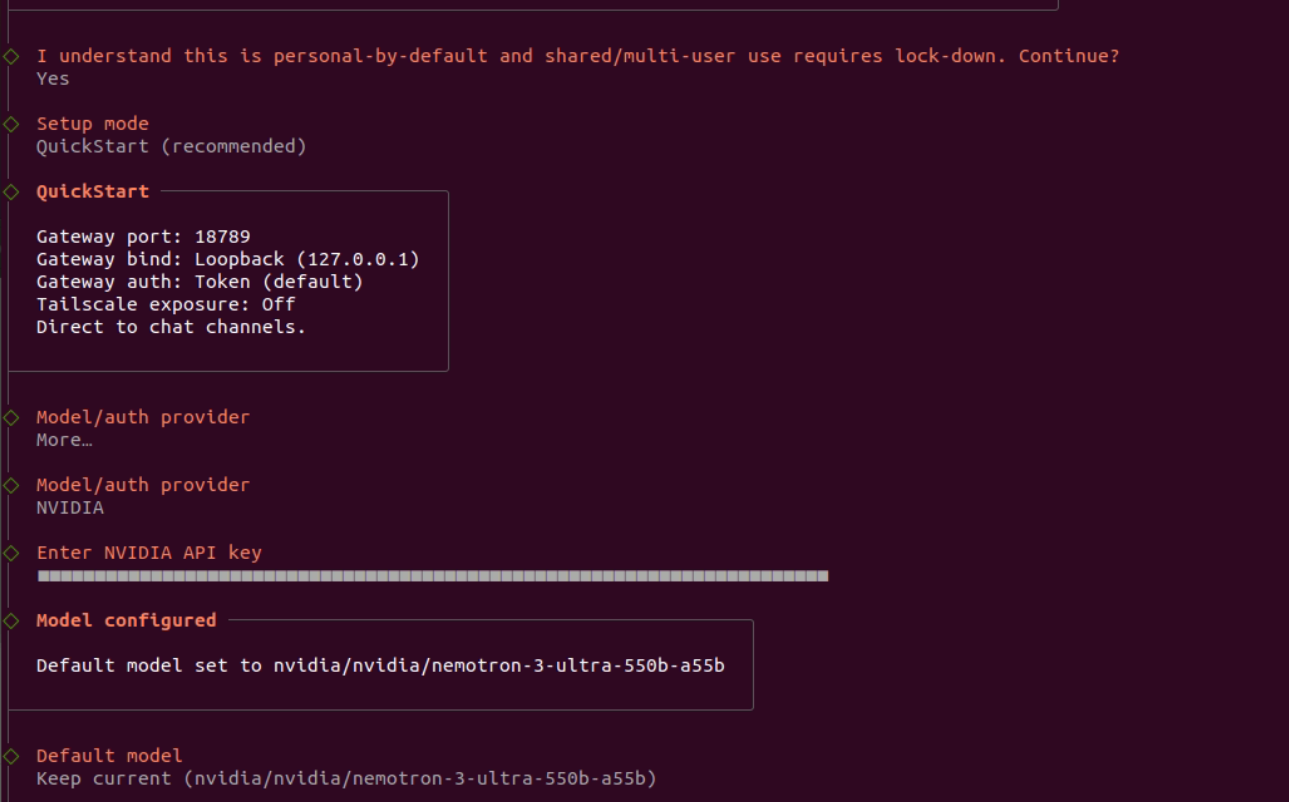
Figure 3-4. NVIDIA API Key input screen
In this tutorial, skip all Channels, Skills, and hooks settings.
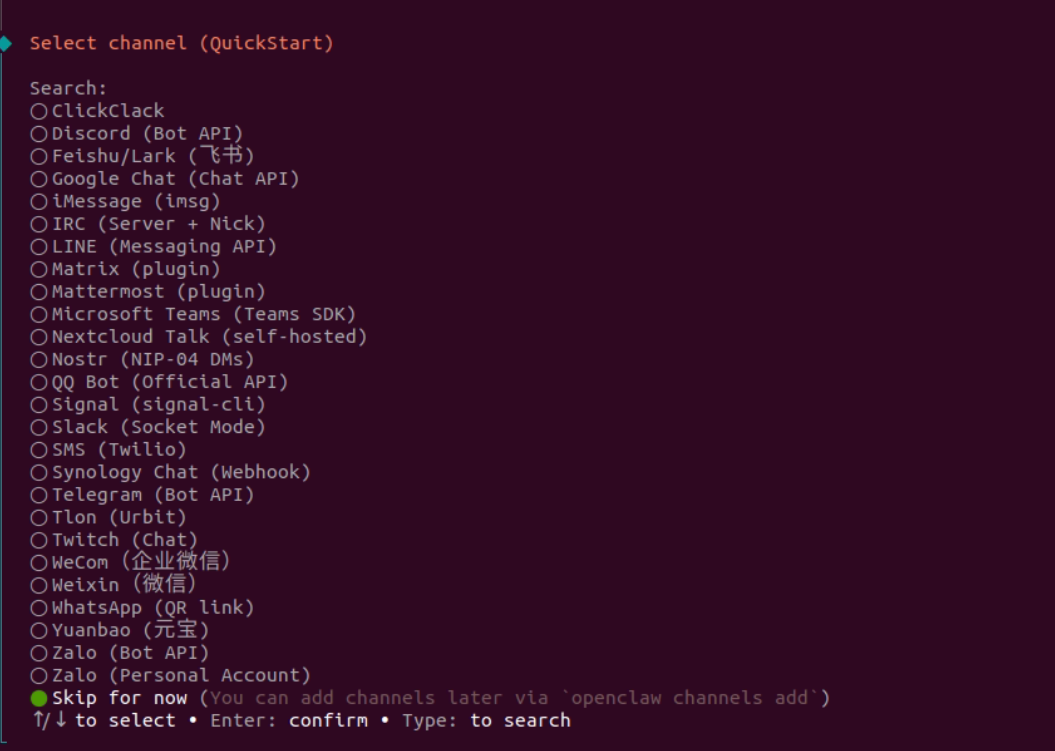
Figure 3-5. OpenClaw channel selection screen
For Web Search, select “Parallel Search (Free)”. For “Configure skills now?”, select “No”.
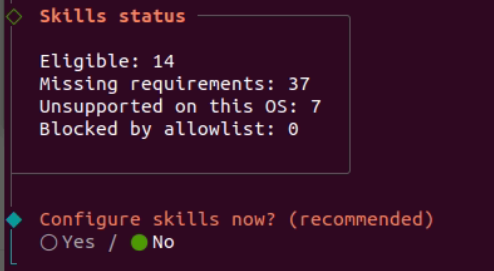
Figure 3-6. Screen for skipping Skills configuration
For “Enable hooks?”, select “Skip for now”.
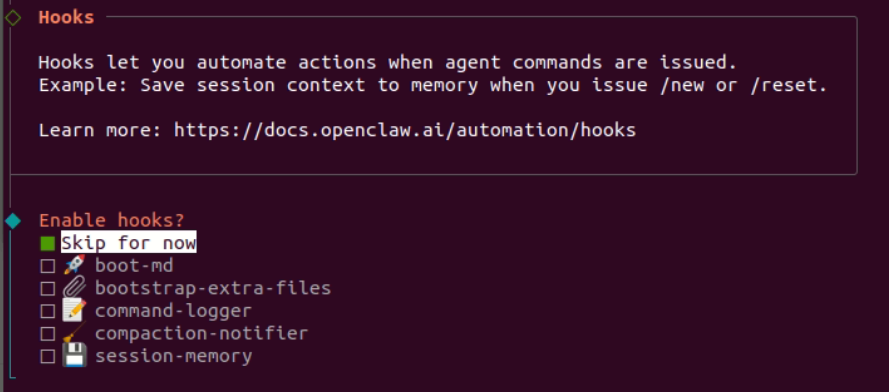
Figure 3-7. Screen for skipping Hooks configuration

Figure 3-8. Hatch later selection screen
3.1 Opening OpenClaw Manually from a Browser
Run the following command from the Ubuntu PC through SSH.
ssh -N -L 18789:127.0.0.1:18789 nano@192.168.10.85An authentication token is required. Run the following commands on the RV1126B board to generate a new token.
TOKEN=$(openssl rand -hex 32)openclaw config set gateway.auth.mode tokenopenclaw config set gateway.auth.token "$TOKEN"echo "$TOKEN" > ~/.openclaw/gateway-token.txtchmod 600 ~/.openclaw/gateway-token.txtopenclaw config validatecat ~/.openclaw/gateway-token.txt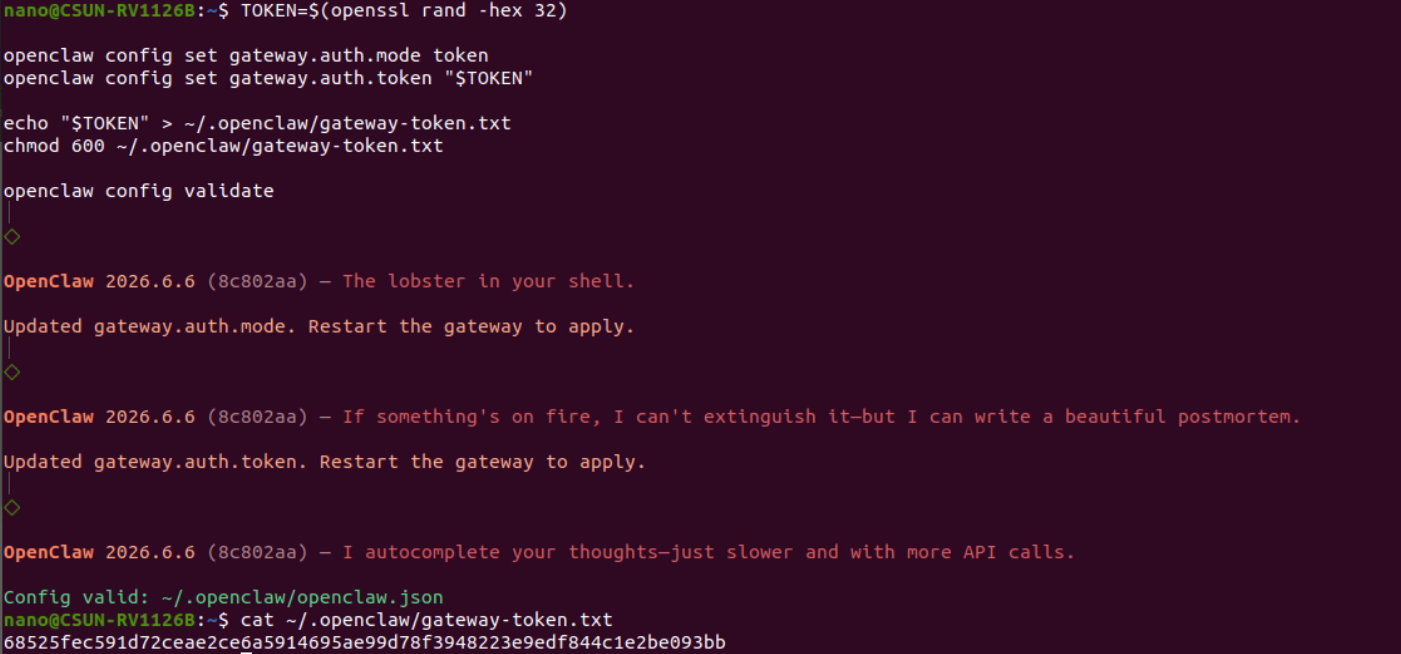
Figure 3-9. Generating and confirming the OpenClaw gateway token
Access the following URL from the Ubuntu PC.
http://localhost:18789/#token=new_tokenExample:
http://localhost:18789/#token=68525fec591d72ceae2ce6a5914695ae99d78f3948223e9edf844c1e2be093bb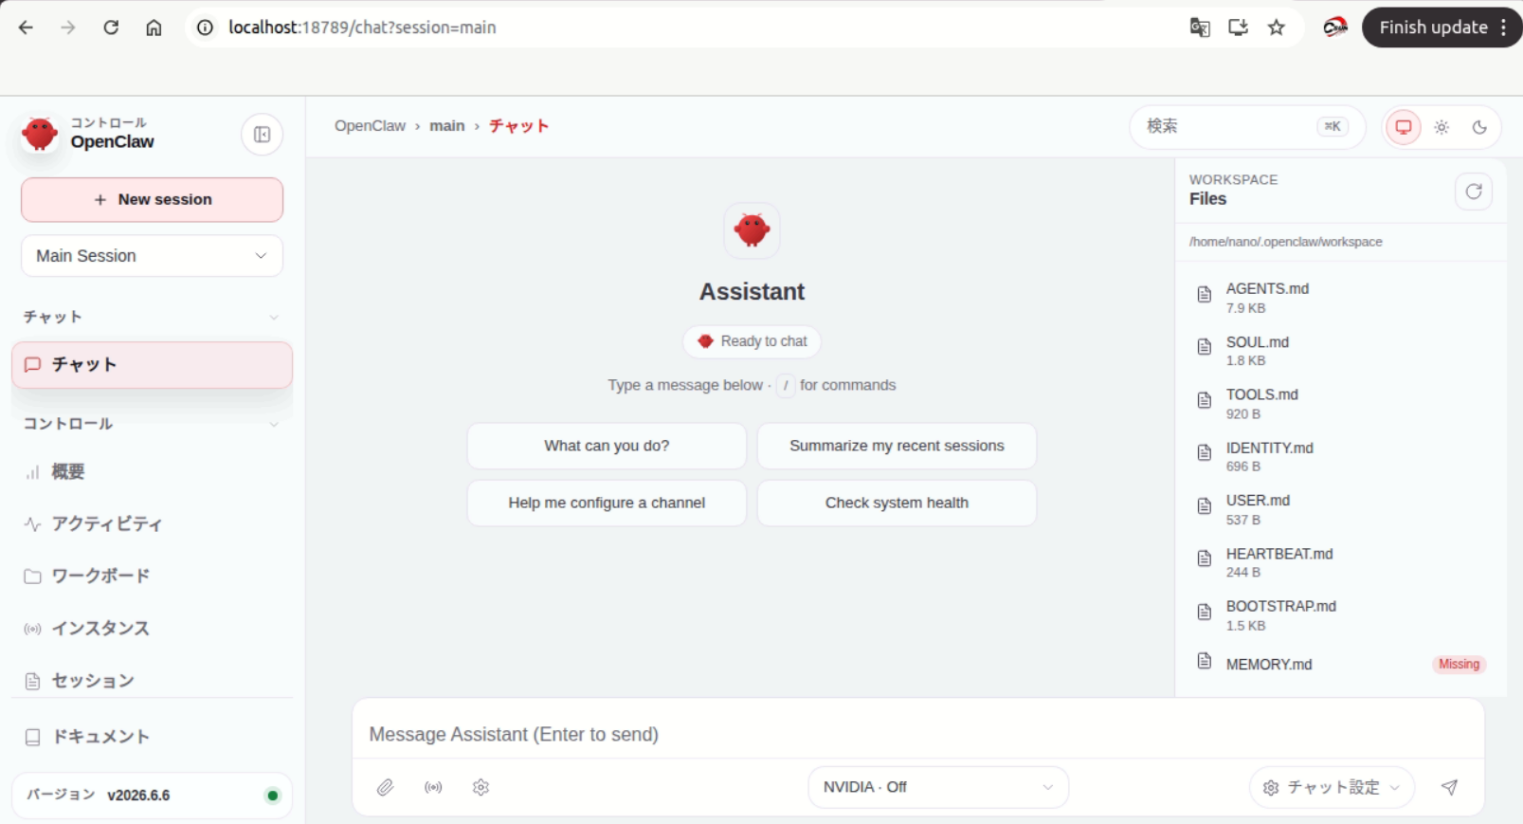
Figure 3-10. Accessing the OpenClaw web console from a browser
4. Integrating OpenClaw with Lark
Lark registration URL: Lark sign-up
Reference URL: Complete Guide to OpenClaw Lark Integration: Automating Work with AI Agents
4.1 Configuring the Lark Open Platform
Open the developer console.
Developer site: Lark Developer
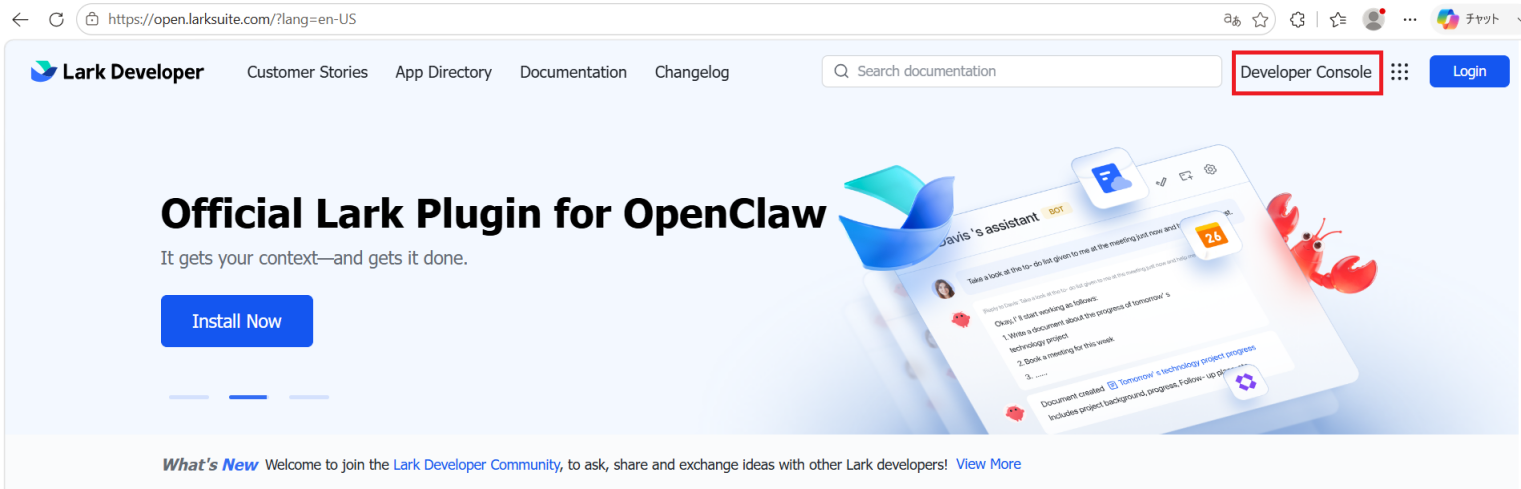
Figure 4-1. Lark Developer console home screen
Create a company application. This tutorial uses corporate registration as an example.
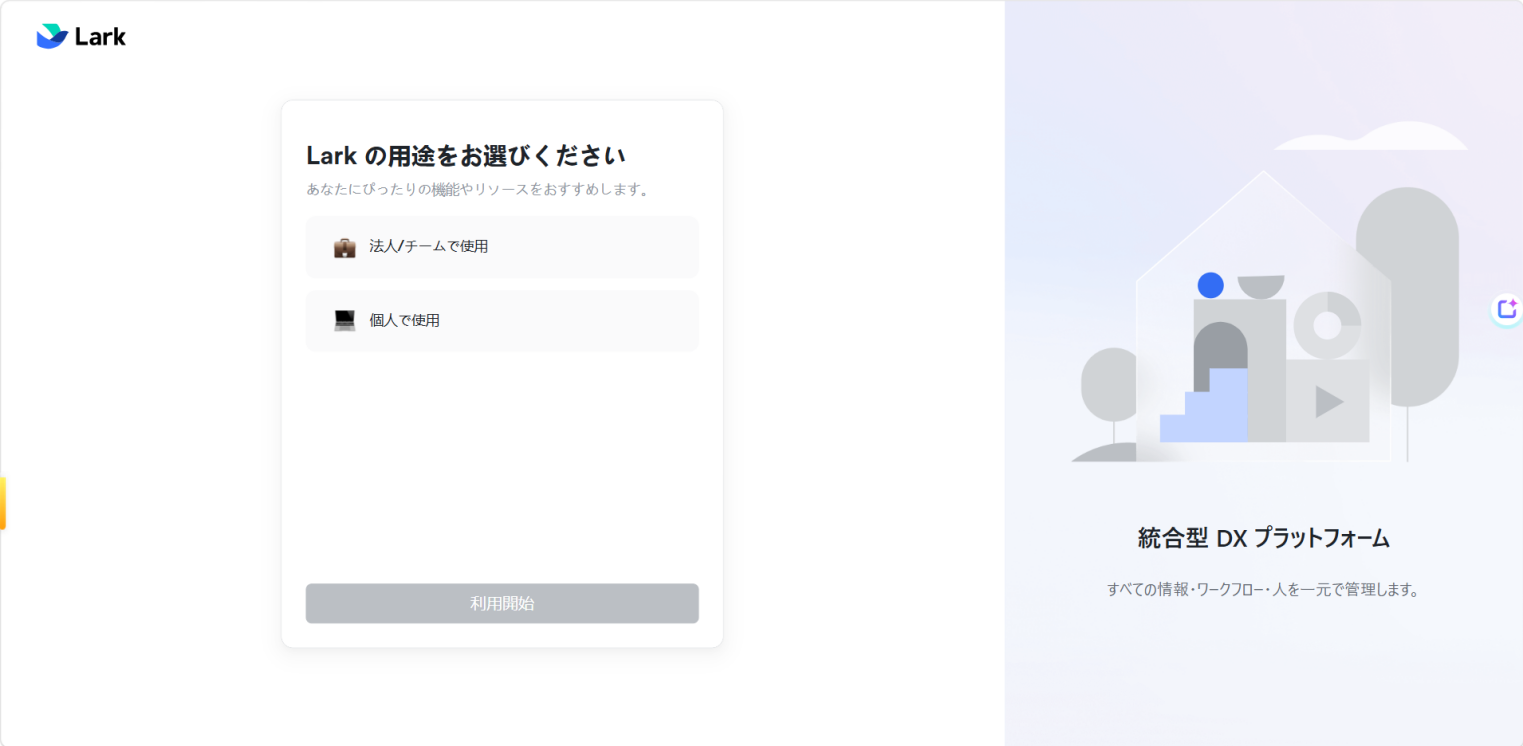
Figure 4-2. Corporate registration in the Lark developer console
Create a custom app.
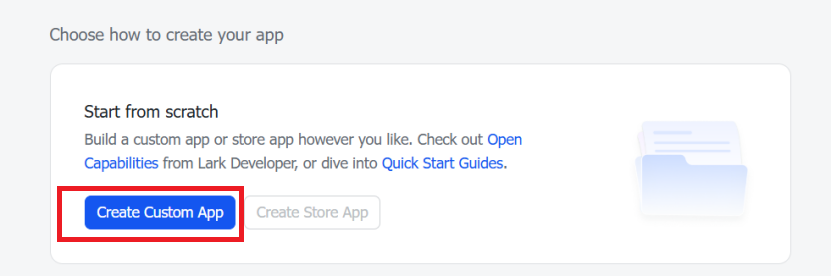
Figure 4-3. Custom app creation menu
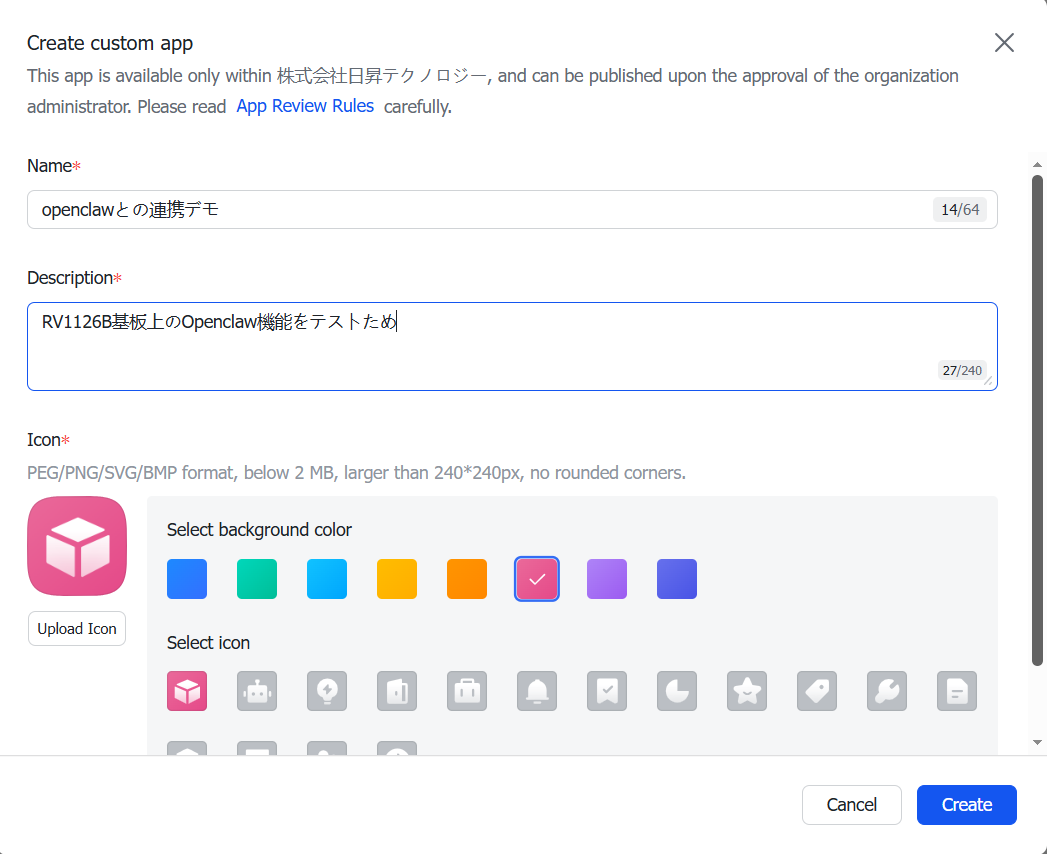
Figure 4-4. Custom app creation form
Record the App ID and App Secret. They will be used later in the OpenClaw configuration.
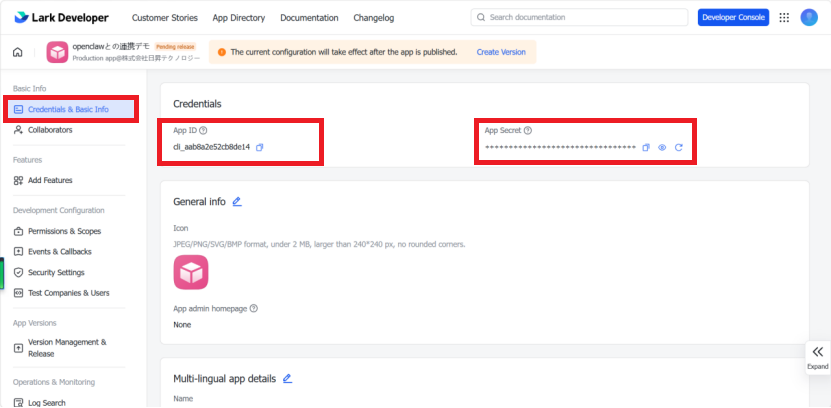
Figure 4-5. App ID and App Secret confirmation screen
Add features.
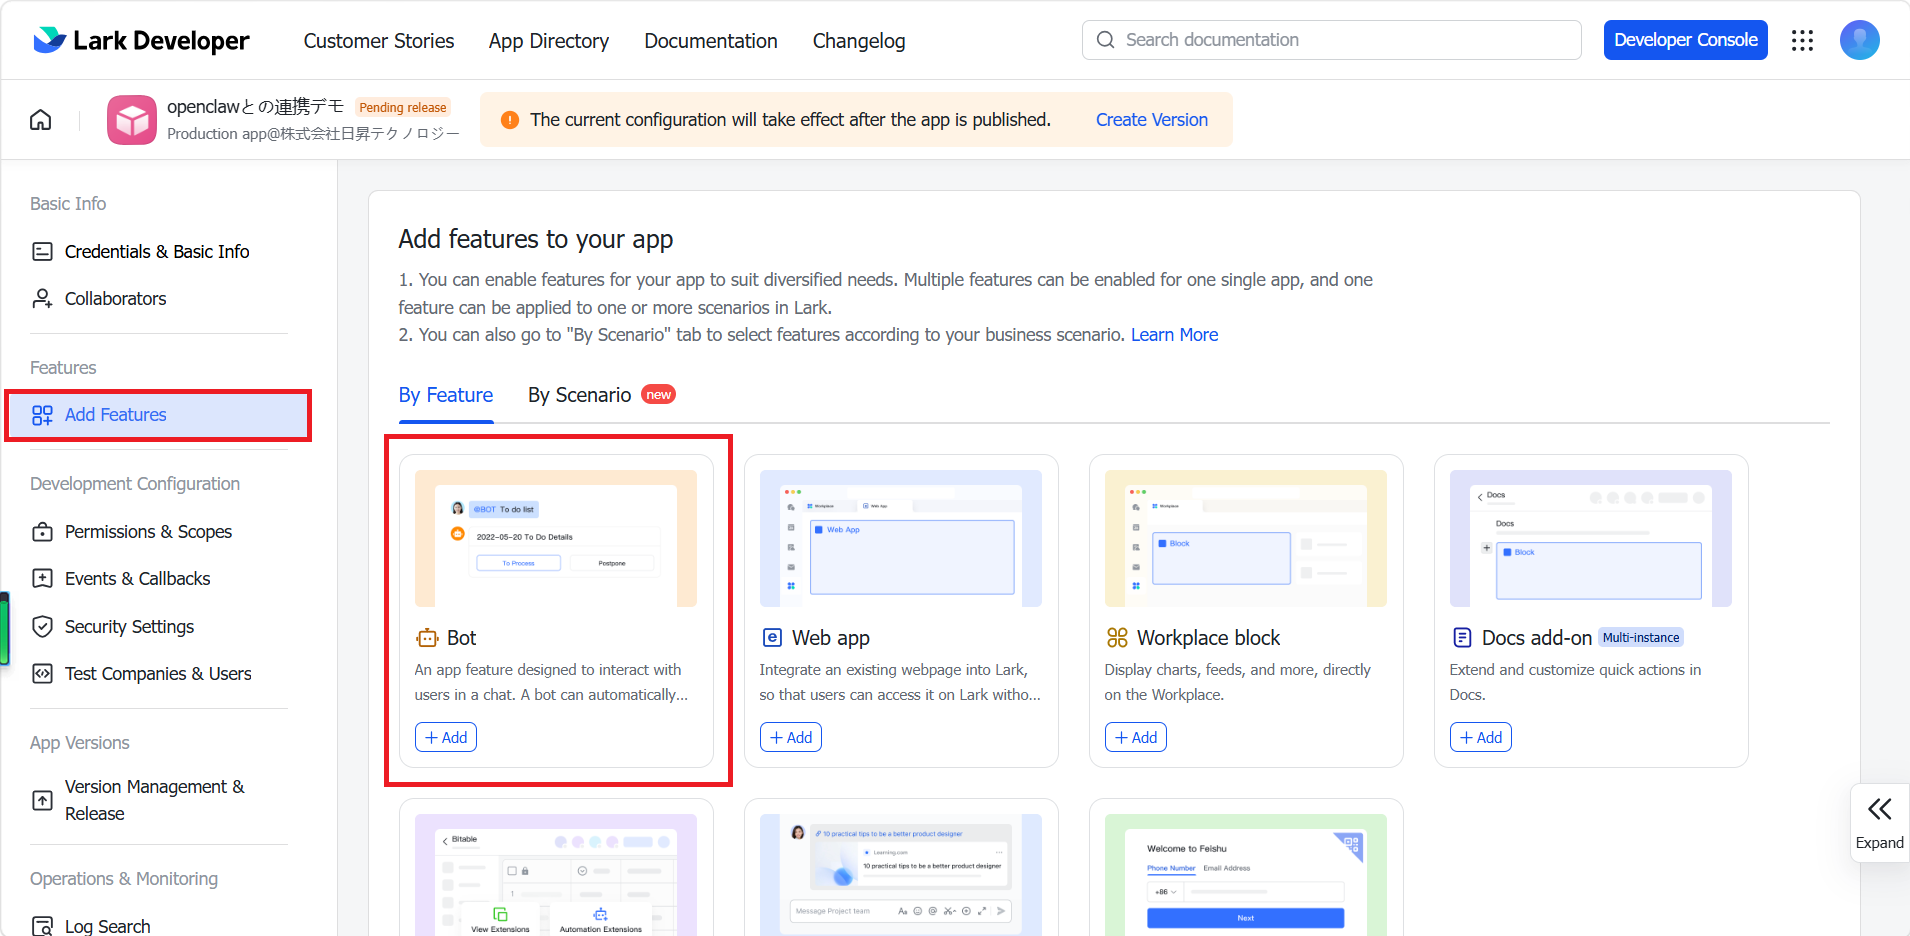
Figure 4-6. Lark app feature addition screen
Configure permissions. Download the following permission_key.txt, copy its content, and complete the permission configuration.
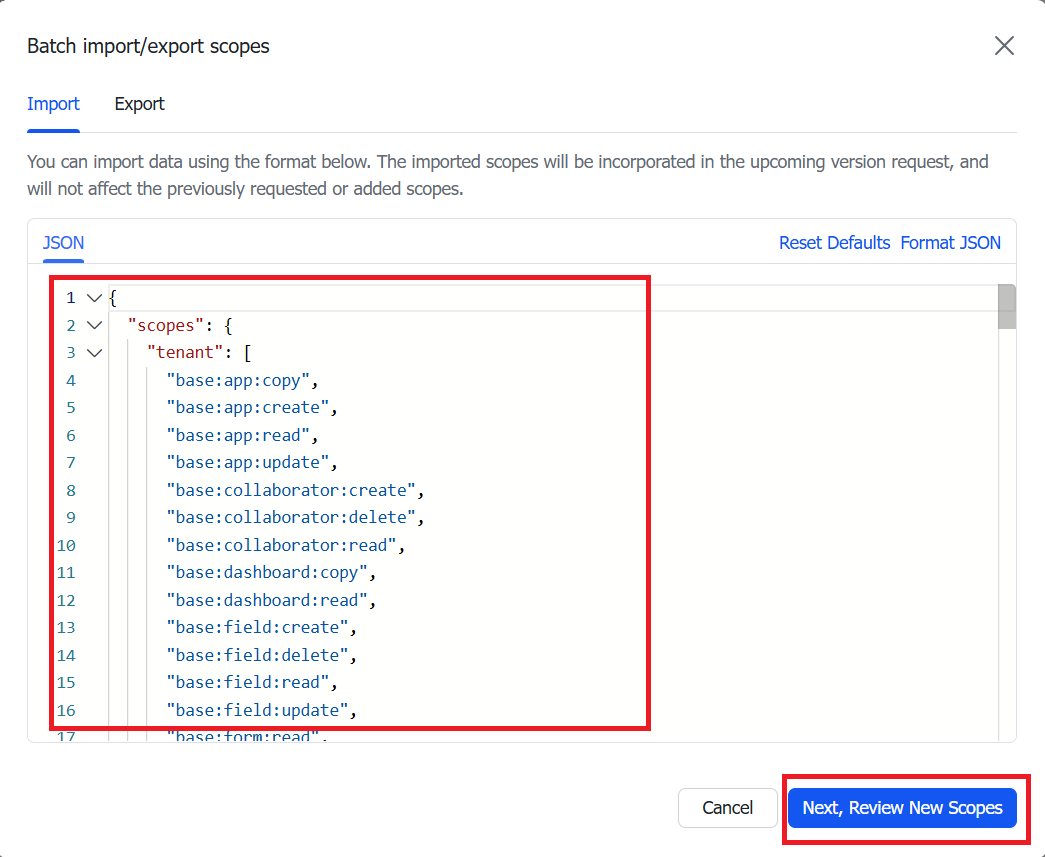
Figure 4-7. Lark app permission configuration screen
Click “Version Management & Release” from the left menu, then click “Save”.
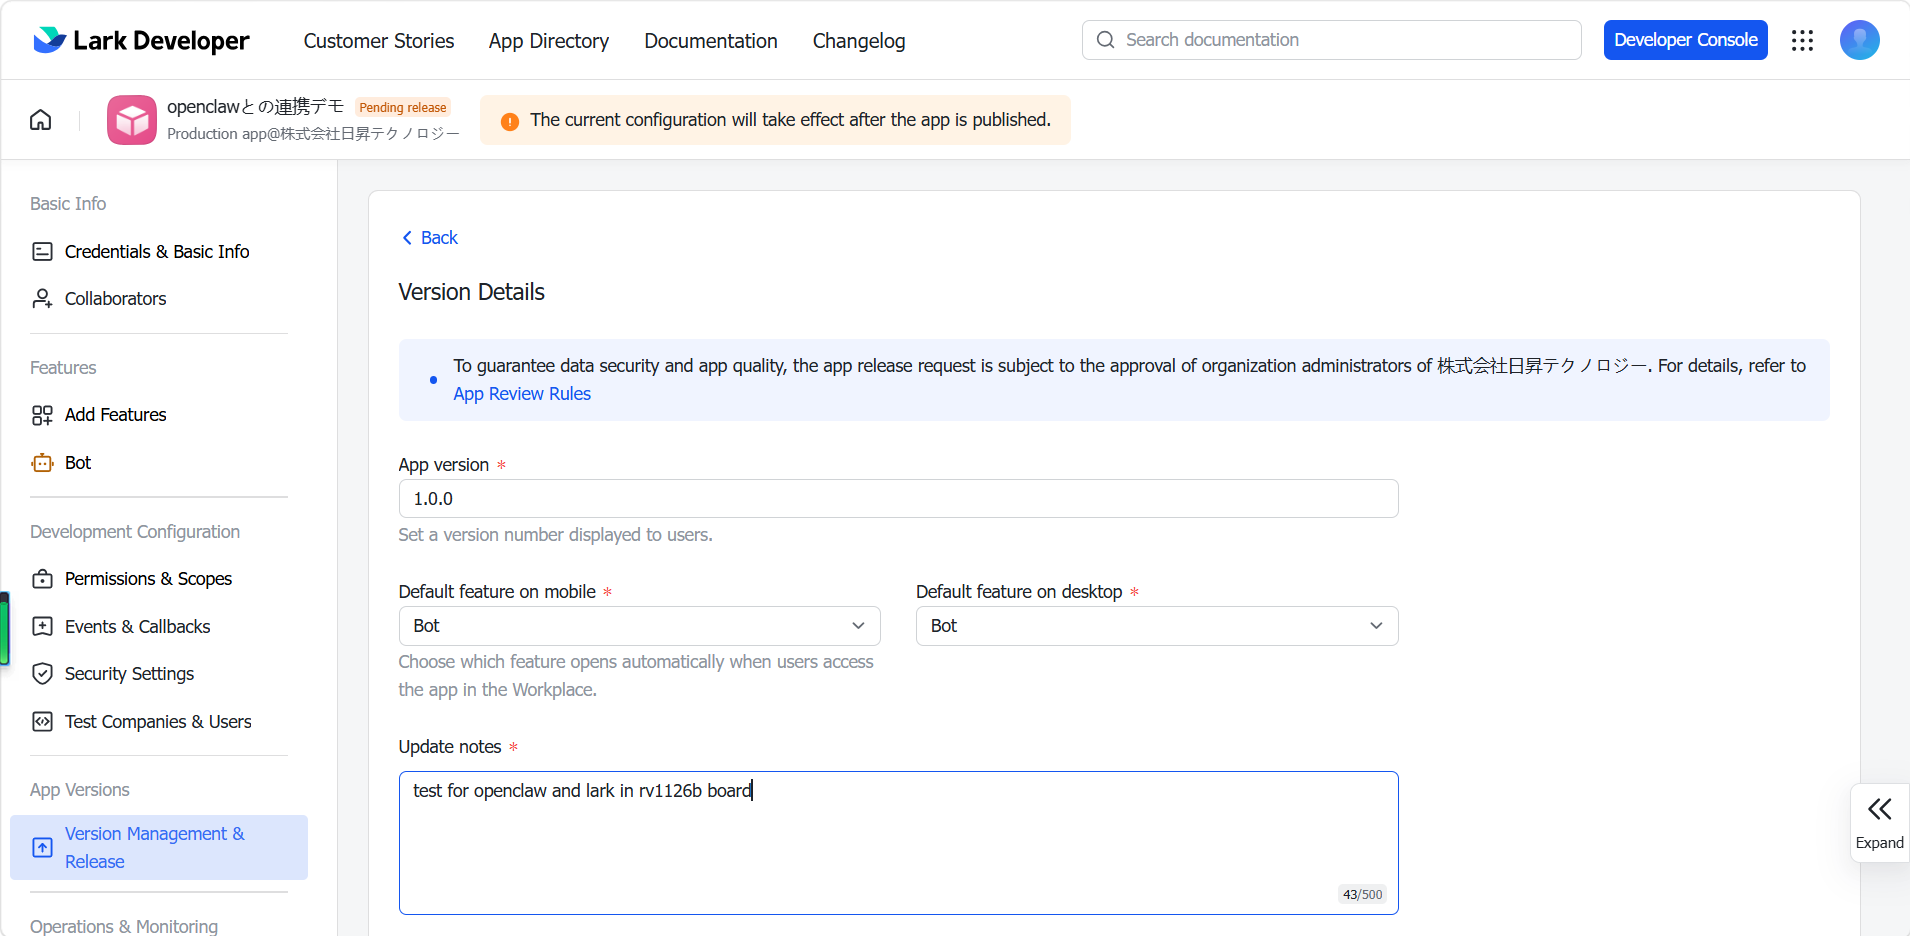
Figure 4-8. Lark app version save screen
4.2 Configuring OpenClaw to Connect to Lark
Install the Lark plugin.
openclaw channels login --channel feishuOpen the OpenClaw configuration.
openclaw config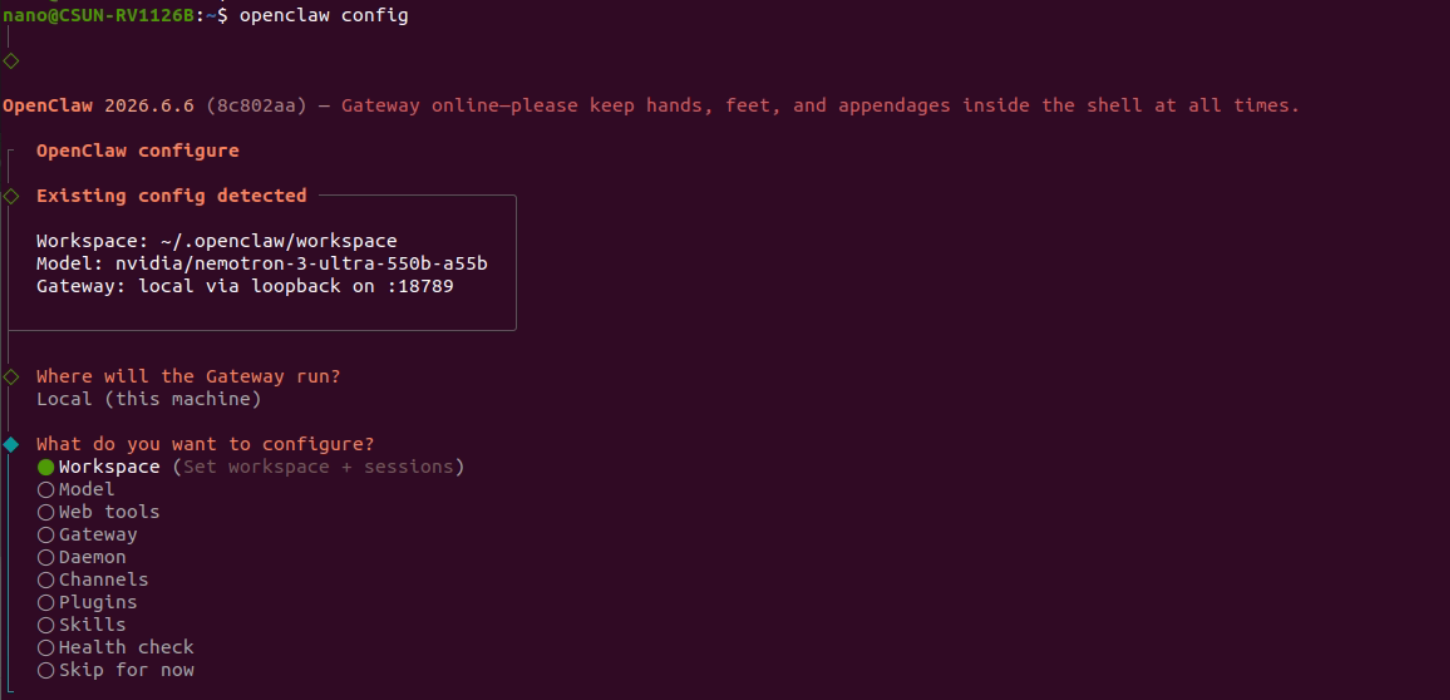
Figure 4-9. OpenClaw config menu
Select Channels.
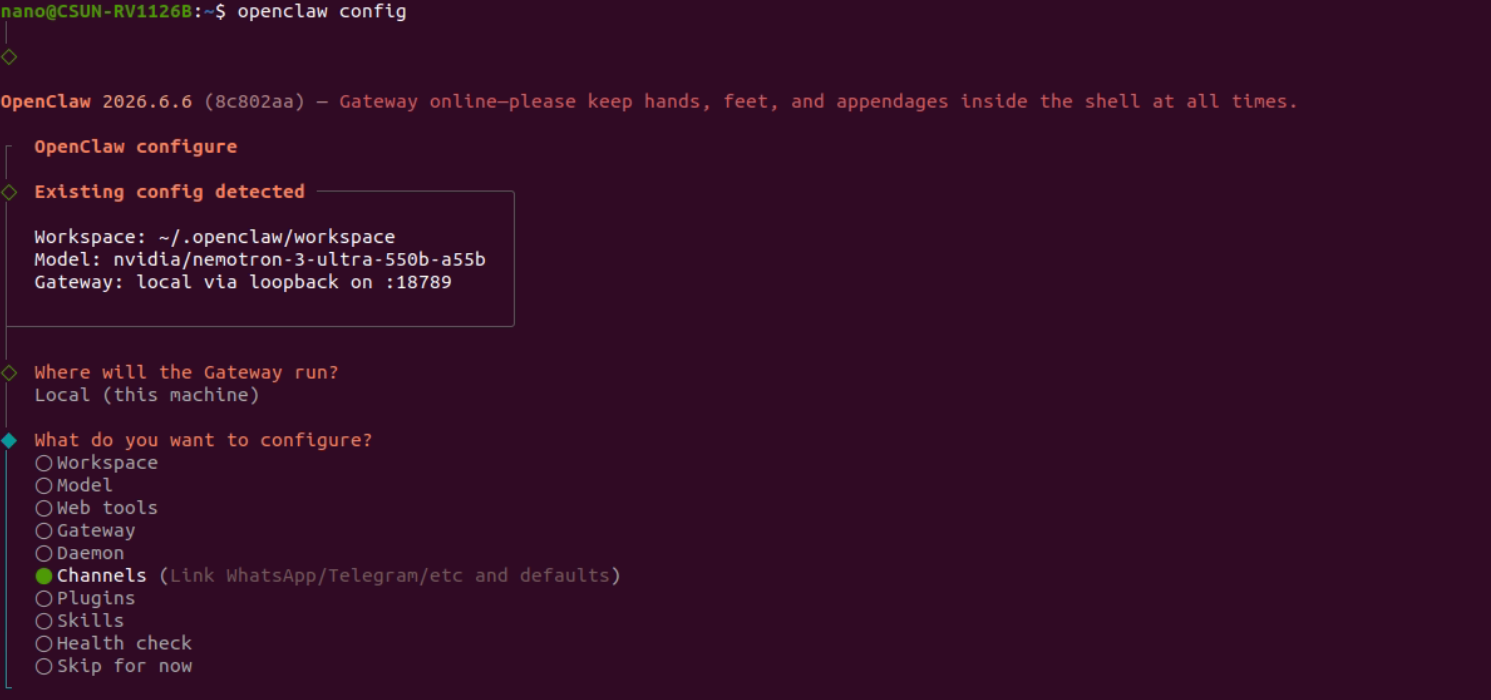
Figure 4-10. Selecting Channels in OpenClaw config
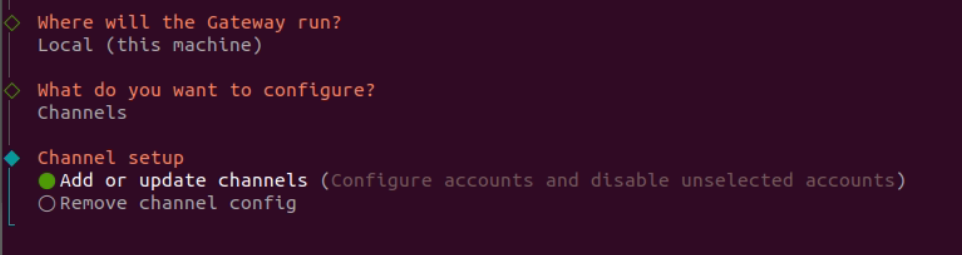
Figure 4-11. Adding a channel
Select Feishu/Lark.
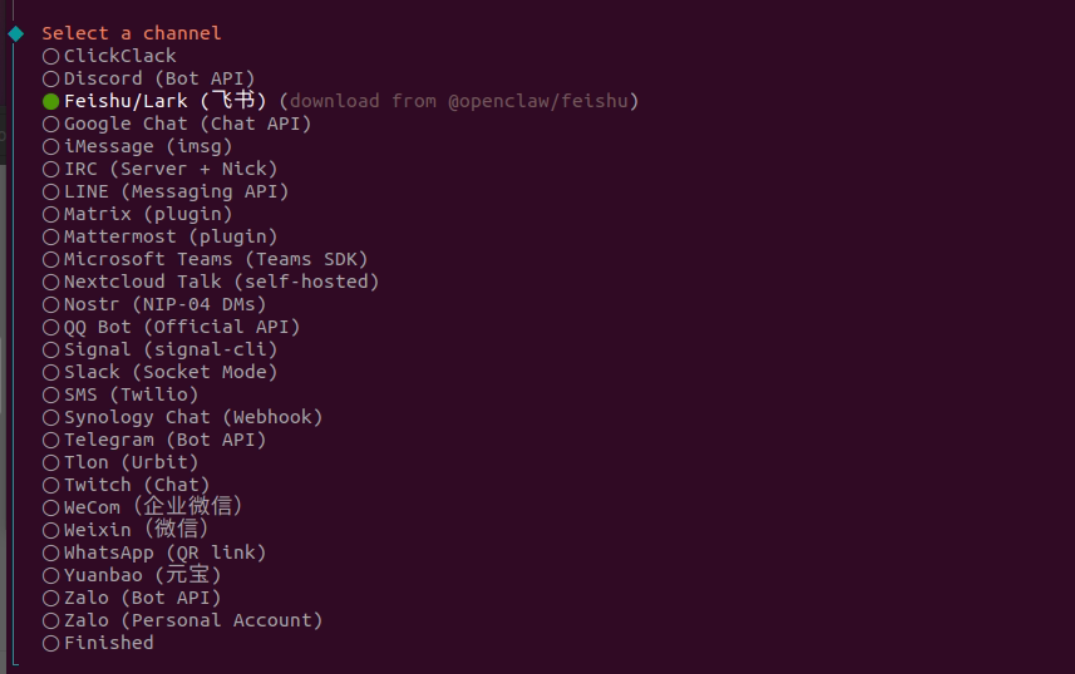
Figure 4-12. Selecting the Feishu/Lark channel
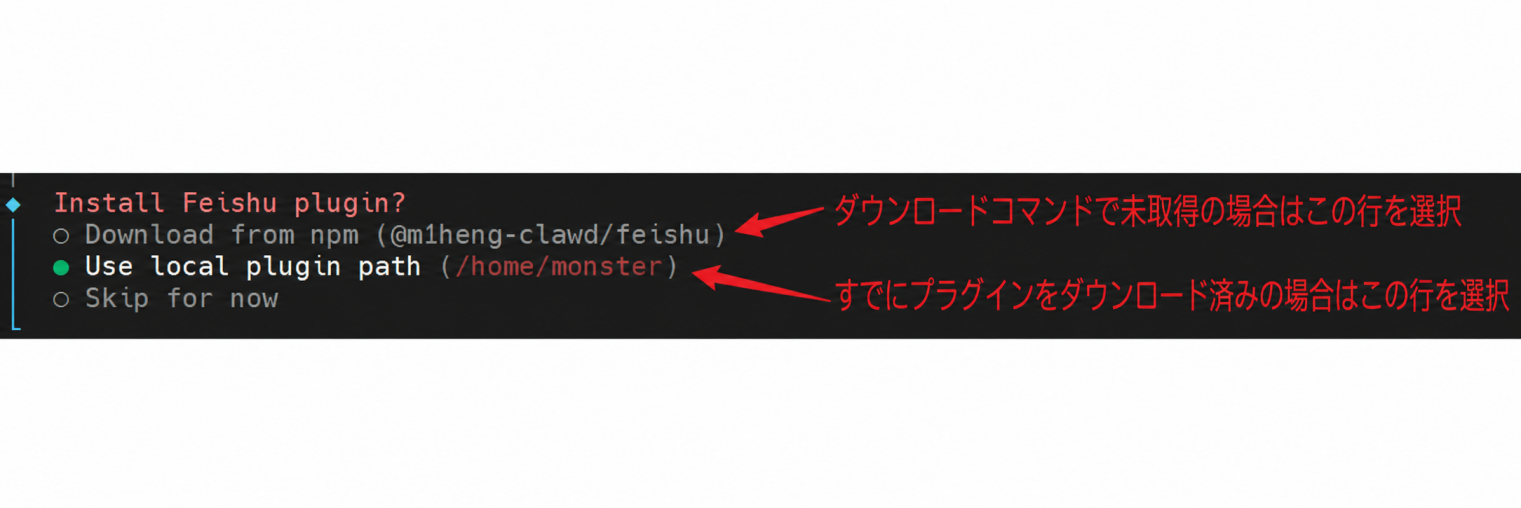
Figure 4-13. Selecting the Lark connection method
Because the plugin has already been installed on the board used in this tutorial, select “Enter App ID and App Secret manually”.

Figure 4-14. Selecting manual App ID and App Secret input
Select “Lark (larksuite.com) - International”.

Figure 4-15. Selecting Lark International
Enter the App ID and App Secret obtained from the Lark developer console.
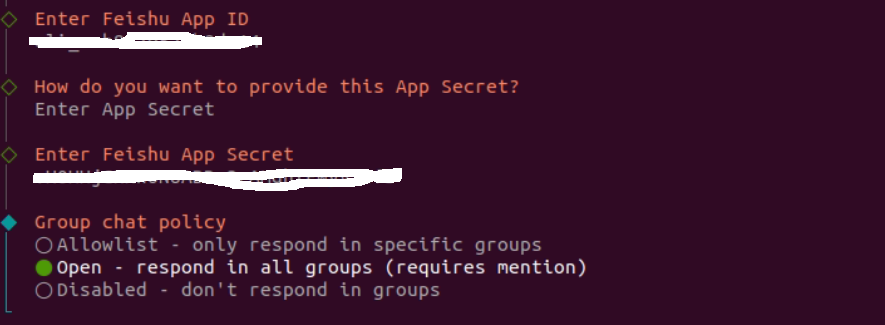
Figure 4-16. Entering the App ID and App Secret
Select the response mode.
- Allowlist: Respond only to specified groups.
- Open: Respond to all groups.
- Disabled: Disable responses.
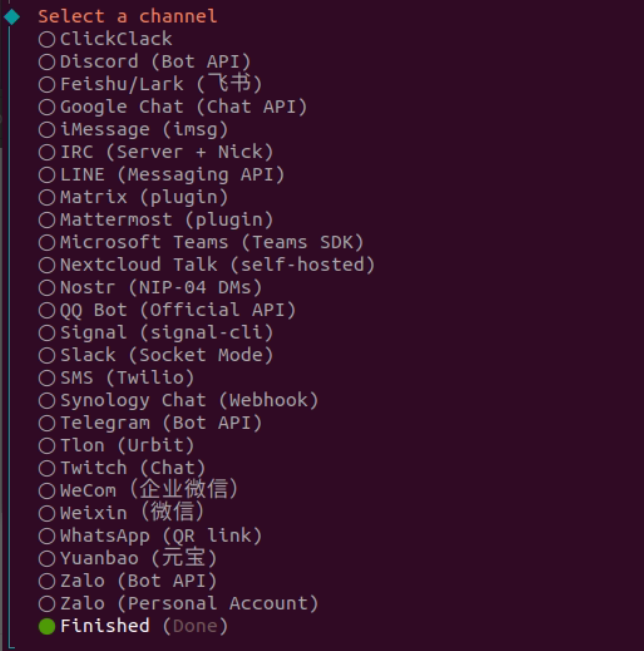
Figure 4-17. Selecting the Lark response mode

Figure 4-18. Final confirmation of Lark channel settings
After this, the OpenClaw config setup is complete.
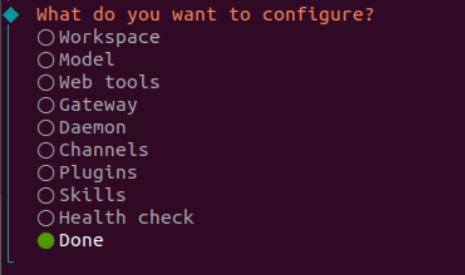
Figure 4-19. OpenClaw config completion screen
4.3 Configuring Lark Events and Callbacks
Return to Lark and configure events and callbacks. First configure “Subscription mode”.
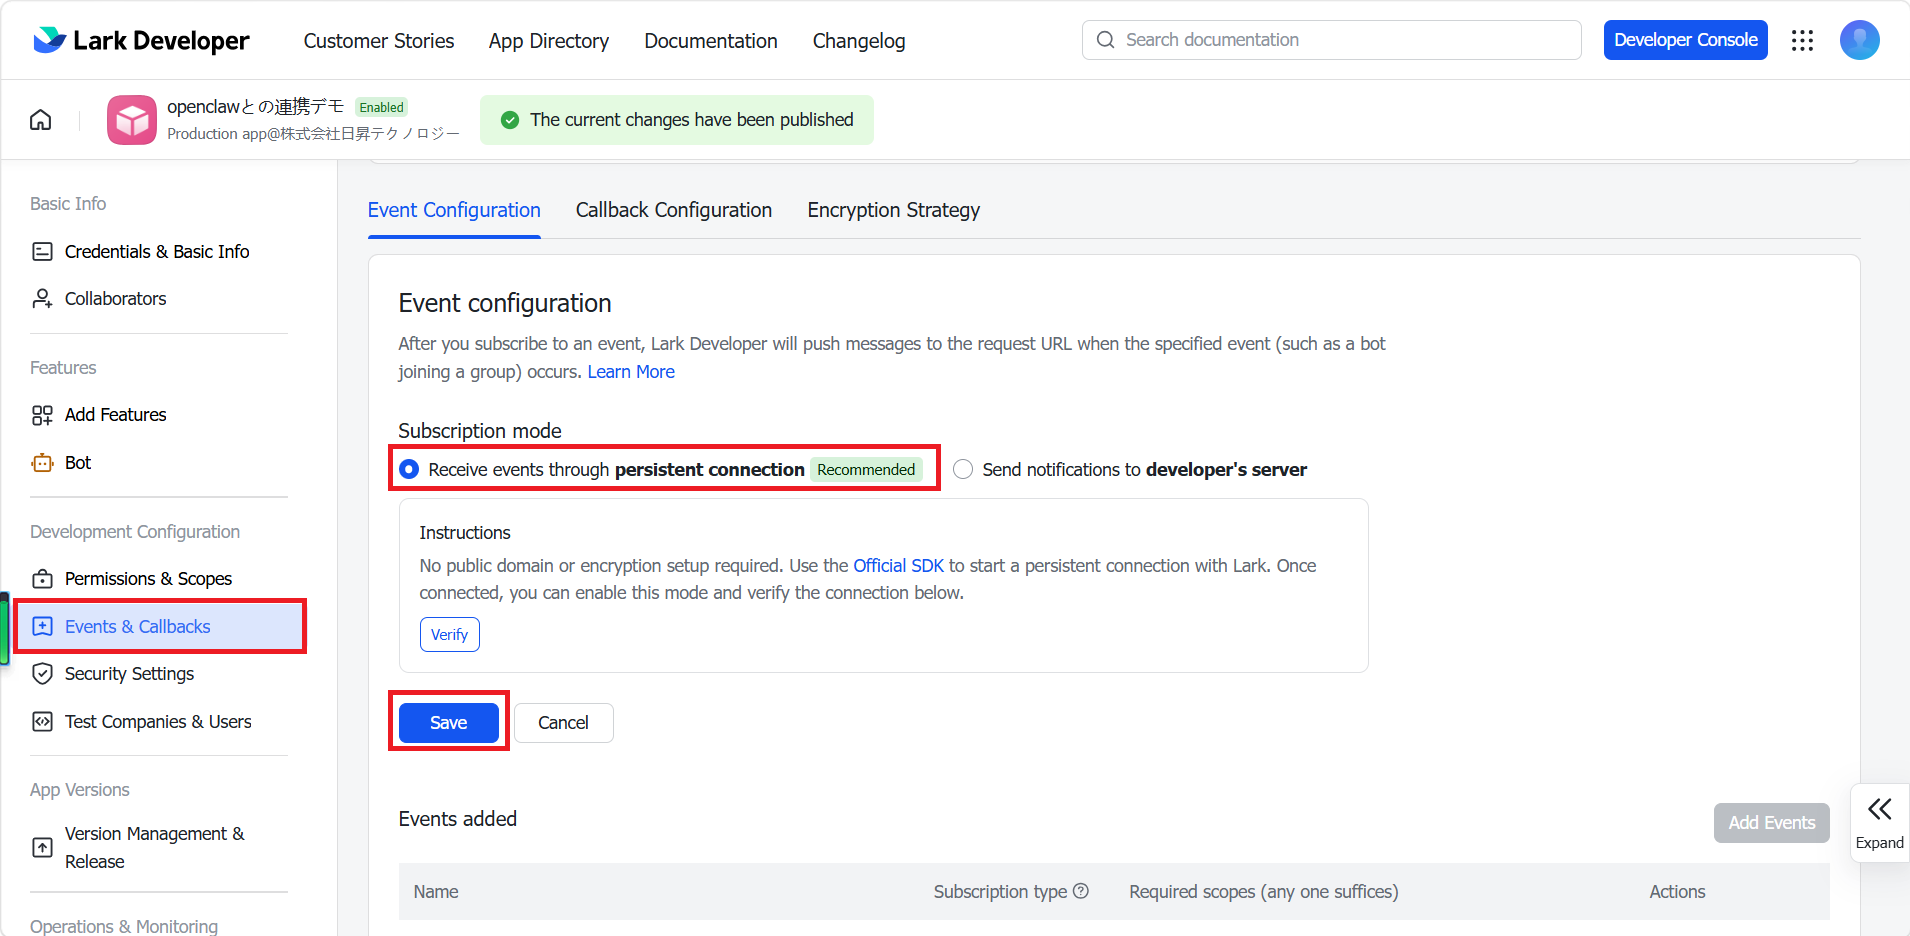
Figure 4-20. Subscription mode settings for Lark Event Subscription
Add events.
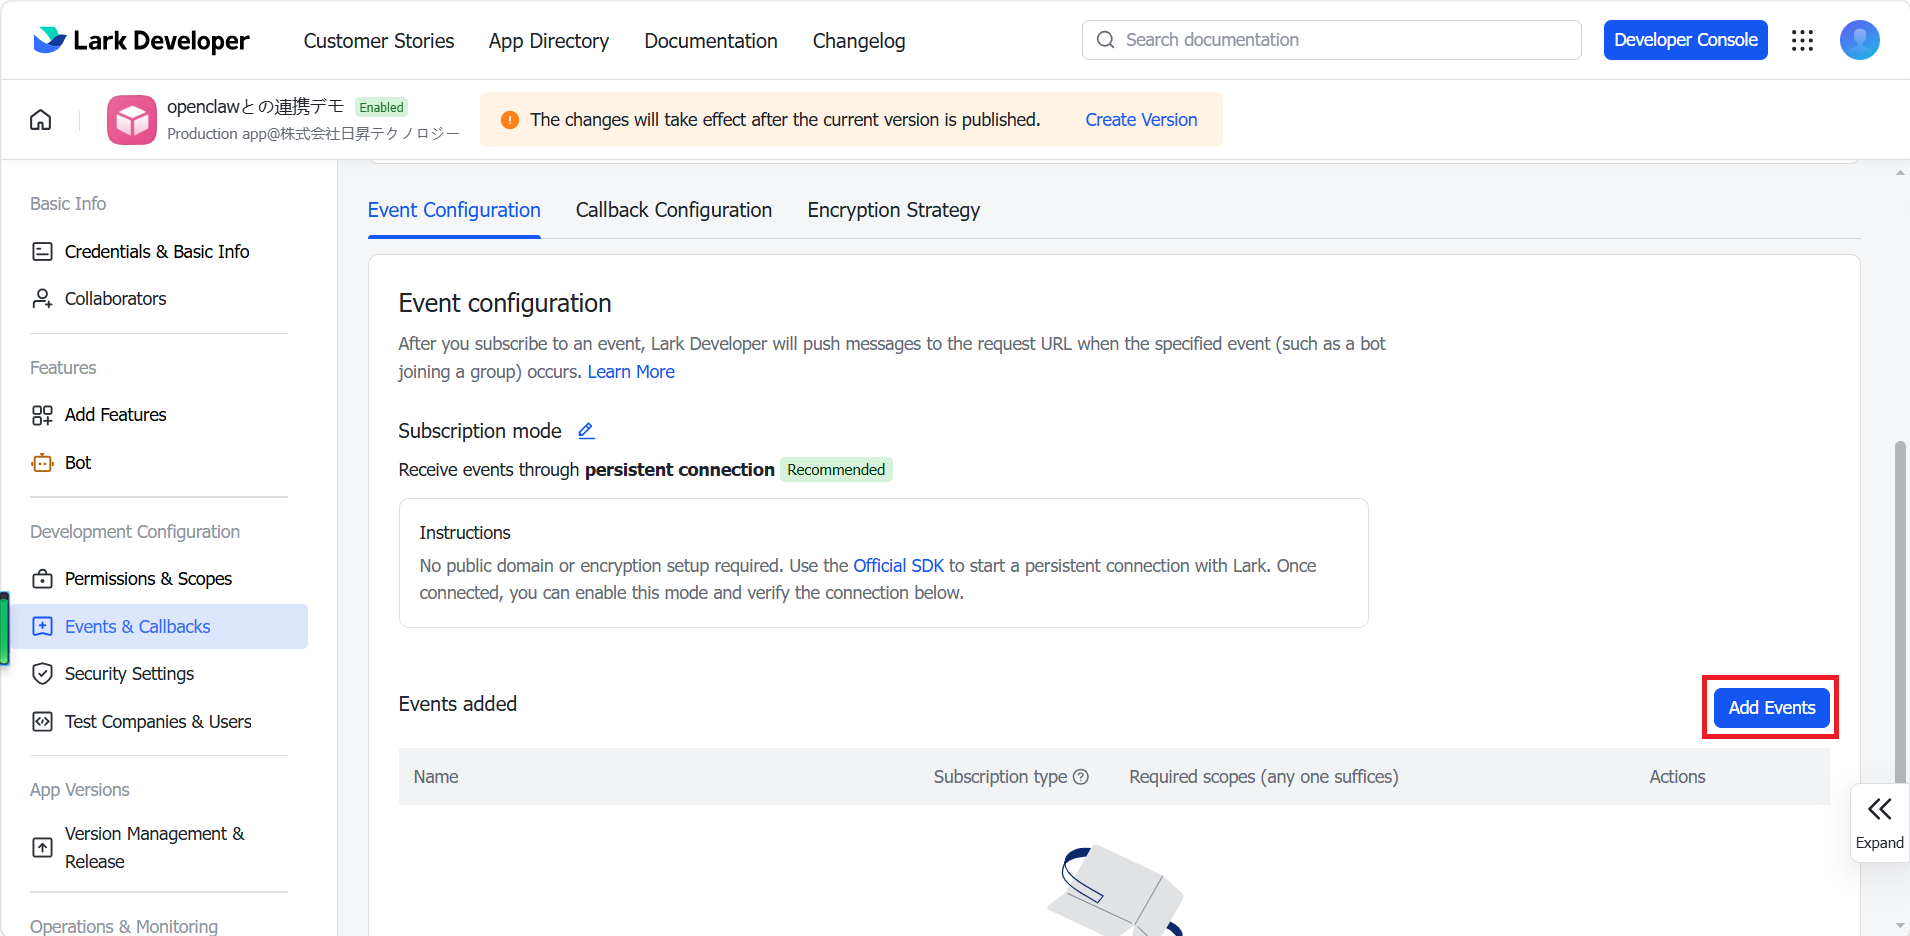
Figure 4-21. Lark event addition screen
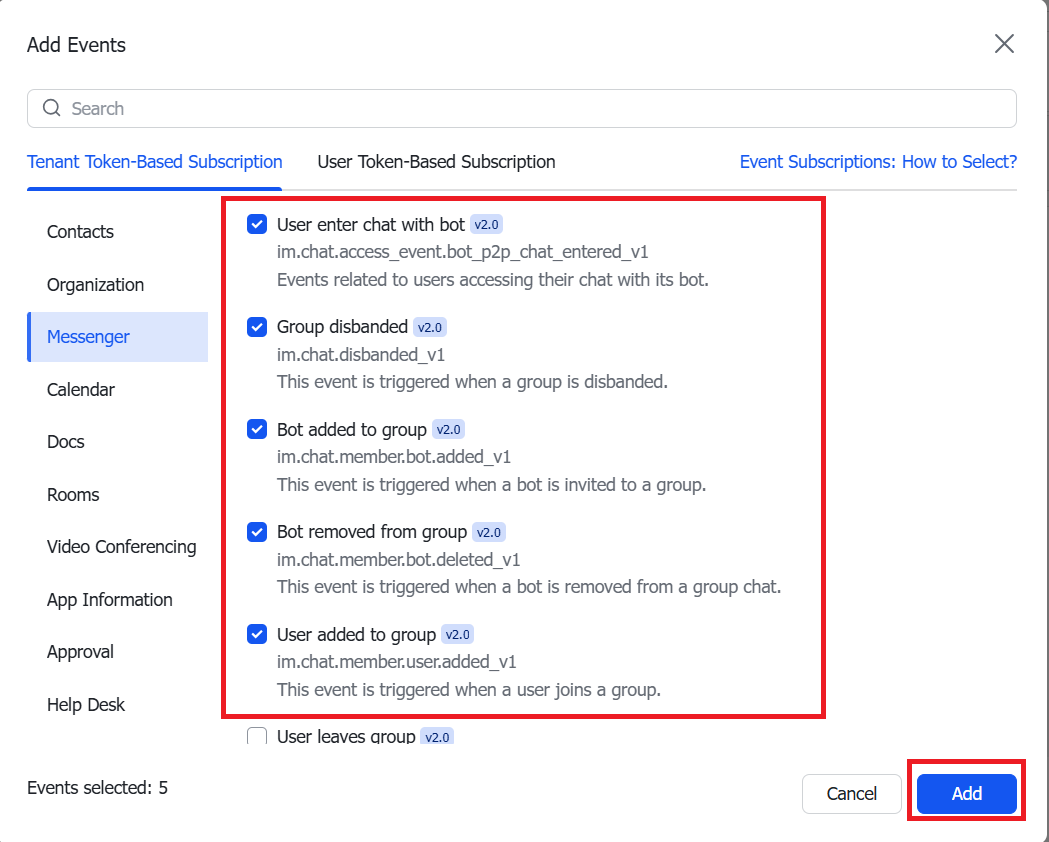
Figure 4-22. Selecting events to add
After adding events, release the version again.
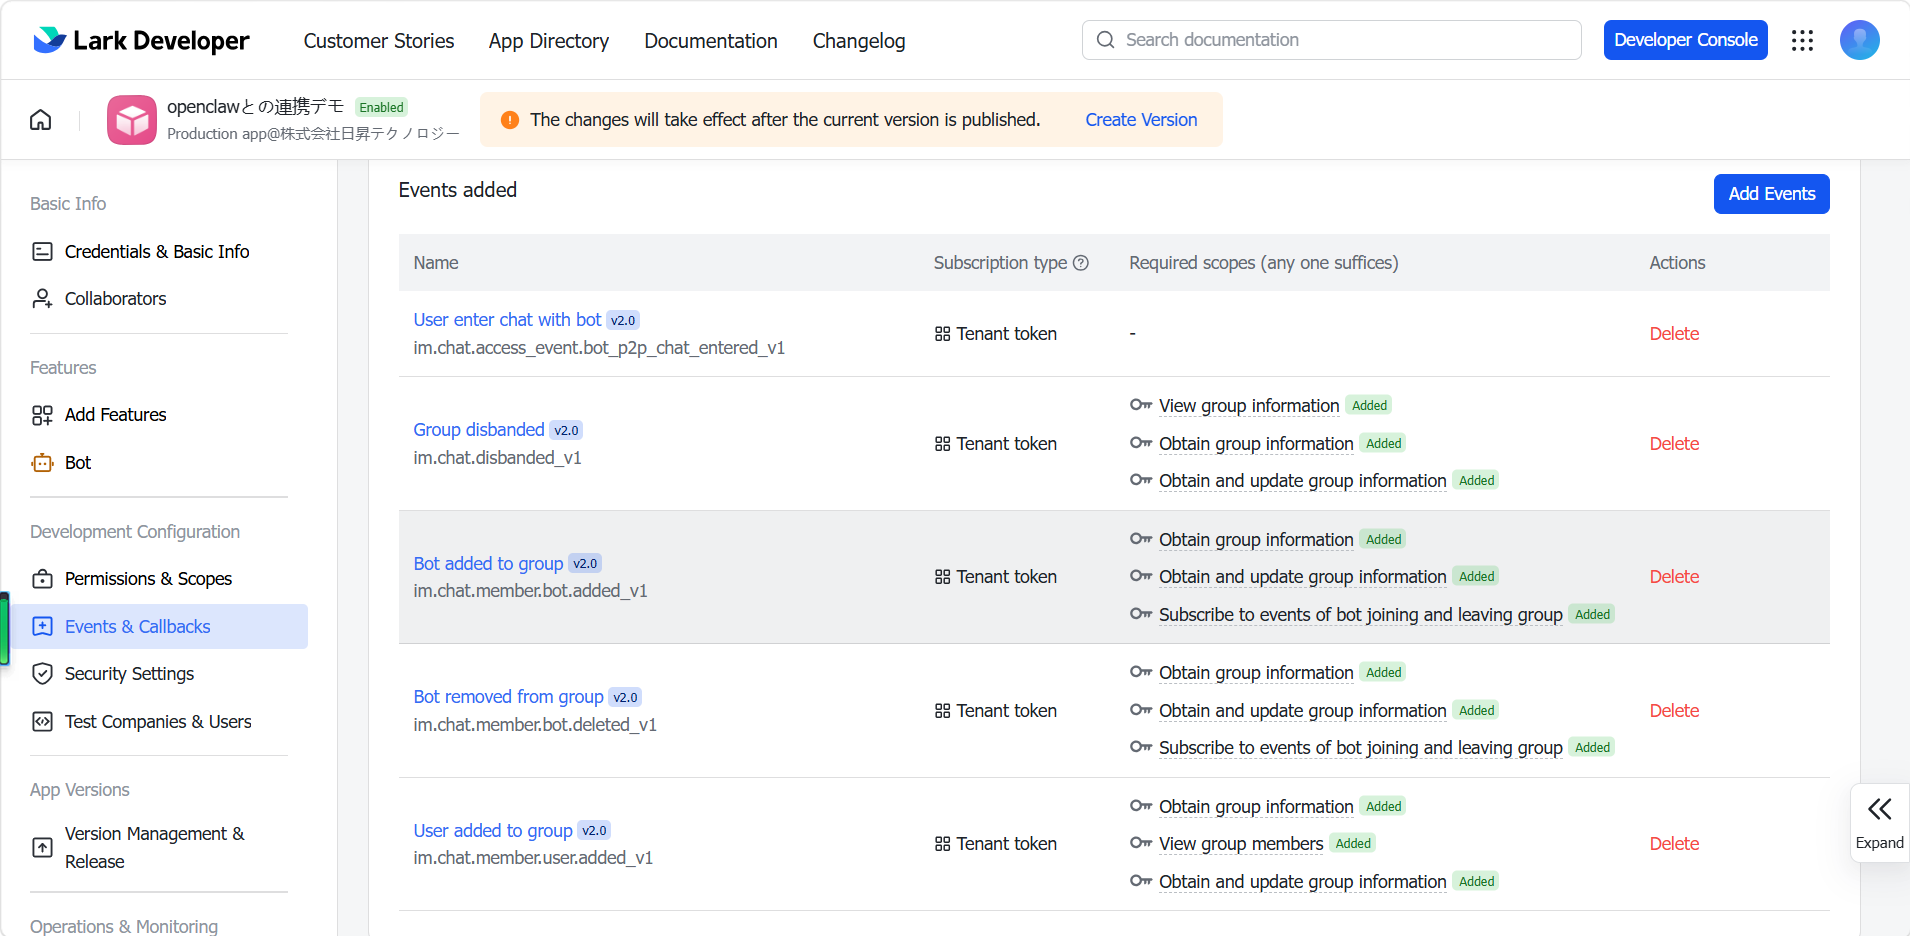
Figure 4-23. Version release after adding events
OpenClaw is now configured to connect to Lark.
5. Using OpenClaw in the Lark Client App
5.1 Installing the Lark Client App
Download and install the Lark client app from Lark: Team Collaboration DX Tool.
5.2 Creating a Chat Group
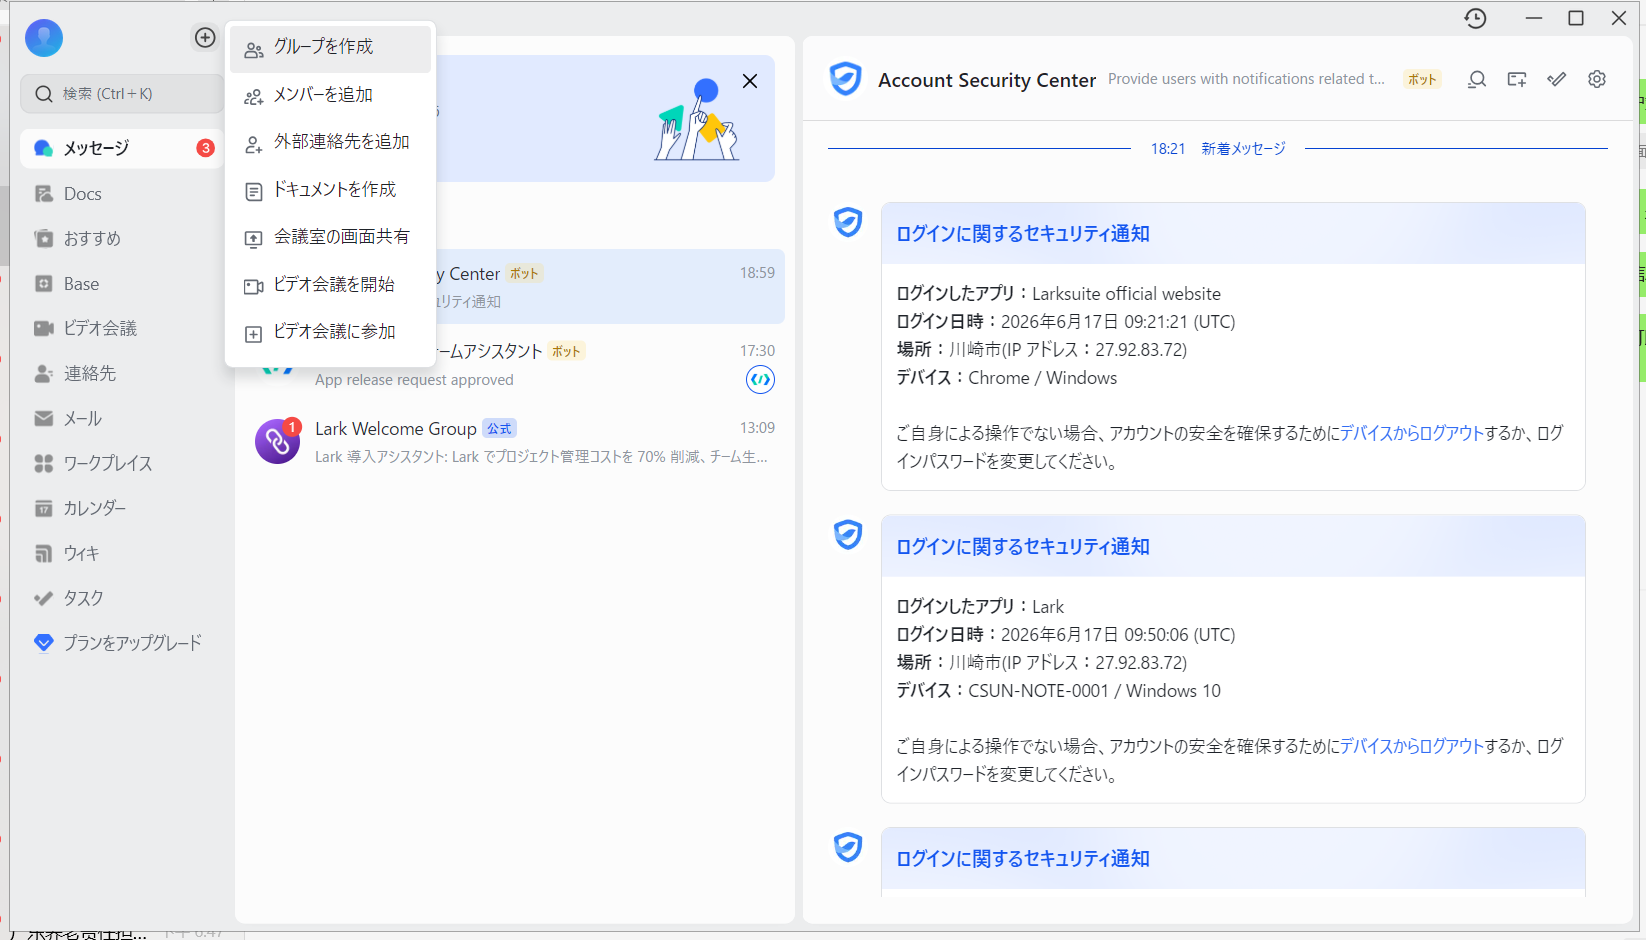
Figure 4-24. Lark client app home screen
Create a group.
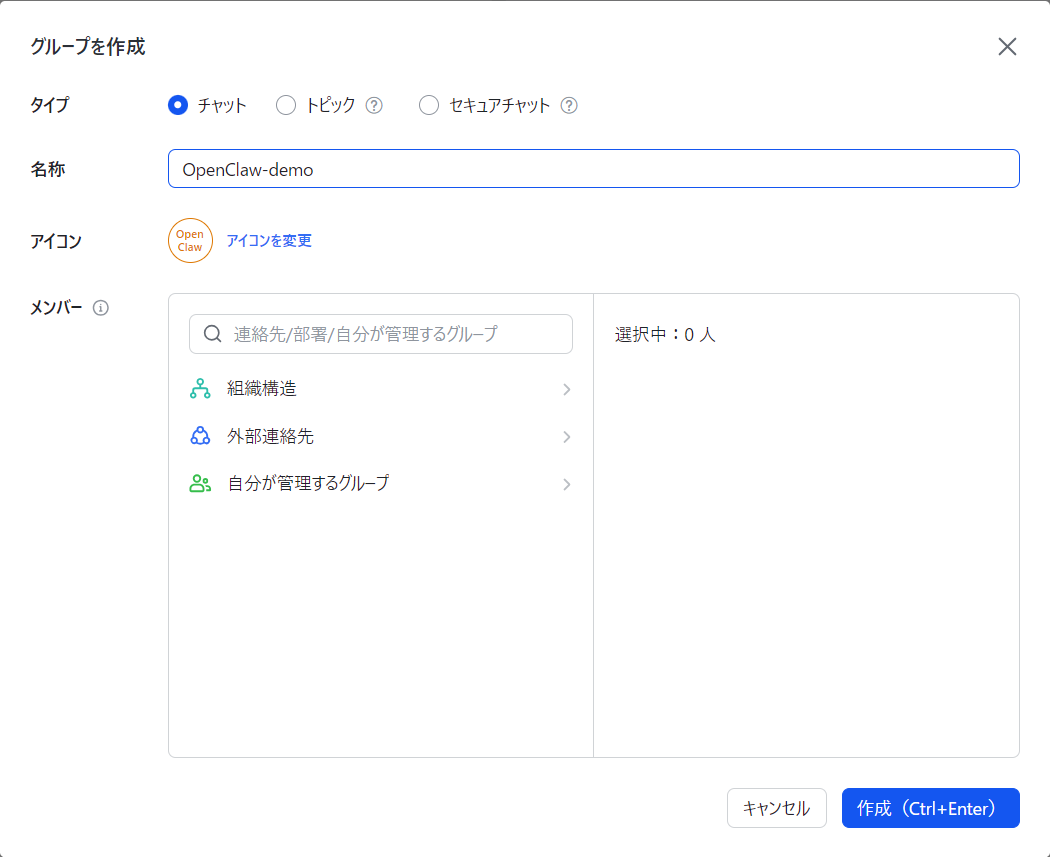
Figure 4-25. Lark chat group creation screen
5.3 Adding the OpenClaw Robot
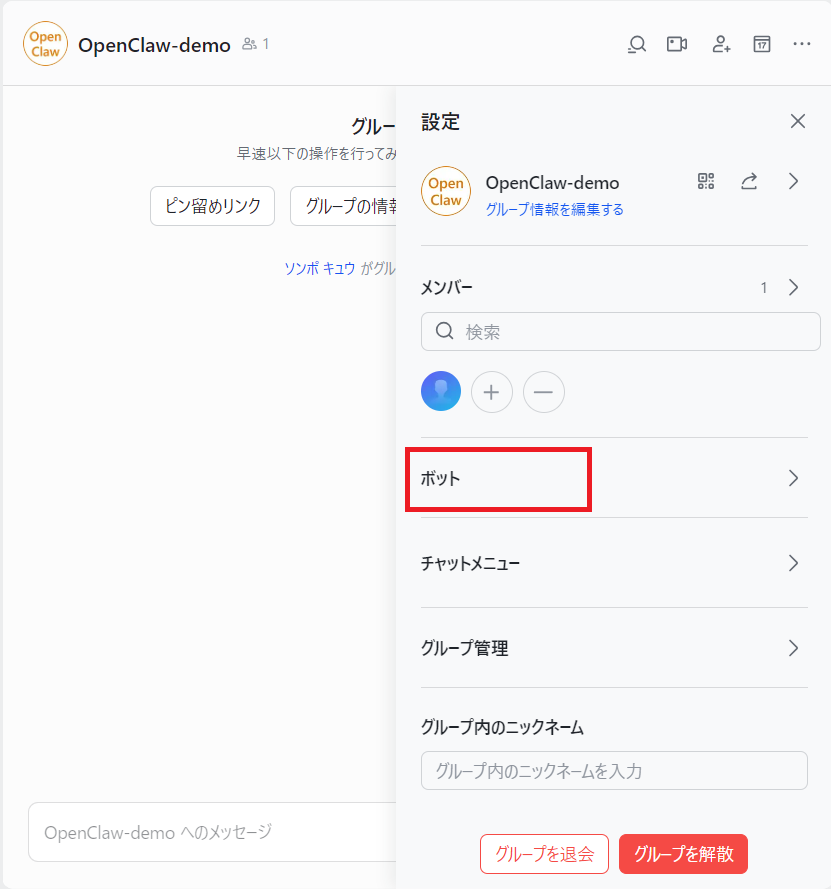
Figure 4-26. Menu for adding a robot to a Lark group
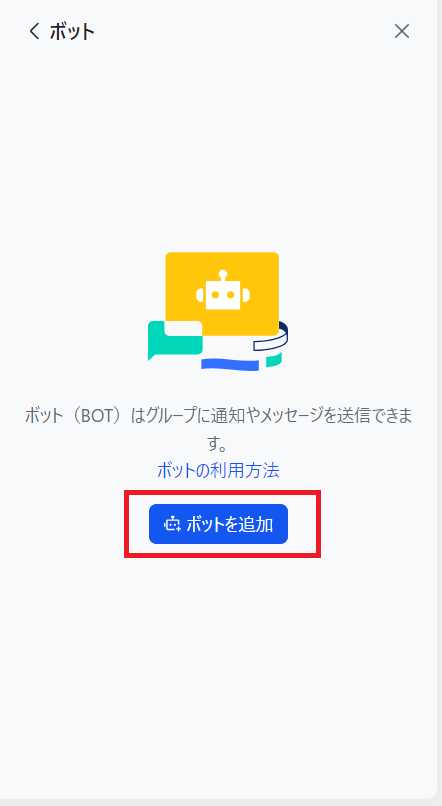
Figure 4-27. Lark bot addition screen
Select the bot created earlier in the Lark Developer console.
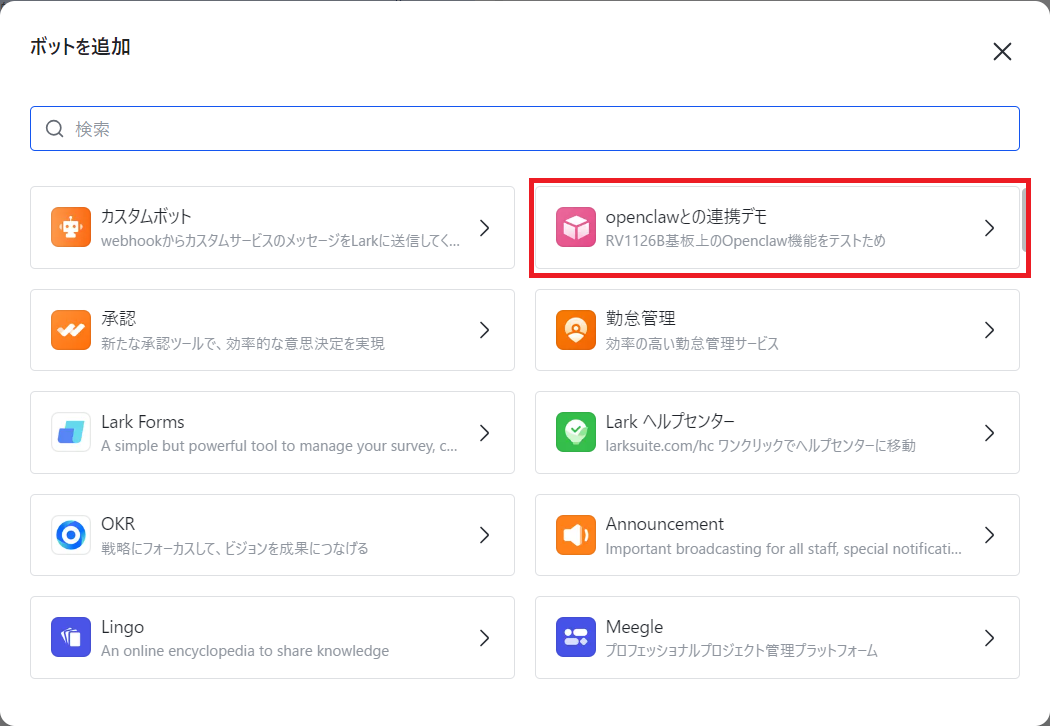
Figure 4-28. Selecting the created bot
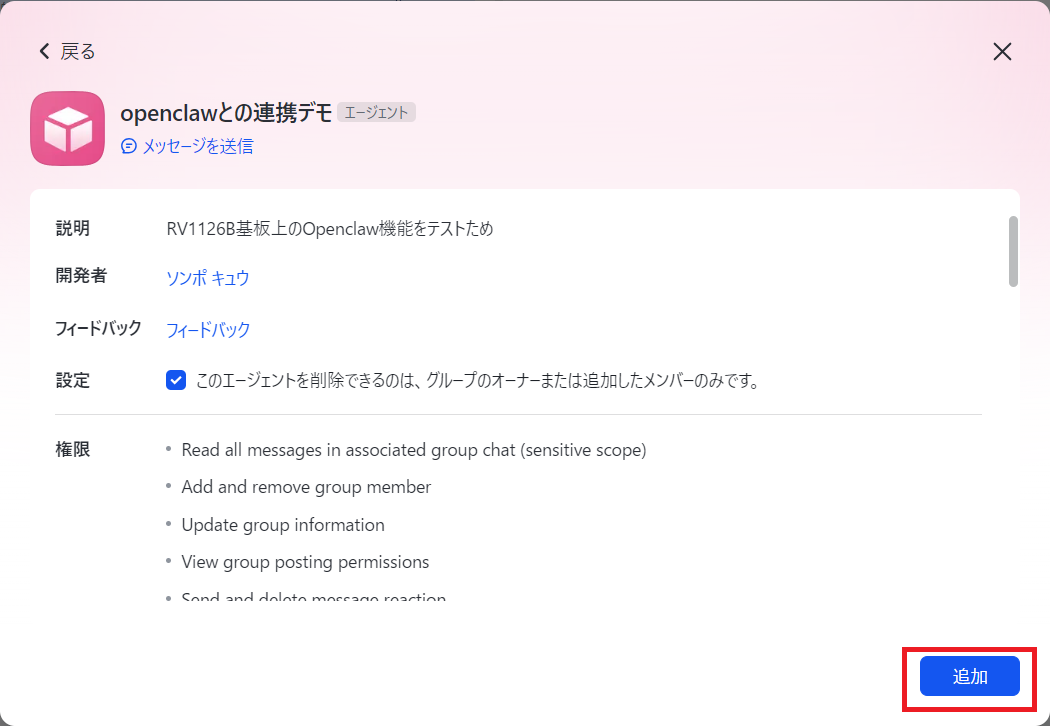
Figure 4-29. Bot addition completion screen
5.4 Testing Conversation with the OpenClaw Robot
Talk to the OpenClaw Robot in the chat group and test whether the functions work correctly.
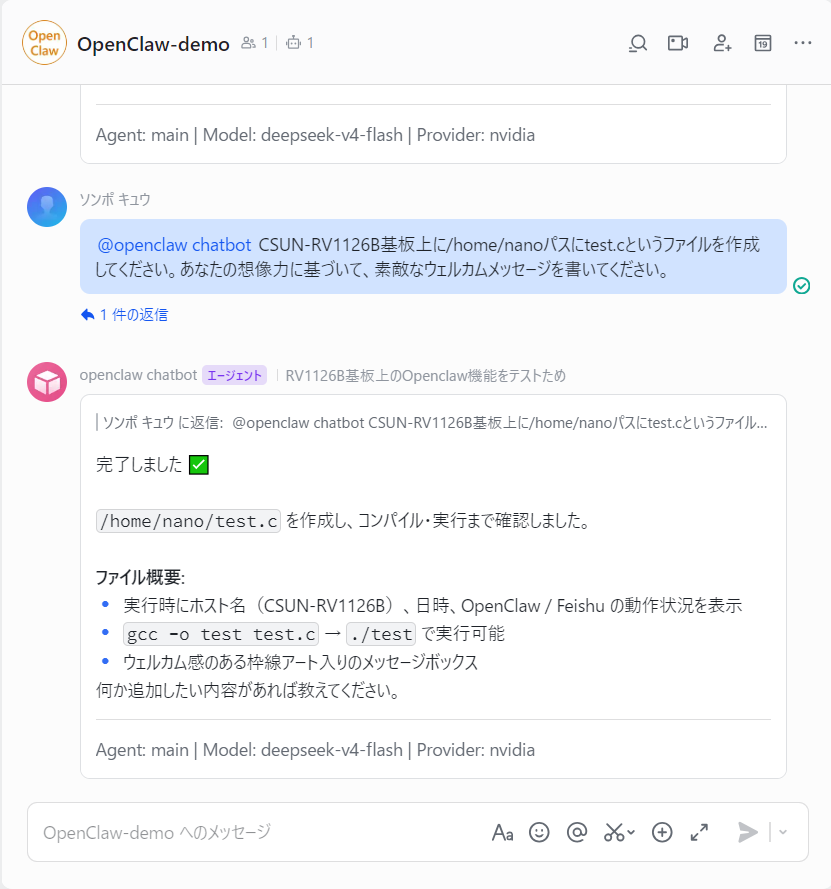
Figure 4-30. Chat test with the OpenClaw Robot
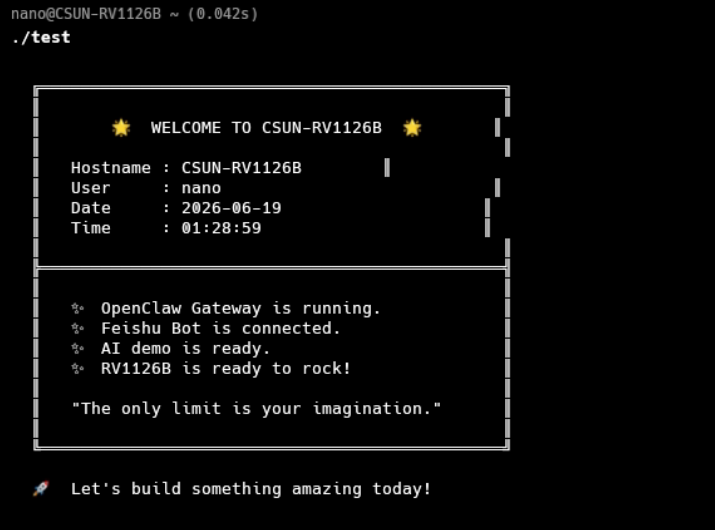
Figure 4-31. Confirming the OpenClaw Robot response