
How to Build the Docker Environment on the Board
1.1. Introduction to Docker
Docker is the most widely used open-source container engine, providing a completely isolated runtime environment for each application. Users can configure various tools and software within an environment, and different environments do not affect each other. Adaptation for EASY-EAI-Nano has now been completed, allowing users to deploy anytime and anywhere. Dockerfile, Image, and Container are three important concepts in Docker. Many containers can be created from an image, and an image can be created through an automated script called a Dockerfile.
**Dockerfile**: Also called an image description file, it is a text document that contains commands for assembling an image and can also be referred to as a script. Users can run the `docker build` command to read the instructions and installation steps in the Dockerfile and automatically generate an image.
**Image**: A type of file system that provides the files and parameter settings required when a container runs. It is equivalent to the installation package downloaded when using specific software, and also equivalent to the ISO file required when installing an operating system (OS).
**Container**: An environment-independent method of packaging software. All application code, libraries, and dependent configuration items are packaged inside the container. Unlike a virtual machine, a container does not create a complete virtual operating system; instead, it allows the application to use the same Linux kernel as the system on which it is running. The application only needs to be provided together with anything that is not already running on the host, namely the required dependencies.
1.1. Introduction to Docker Figure 1
1.2. Building the Docker Environment
1.2.1 Installing Docker
Enter the board environment, update the package database, and then install Docker.
adb shell
1.2.1 Installing Docker Figure 2
apt-get update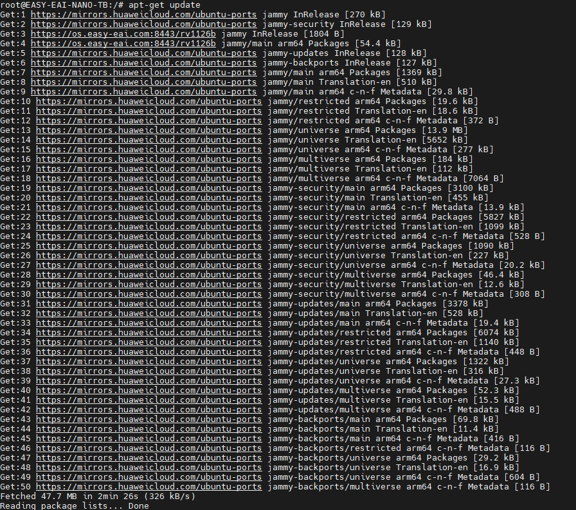
1.2.1 Installing Docker Figure 3
apt-get install docker.io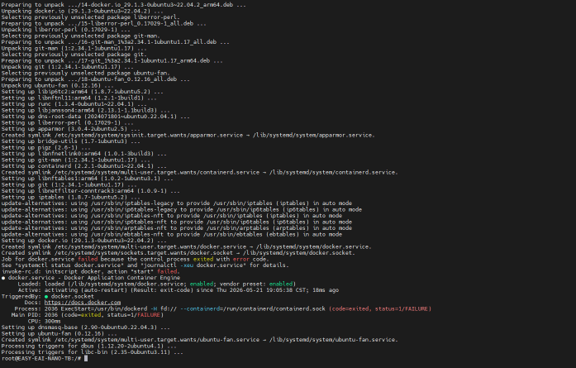
1.2.1 Installing Docker Figure 4
docker version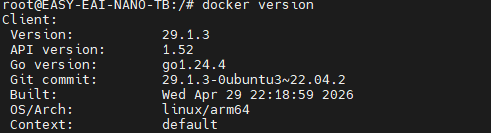
1.2.1 Installing Docker Figure 5
1.2.2 Obtaining Images
Obtain images as needed. You can also configure domestic mirror sources.
sudo vim /etc/docker/daemon.json{"registry-mirrors":\["https://hub-mirror.c.163.com","https://docker.mirrors.ustc.edu.cn","https://ueo0uggy.mirror.aliyuncs.com","https://docker.m.daocloud.io","https://cf-workers-docker-io-apl.pages.dev"\]}Save and exit the editor, then restart the Docker service.
sudo systemctl restart dockerdocker pull ubuntu
1.2.2 Obtaining Images Figure 6
Because no tag is specified in this method, Docker Engine uses :latest as the default tag to pull the image. Another method is to save the image as a local file and directly use the generated file for sharing. Check the list of image information saved (downloaded) on the local machine:
docker images
1.2.2 Obtaining Images Figure 7
1.2.3 Running Docker Containers and Basic Operations
There are two ways to start a container. Method 1: Start it by using the TAG of a Docker image (a tag refers to a specific image snapshot). Method 2: Start it by using the ImageID (image ID: the unique identification code corresponding to the image). The following demonstrates how to start a container by using the Docker image TAG.
docker run -t -i ubuntu:latest /bin/bash* -t: Allocates a pseudo-terminal (pseudo-TTY) inside the Ubuntu container.
* -i: Allows an interactive connection to be created by obtaining standard input (STDIN) from the container.
* ubuntu:latest: The Ubuntu Docker image whose tag is latest.
* /bin/bash: The BASH shell for the new container. This is optional. If no shell is specified, the default shell will be assigned to the container.
After the container starts, it automatically enters the container shell (command line).

1.2.3 Running Docker Containers and Basic Operations Figure 8
Press CTRL+P and then CTRL+Q to detach from the current container and return to the host system terminal. Note: This only detaches from the container; it does not stop the container. The container continues running in the background.
Run the following command in the Docker host terminal to find the container name and ID:
docker ps -a
1.2.3 Running Docker Containers and Basic Operations Figure 9
After finding the ID, you can perform related operations on the container.
Pausing and resuming a running container
docker pause DockerID

docker unpause DockerID
1.2.3 Running Docker Containers and Basic Operations Figure 10
Starting a container
docker start Dockername
1.2.3 Running Docker Containers and Basic Operations Figure 11
Deleting a container
First, you need to terminate (stop) the running container.
docker stop DockerID
1.2.3 Running Docker Containers and Basic Operations Figure 12
When all containers are no longer needed, deleting multiple containers one by one becomes cumbersome. Therefore, you can delete all stopped containers in a batch. To batch-delete all stopped containers, run the following:
docker container prune
1.2.3 Running Docker Containers and Basic Operations Figure 13
After deletion, run docker ps -a to view all containers; it will show that the list is empty.

1.2.3 Running Docker Containers and Basic Operations Figure 14
Deleting a Docker image
docker rmi imageID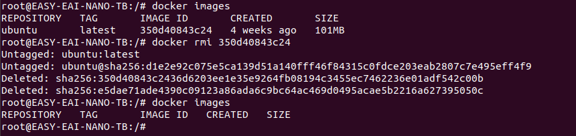
1.2.3 Running Docker Containers and Basic Operations Figure 15