
ResNet50 Training and Deployment Guide
Document Information
This tutorial describes how to train the ResNet50 image classification algorithm and deploy it to the CSUN RV1126B board.
| Item | Description |
|---|---|
| Document name | ResNet50 Training and Deployment Guide |
| Company | Nissho Technology Co., Ltd. |
| URL | https://www.dragonwake.com |
| info@dragonwake.com | |
| Created | 2026/06/02 |
| Version | Ver1.0 |
| Revision | Initial release |
1. ResNet50 Overview
The ResNet50 network was proposed by He Kaiming of Microsoft Research in 2015 and won first place in the ILSVRC 2015 image classification competition. Before ResNet, conventional CNNs were usually built by stacking convolution layers and pooling layers. However, when the network became deeper beyond a certain point, a degradation problem could occur. Residual networks are easier to optimize, and accuracy can be improved by adding sufficient depth. The residual blocks inside the network use skip connections, which help alleviate the vanishing-gradient problem that often occurs when deep neural networks become very deep.
This tutorial explains how to train the ResNet50 image classification algorithm and deploy it to the CSUN RV1126B board.
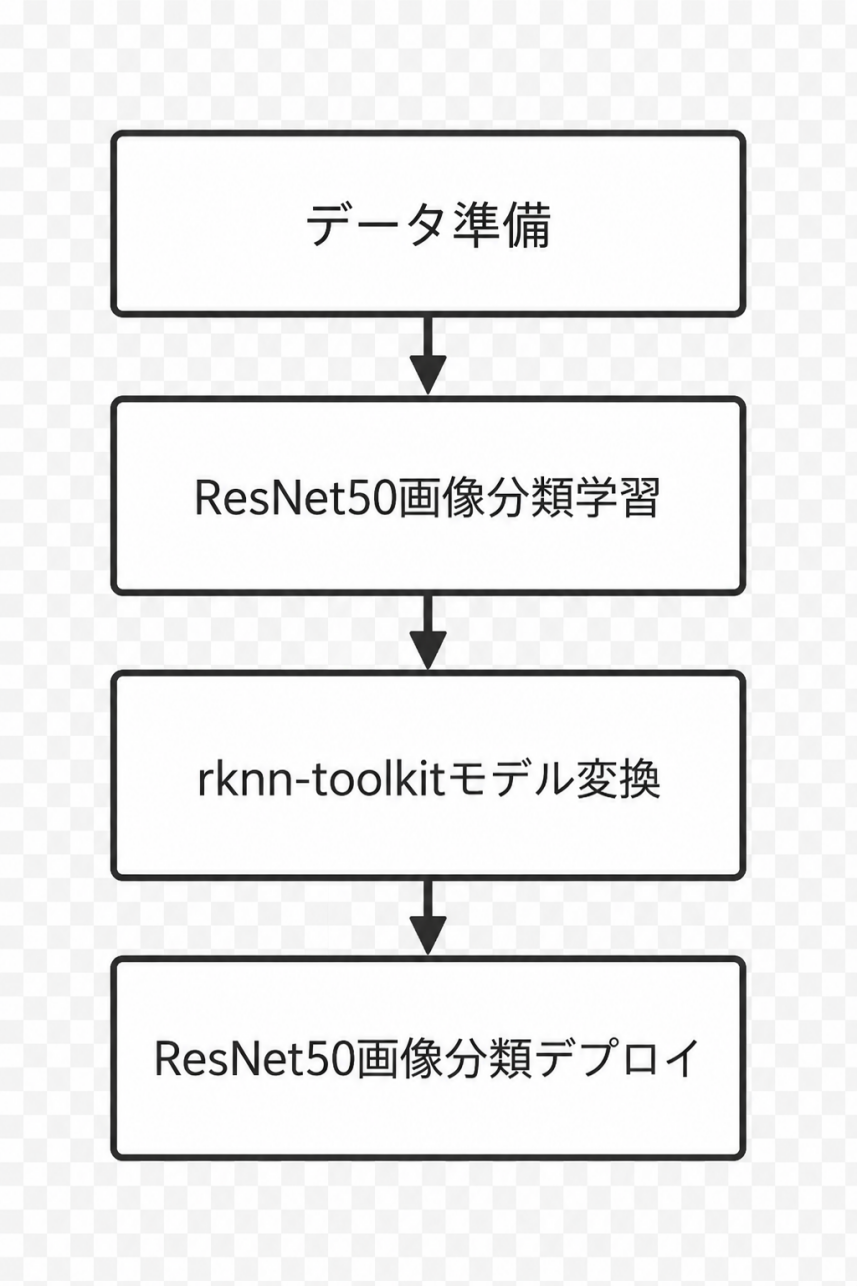
Figure 1-1 Overall ResNet50 training and deployment workflow
2. Downloading the Materials
Download the materials and source code required for this manual from the following link.
https://dl.dragonwake.com/download/rv1126b/AI/demo/Resnet50/AIDemo_ResNet50_All.zip
After extraction, the directory structure is as follows.
|-- 01-data Dataset|-- 02-training Training source code|-- 03-model_convert Source code for AI model conversion|-- 04-AI_deploy Source code for AI model deployment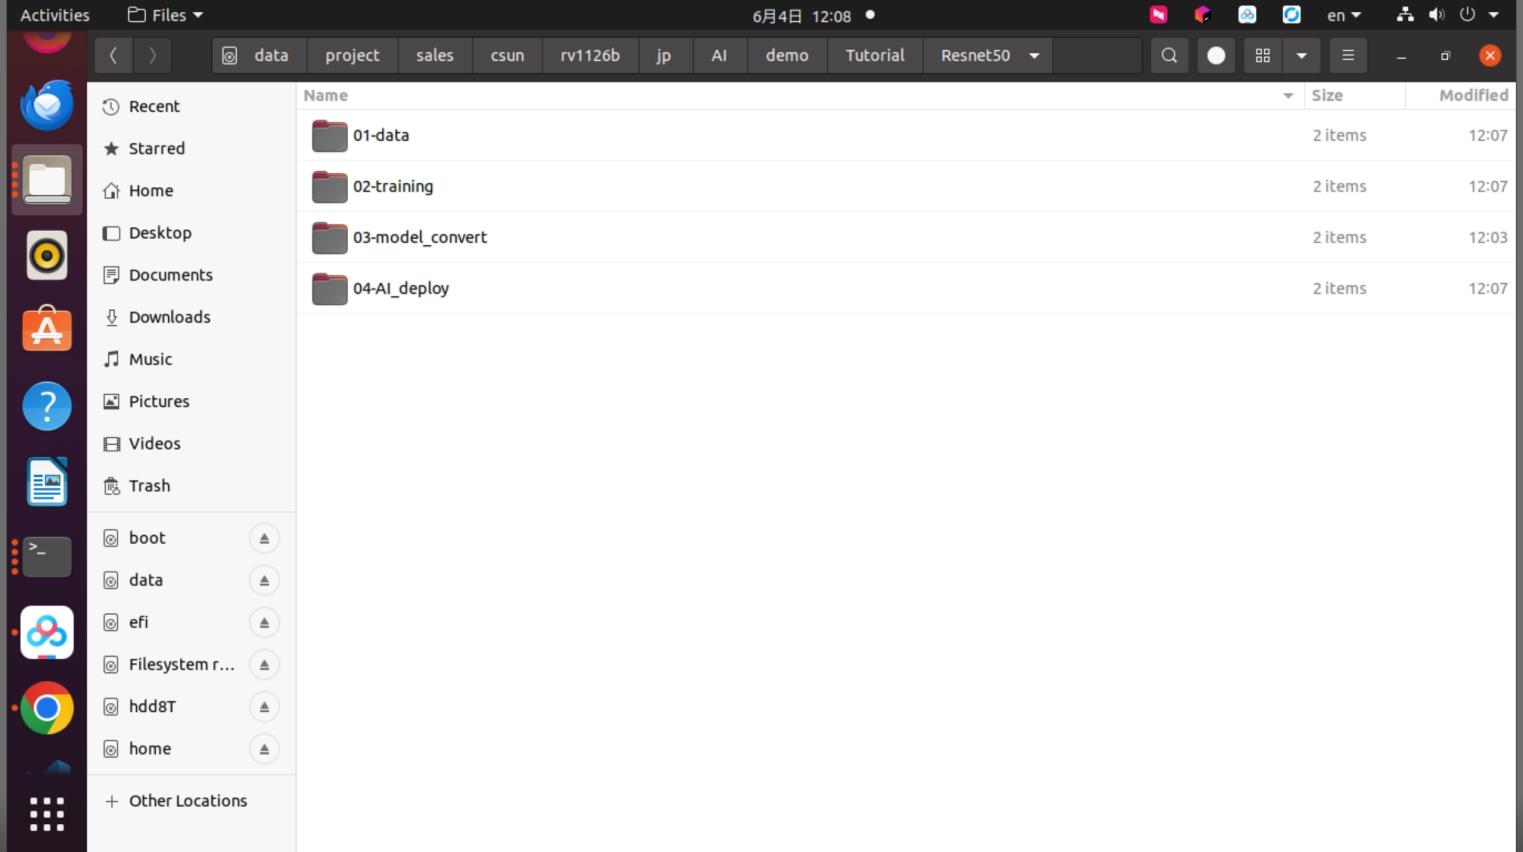
Figure 2-1 Directory structure after extracting AIDemo_ResNet50_All.zip
3. Preparing the Dataset
This tutorial uses vehicle classification as an example. The dataset structure is as follows.
trainfolder: training datasetvalfolder: validation dataset
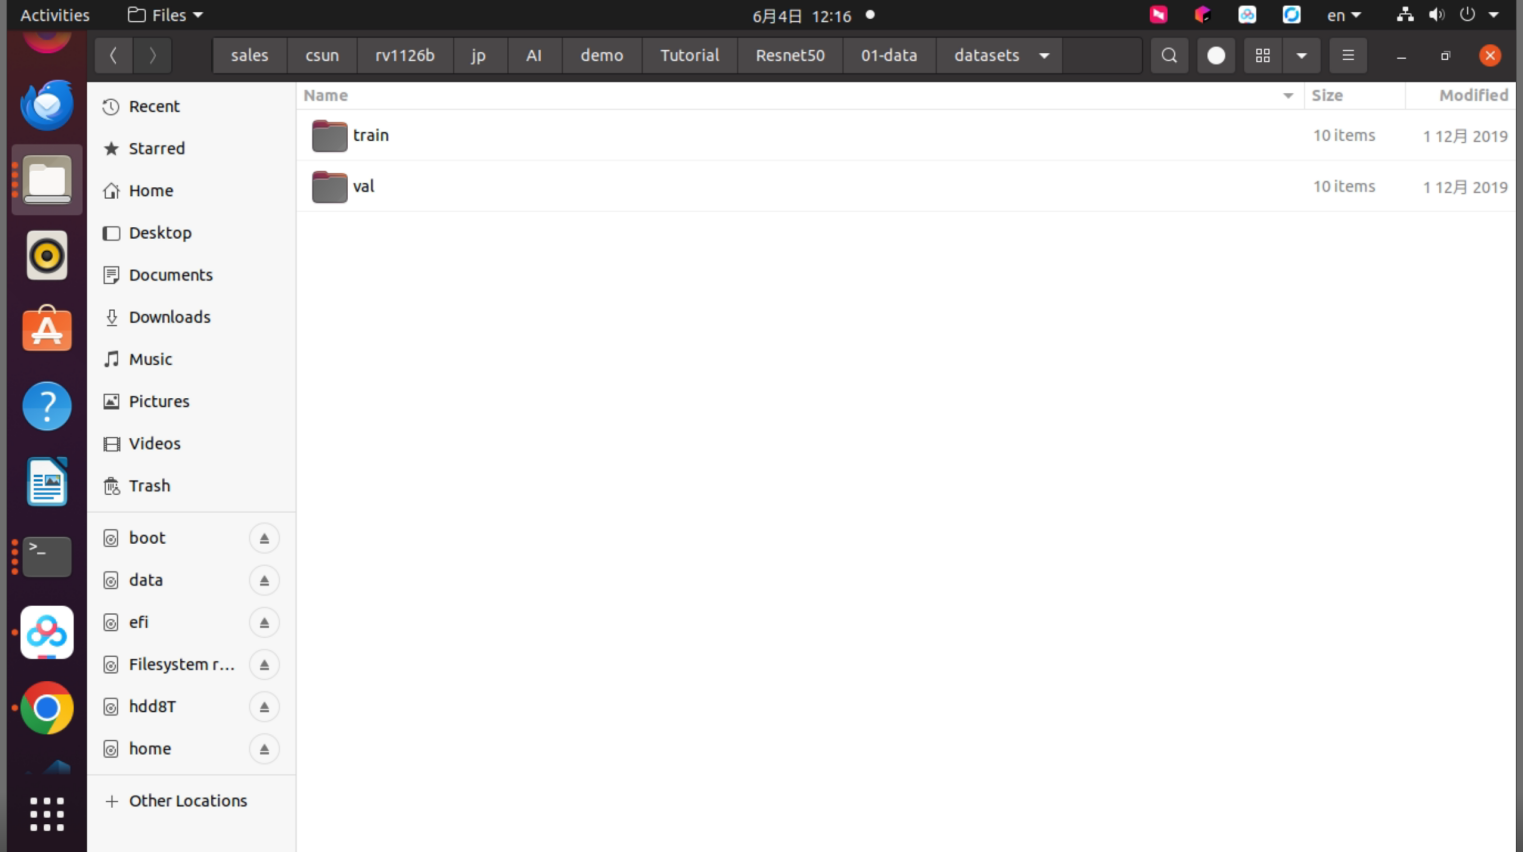
Figure 3-1 train and val dataset folders
After opening the dataset, you can see 10 vehicle categories.
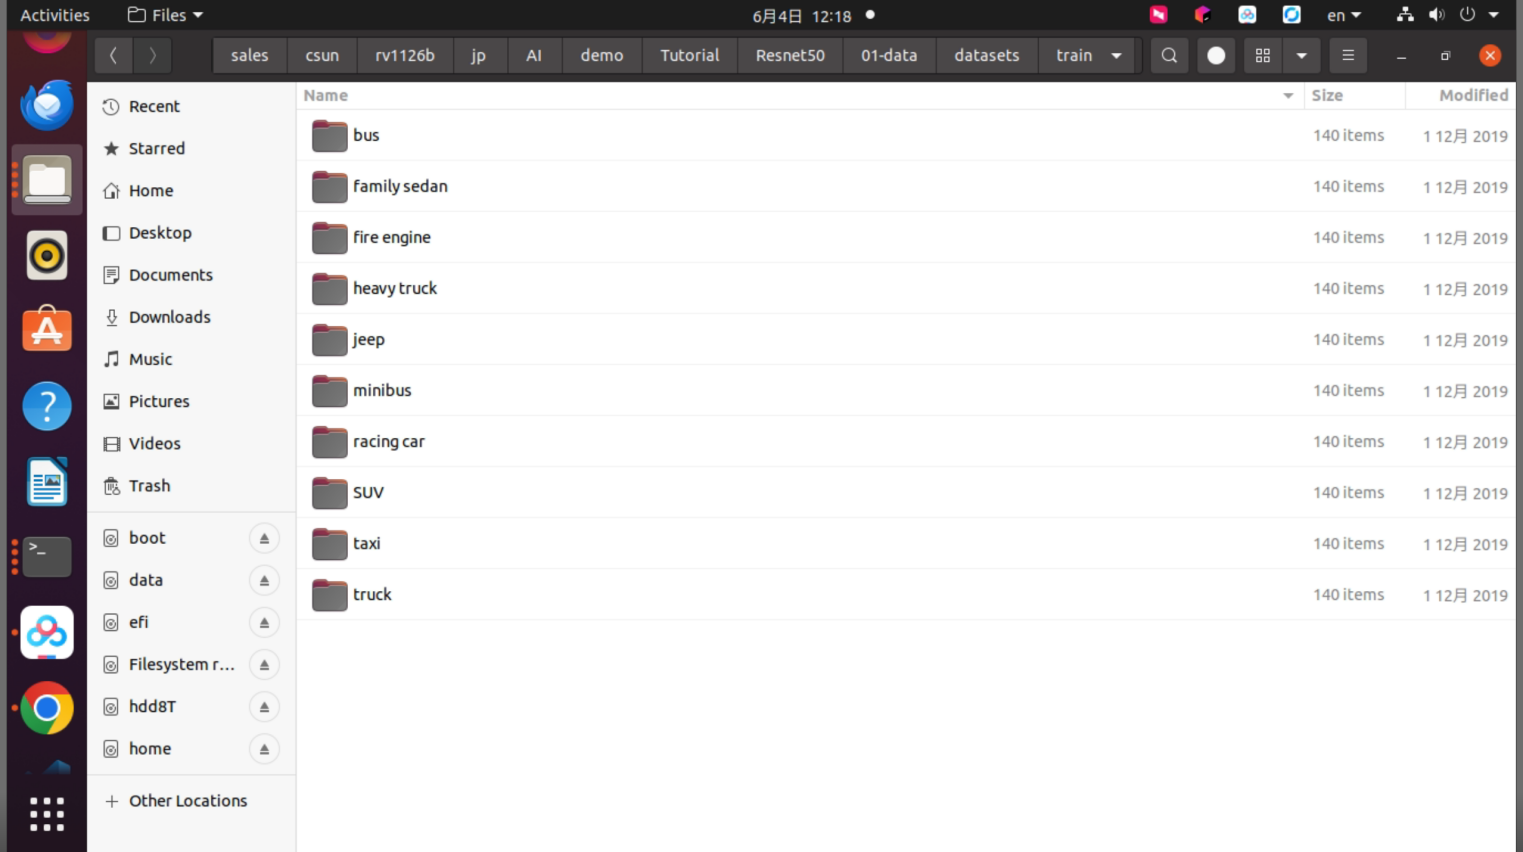
Figure 3-2 Vehicle category folders in the dataset
The mapping between category names and category index numbers is as follows.
| Category name | Category index |
|---|---|
| SUV | 0 |
| BUS | 1 |
| family sedan | 2 |
| fire engine | 3 |
| heavy truck | 4 |
| jeep | 5 |
| mini bus | 6 |
| racing car | 7 |
| taxi | 8 |
| truck | 9 |
4. Training ResNet50 Image Classification
4.1. Training Source Code
The training source code directory is shown below.
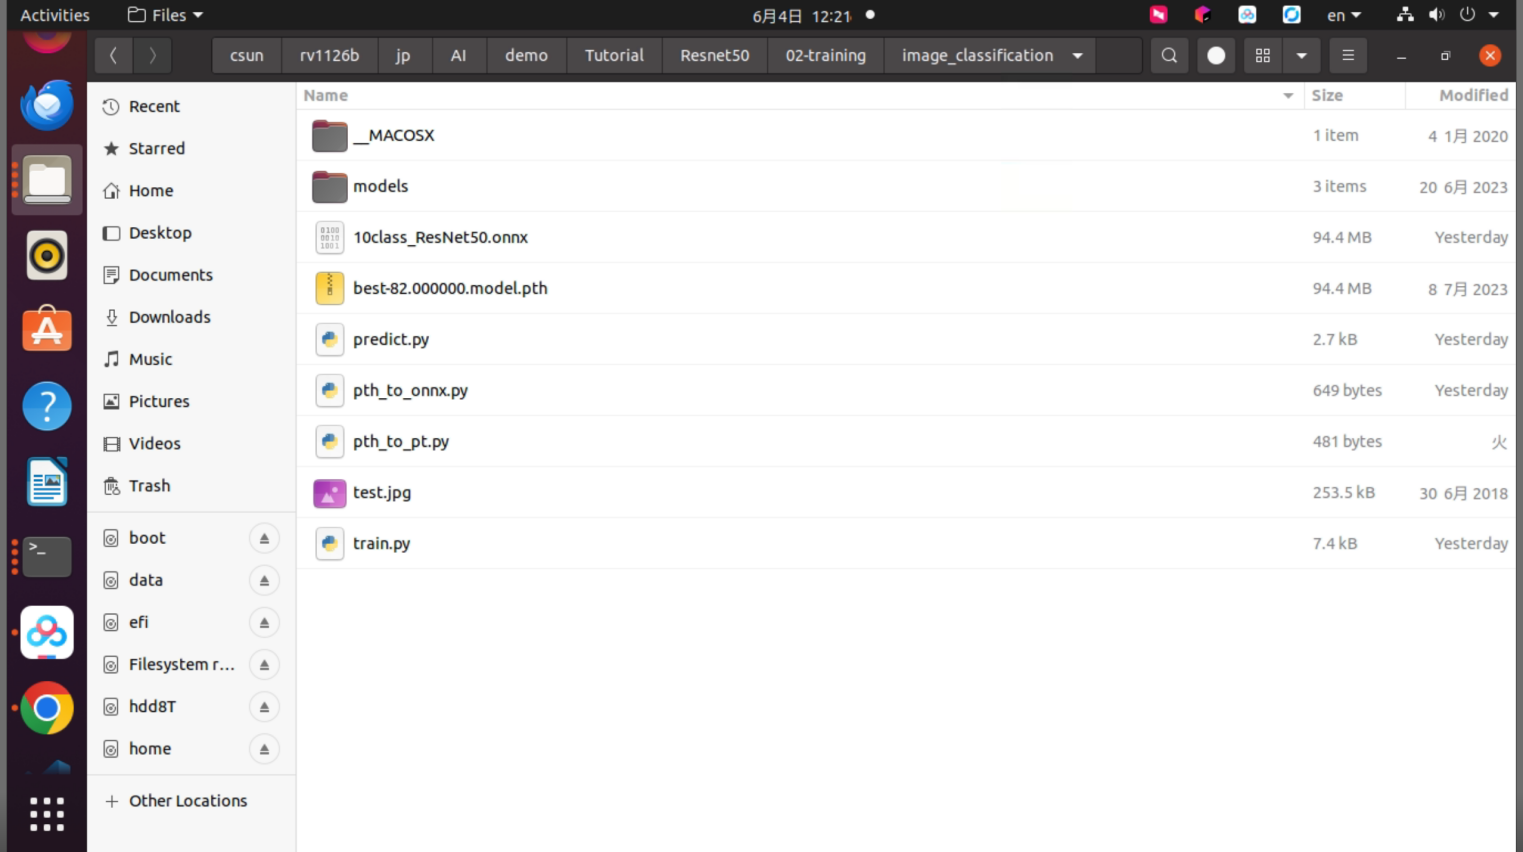
Figure 4-1 ResNet50 training source code directory
Copy the dataset to the current directory.
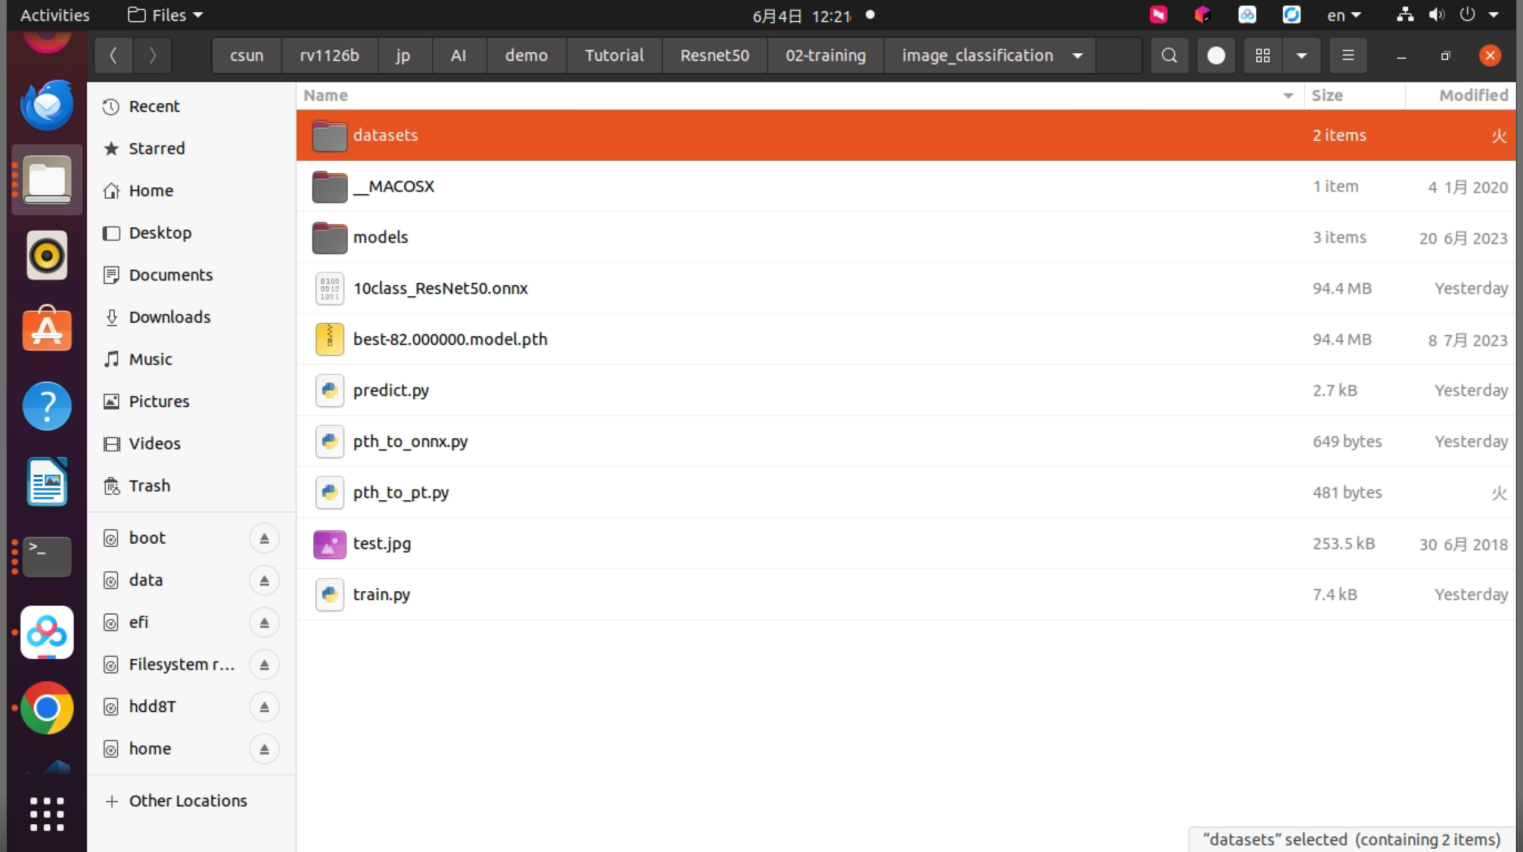
Figure 4-2 Dataset copied to the training directory
4.2. Model Training
This guide installs PyTorch and other dependencies in the CSUN RV1126B Docker development environment and uses it as the training environment.
If the pip command is not available, install it first.
sudo apt updatesudo apt install pipTo use CUDA inside the Docker environment, nvidia-container-toolkit is required on the host side.
Run the following commands on the host to install NVIDIA Container Toolkit.
curl -fsSL https://nvidia.github.io/libnvidia-container/gpgkey |   sudo gpg --dearmor --yes -o /usr/share/keyrings/nvidia-container-toolkit-keyring.gpg
curl -s -L https://nvidia.github.io/libnvidia-container/stable/deb/nvidia-container-toolkit.list |   sed 's#deb https://#deb [arch=amd64 signed-by=/usr/share/keyrings/nvidia-container-toolkit-keyring.gpg] https://#g' |   sed 's#$(ARCH)#amd64#g' |   sudo tee /etc/apt/sources.list.d/nvidia-container-toolkit.list
sudo apt-get updateapt-cache policy nvidia-container-toolkitsudo apt-get install -y nvidia-container-toolkit
Run the following command on the host to verify that the Docker container can detect the GPU.
docker run --rm --gpus all nvidia/cuda:11.8.0-runtime-ubuntu22.04 nvidia-smi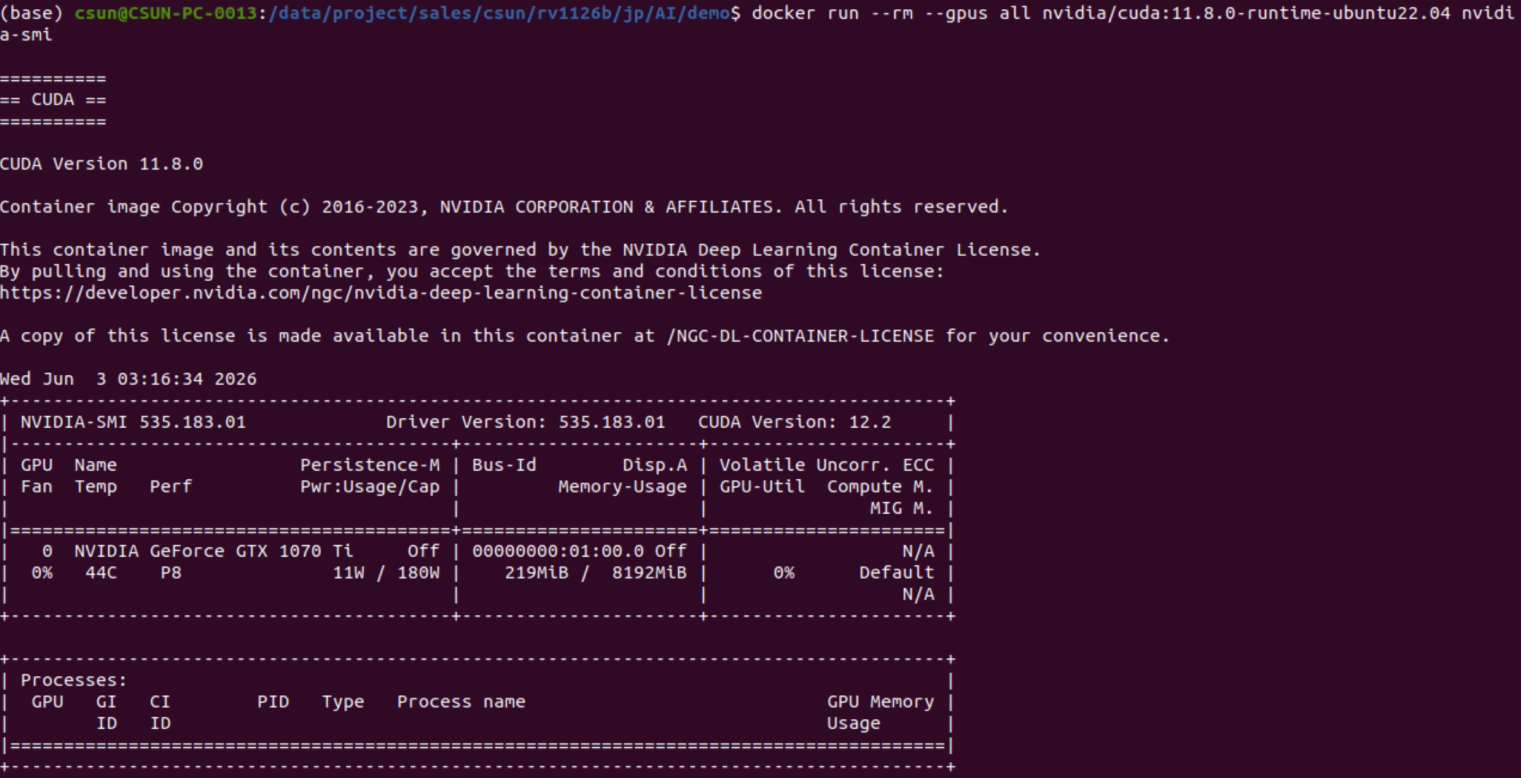
Figure 4-3 Verifying GPU access from a Docker container
Create requirements.txt with the following content, then run pip install -r requirements.txt in the Docker development environment.
# GPU environment for NVIDIA GeForce GTX 1070 Ti# GPU: Pascal architecture, Compute Capability 6.1# Recommended: PyTorch 2.5.1 + CUDA 11.8 wheel## Install:#   pip install -r requirements.txt## Verify:#   python -c "import torch; print(torch.__version__); print(torch.version.cuda); print(torch.cuda.is_available()); print(torch.cuda.get_device_name(0) if torch.cuda.is_available() else 'none')"
--index-url https://download.pytorch.org/whl/cu118--extra-index-url https://pypi.org/simple
torch==2.5.1torchvision==0.20.1numpymatplotlibPillowopencv-pythononnx
After training finishes, matplotlib is used to draw graphs such as accuracy curves. However, matplotlib may use the GTK graphical backend by default. Install the following dependencies if needed.
sudo apt install -y libcanberra-gtk-module libcanberra-gtk3-module librsvg2-commonRun the following command in the training source code directory to start training.
python train.pyAn example execution result is shown below.
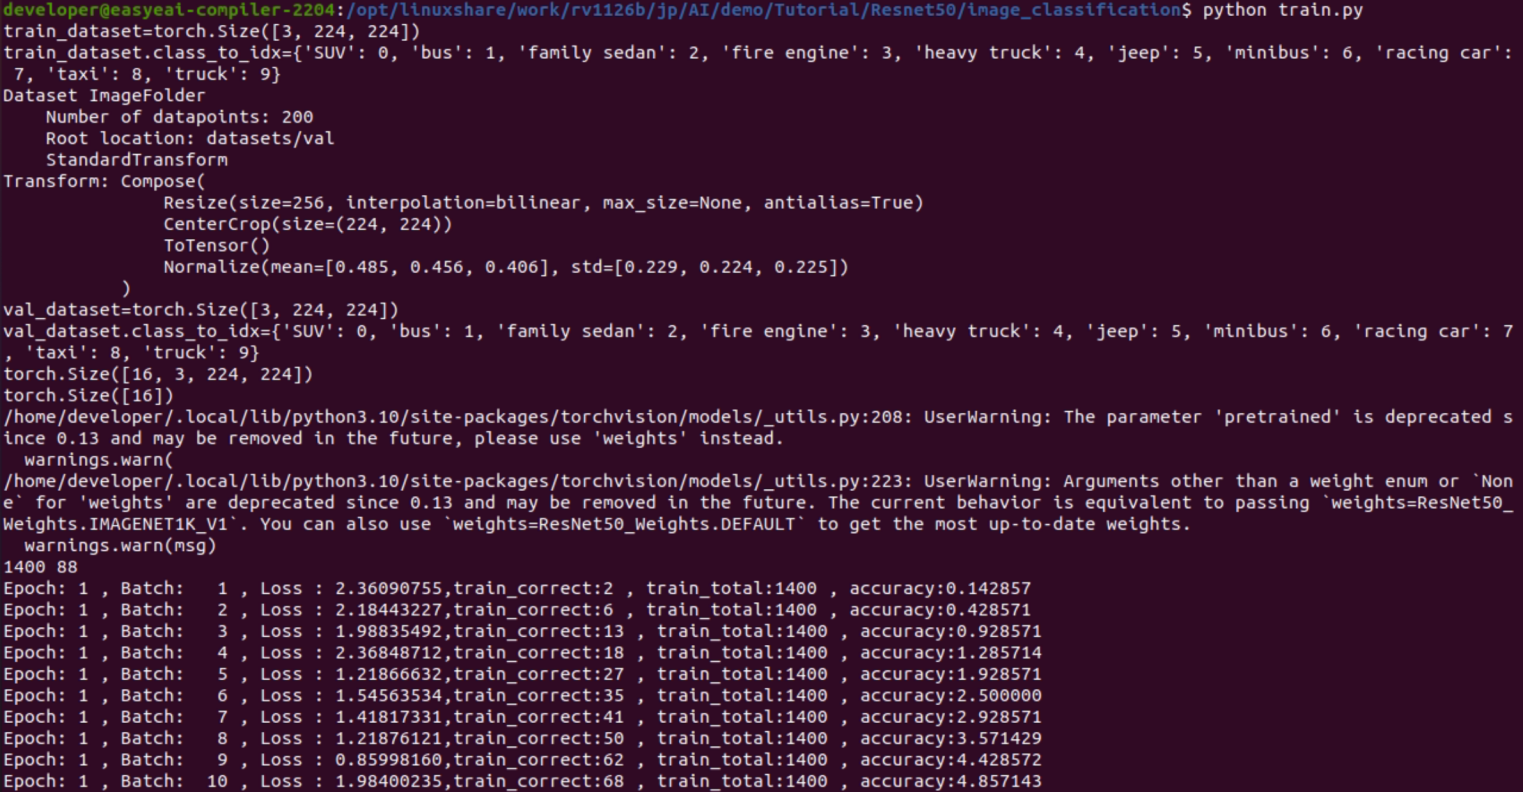
Figure 4-4 ResNet50 training terminal output
The test loss result after training is shown below.
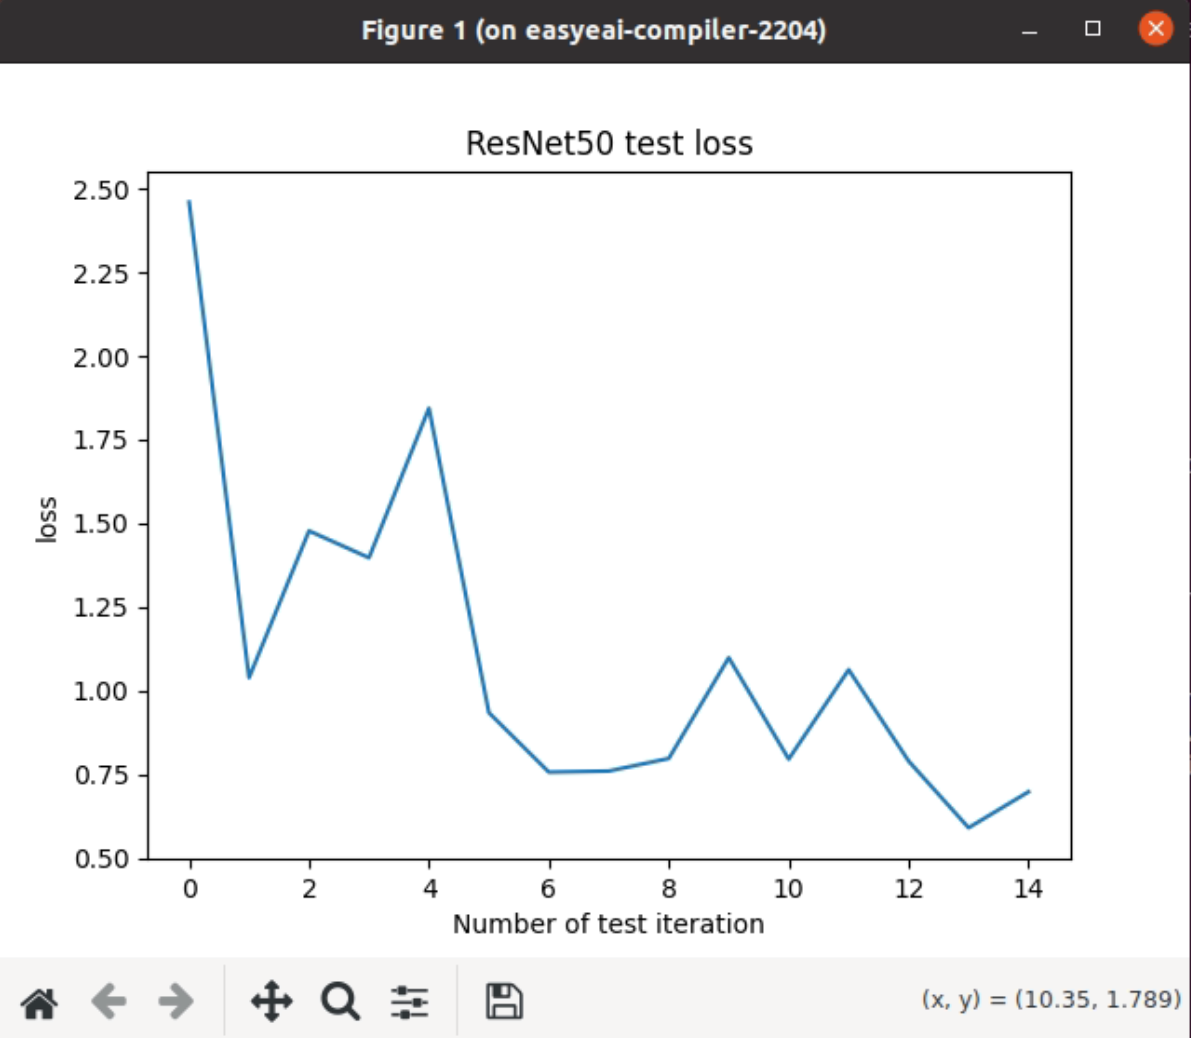
Figure 4-5 ResNet50 test loss result
The test accuracy result after training is shown below.
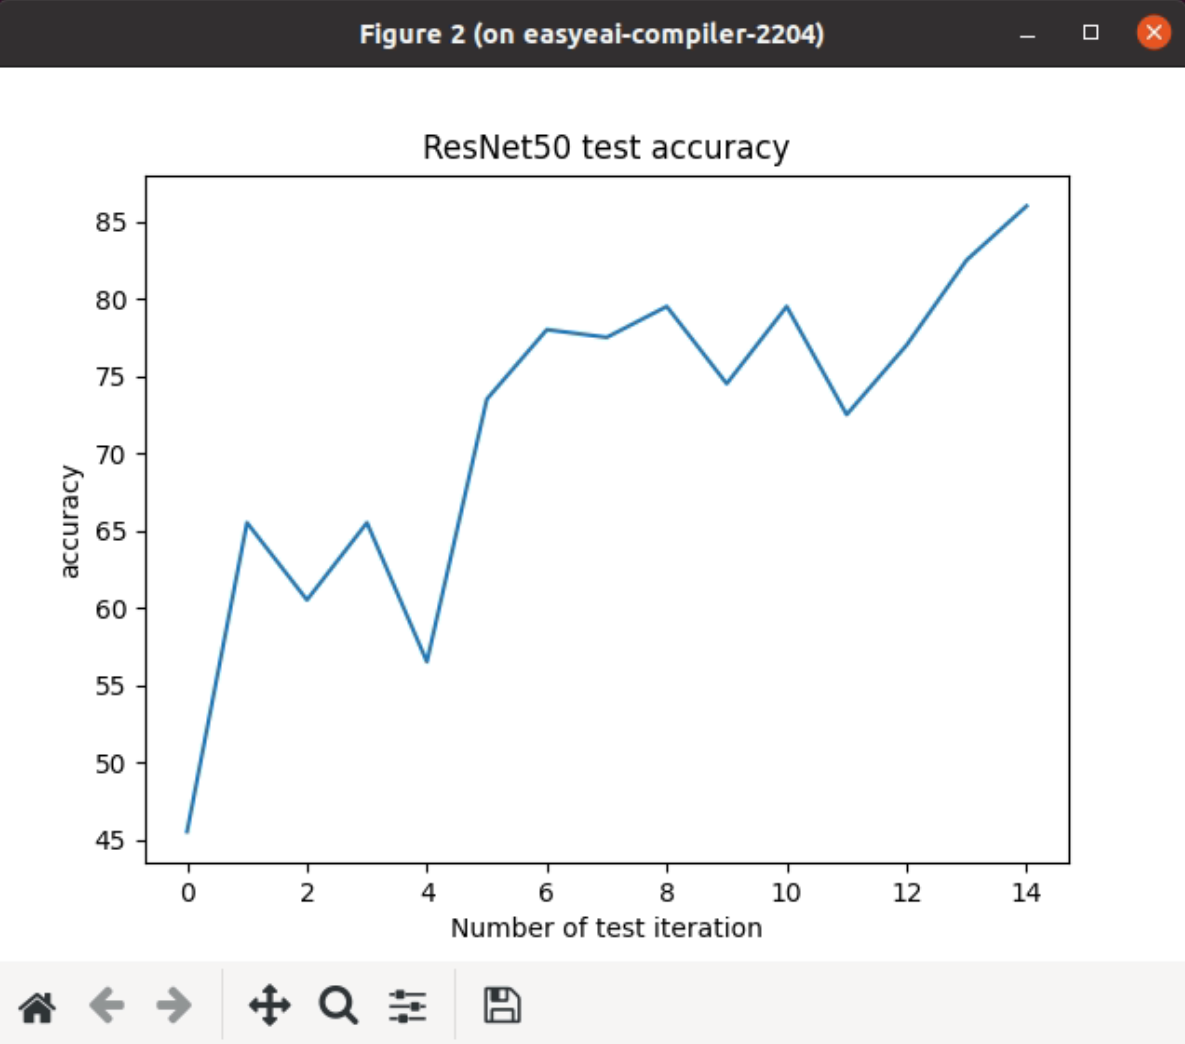
Figure 4-6 ResNet50 test accuracy result
The generated best model is shown below.
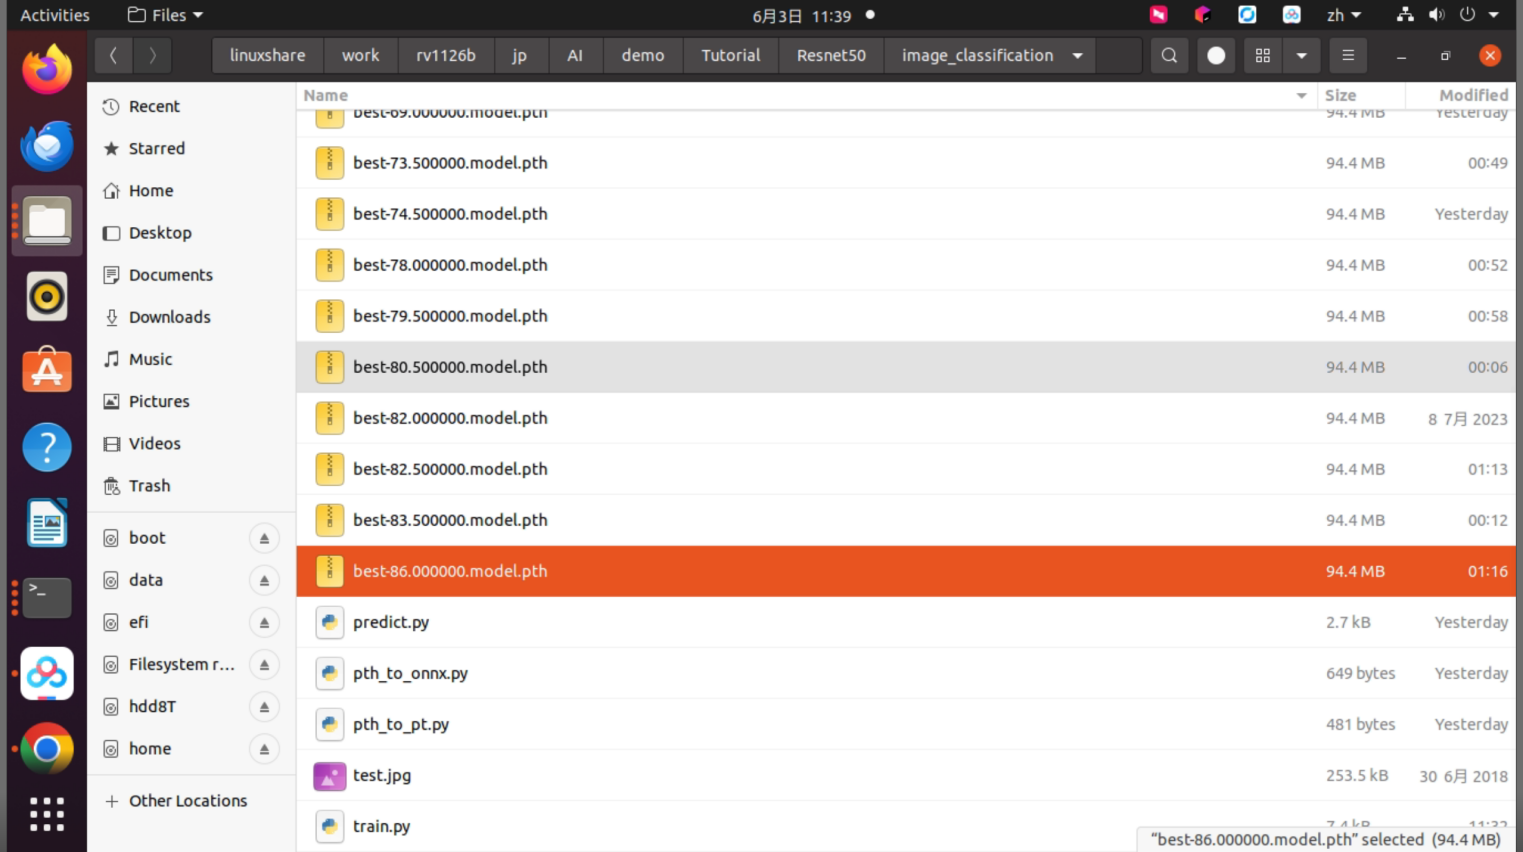
Figure 4-7 Generated best model files
4.3. Testing the Model on the PC Side
Run the following command in the training source code directory to test the model. If the generated model name is different, also update the model file name in predict.py.
After downloading and extracting the complete package, the path is as follows.
/data/project/sales/csun/rv1126b/jp/AI/demo/Tutorial/Resnet50/02-training/image_classificationpython predict.py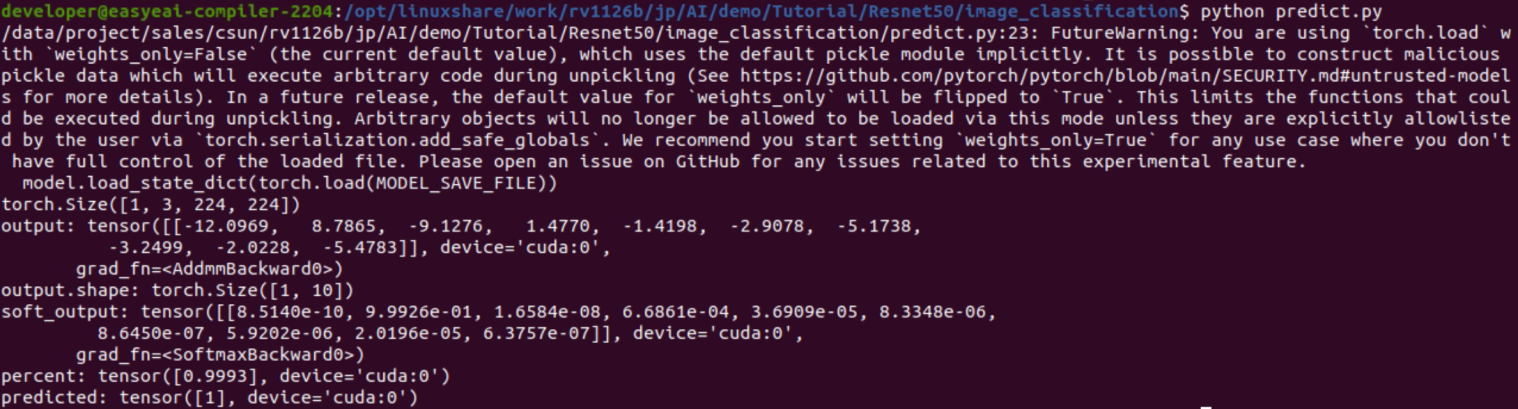
Figure 4-8 predict.py execution result
The result category index is 1, which corresponds to BUS. This confirms that the test result is correct.
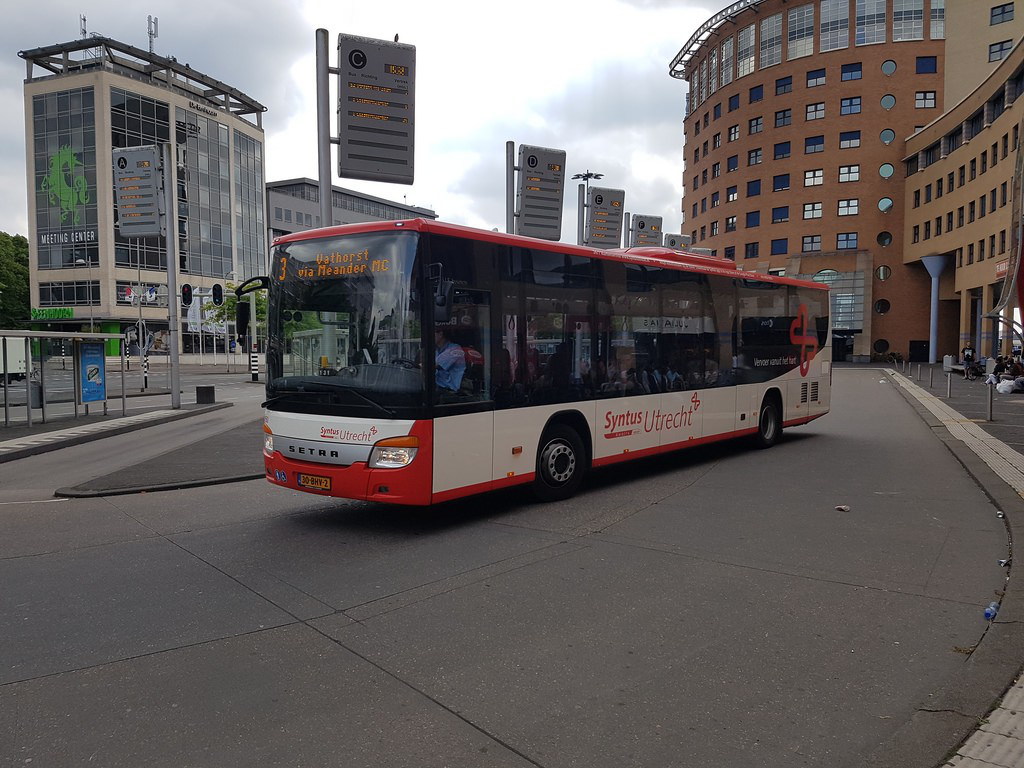
Figure 4-9 Test image recognized as BUS
4.4. Converting the pth Model to an ONNX Model
Check the generated model name.
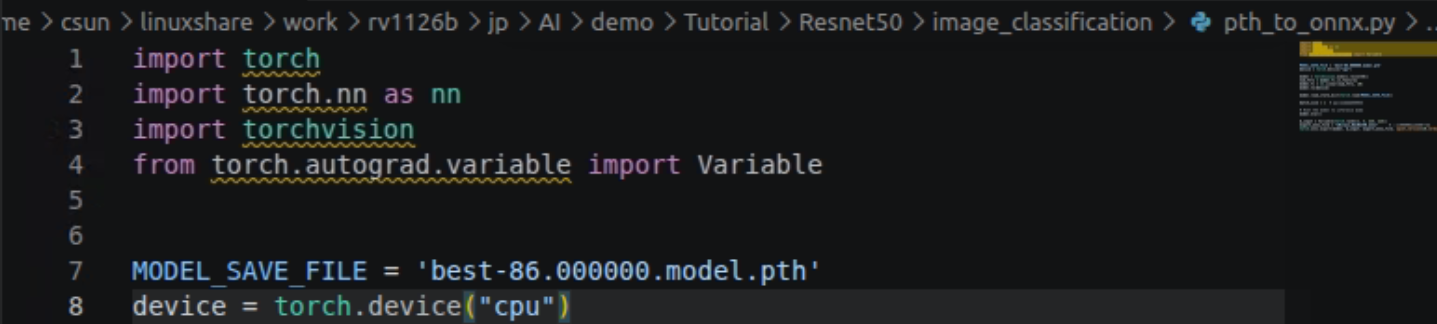
Figure 4-10 Model file name specified in pth_to_onnx.py
Run the following command to convert the PyTorch pth model to an ONNX model.
python pth_to_onnx.py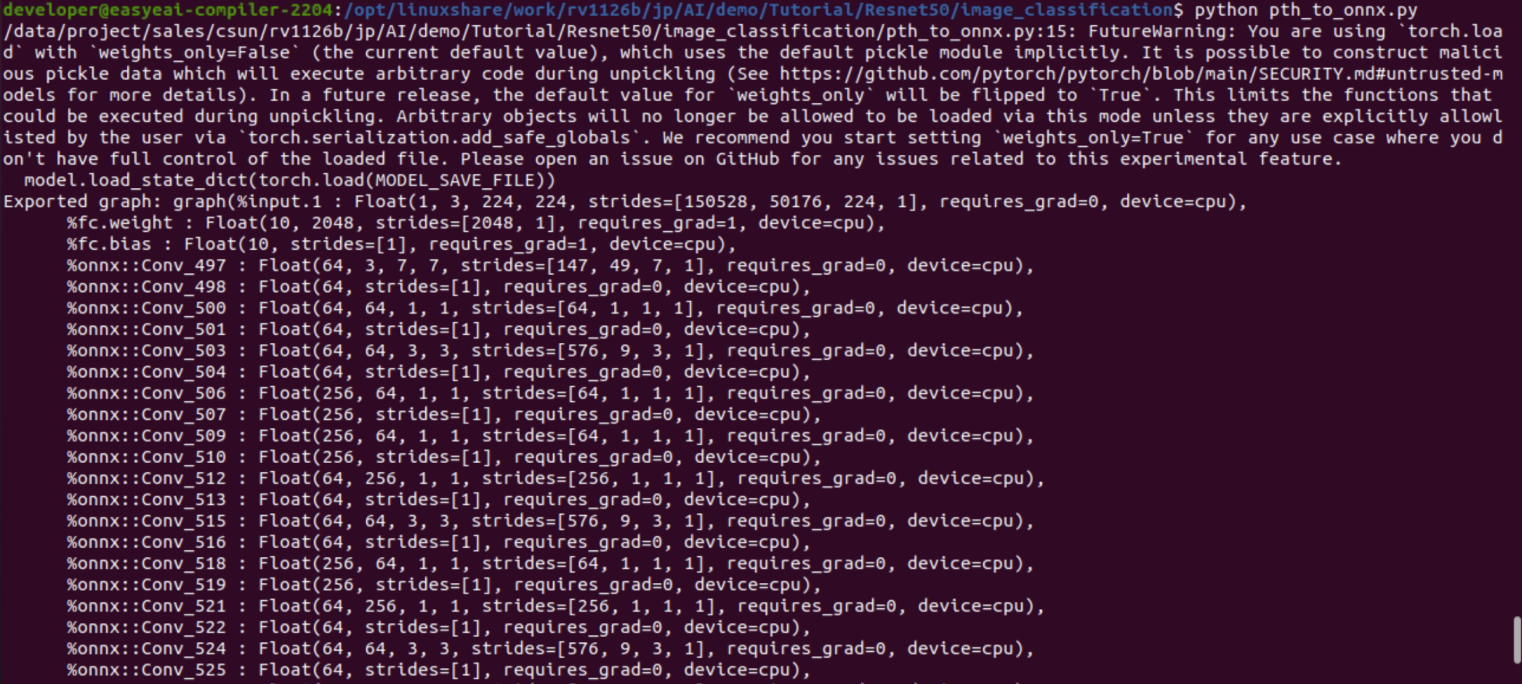
Figure 4-11 pth to ONNX conversion output
The generated ONNX model is shown below.
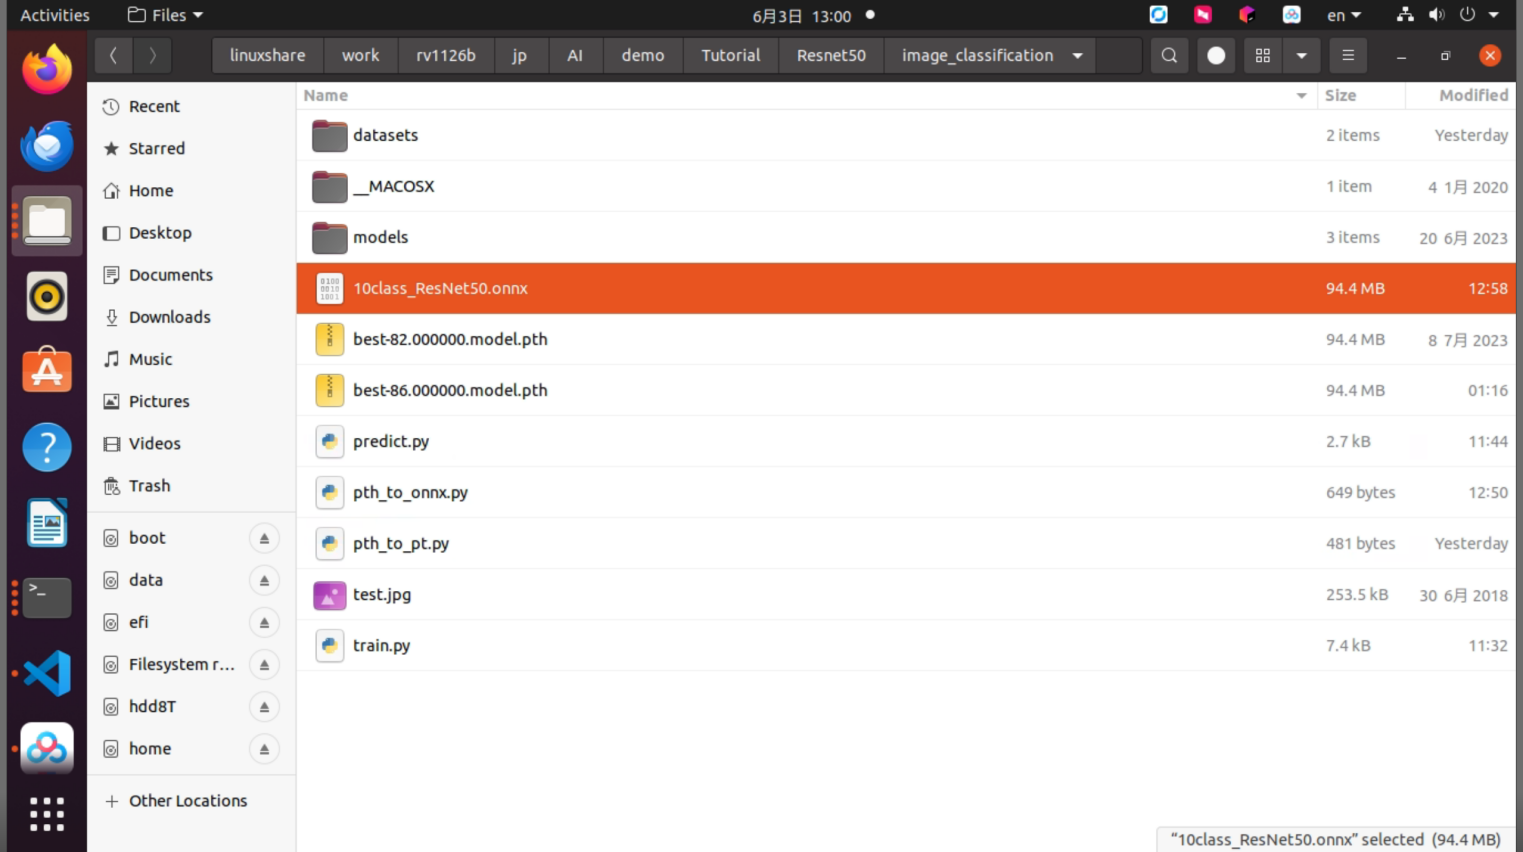
Figure 4-12 Generated ONNX model file
5. rknn-toolkit Model Conversion
5.1. Building the rknn-toolkit Model Conversion Environment
To run the ONNX model on the RV1126B board, it must be converted to an RKNN model. Therefore, the rknn-toolkit model conversion environment must be prepared in advance. Models from TensorFlow, TensorFlow Lite, Caffe, Darknet, and other frameworks can be converted in a similar way. This tutorial uses ONNX as the example.
5.1.1. Overview
The model conversion environment setup flow is shown below.
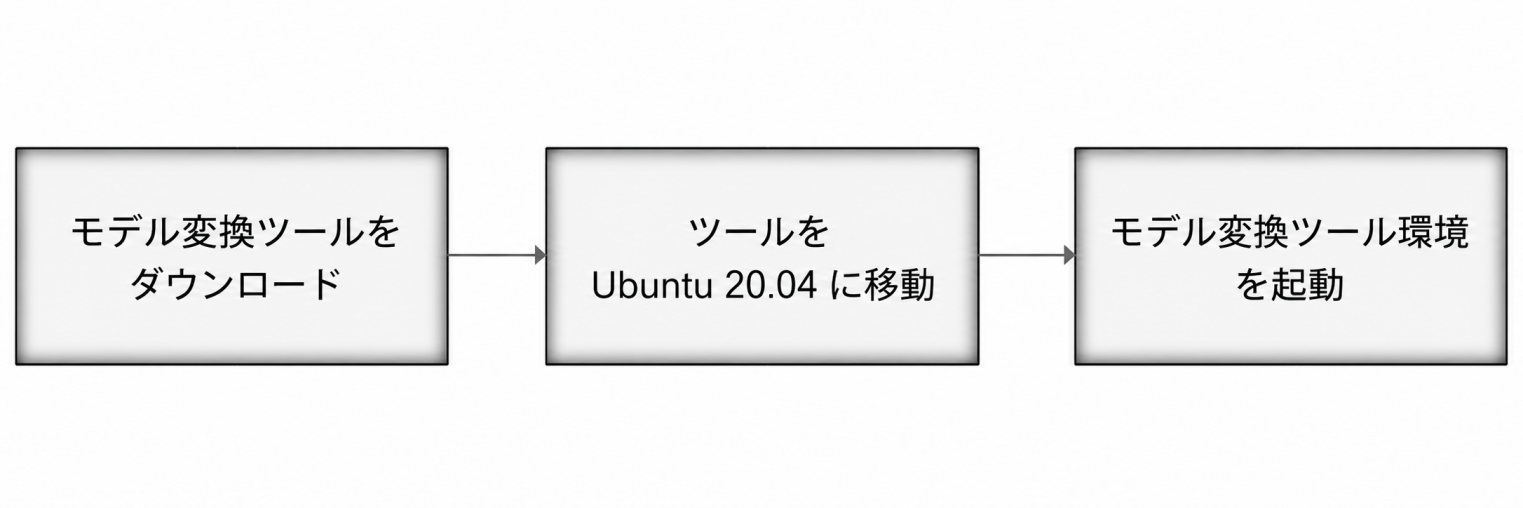
Figure 5-1 Model conversion tool environment setup flow
5.1.2. Downloading the Model Conversion Tool
Refer to the AI Model Conversion Environment Setup Guide for this section.
Download the following Docker image file to run the model conversion tool properly.
https://dl.dragonwake.com/download/rv1126b/AI/images/rknn-toolkit2-v2.3.2-cp38-docker.tar.gz
5.1.3. Moving the Tool to Ubuntu 20.04
After downloading, the Docker image file is shown as follows.
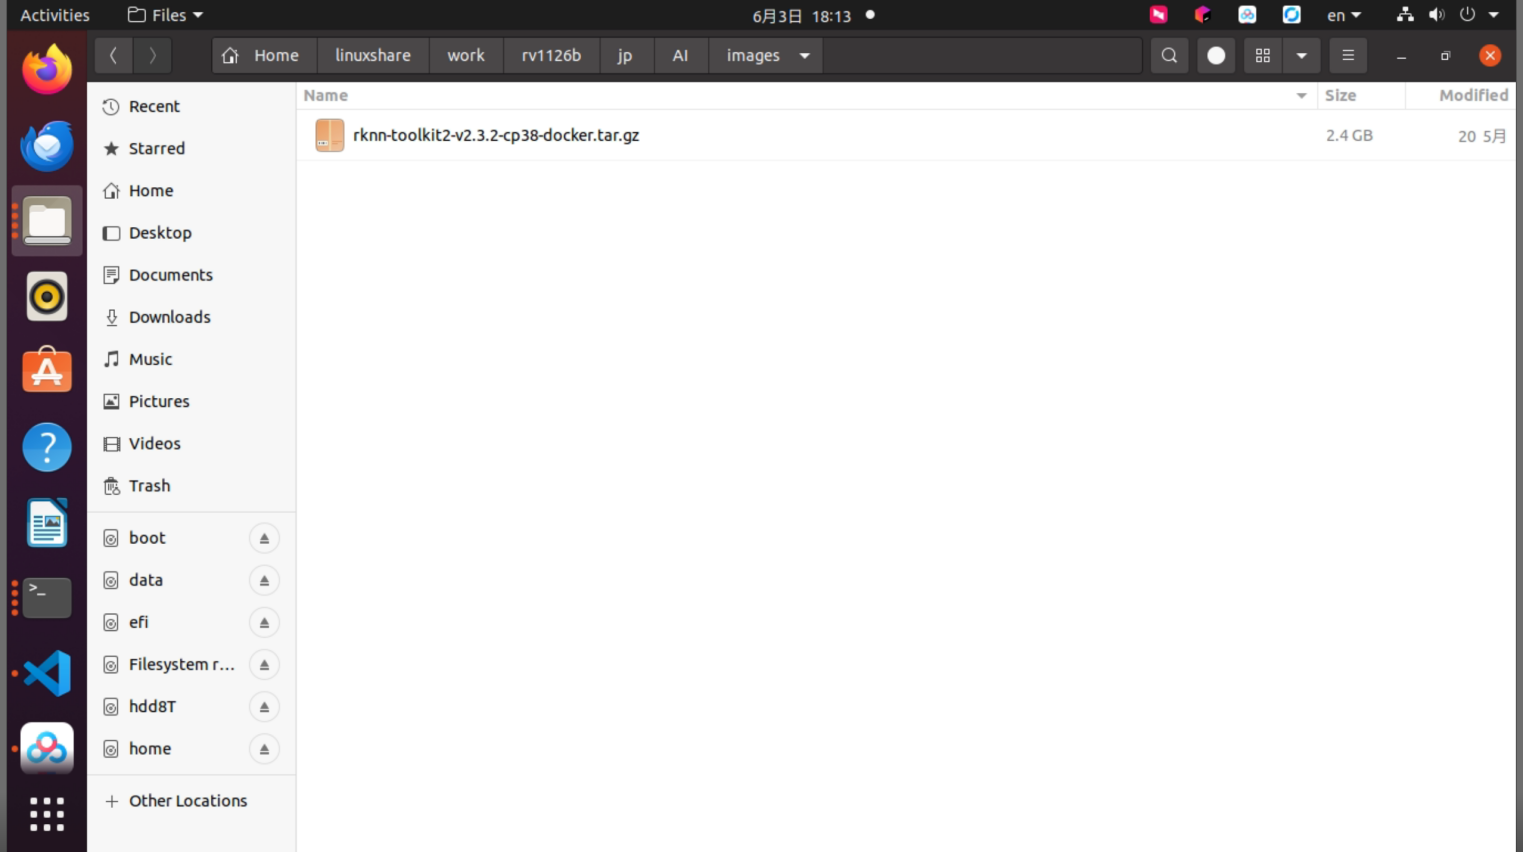
Figure 5-2 rknn-toolkit2 Docker image file
5.1.4. Starting the Model Conversion Tool Environment
Run the following commands to load the Docker image of the model conversion tool.
cd /data/project/sales/csun/rv1126b/jp/AI/imagesdocker load --input rknn-toolkit2-v2.3.2-cp38-docker.tar.gzRun the following command to enter the bash environment of the image.
docker run -t -i --privileged -v /dev/bus/usb:/dev/bus/usb -v /data/project/sales/csun/rv1126b/jp/AI/demo/Tutorial:/test rknn-toolkit2:2.3.2-cp38 /bin/bashAn example execution result is shown below.

Figure 5-3 rknn-toolkit2 Docker bash environment
Enter python to start the Python environment, and verify that the rknn library can be imported. A successful environment test is shown below.

Figure 5-4 rknn library import test
The model conversion tool environment setup is now complete.
5.2. Converting the Model to RKNN
CSUN RV1126B supports evaluation and execution of models with the .rknn extension. Common TensorFlow, TensorFlow Lite, Caffe, Darknet, ONNX, and PyTorch models can be converted to RKNN models using the provided toolkit. Models trained with other frameworks can be converted to ONNX first and then to RKNN. The model conversion process is shown below.
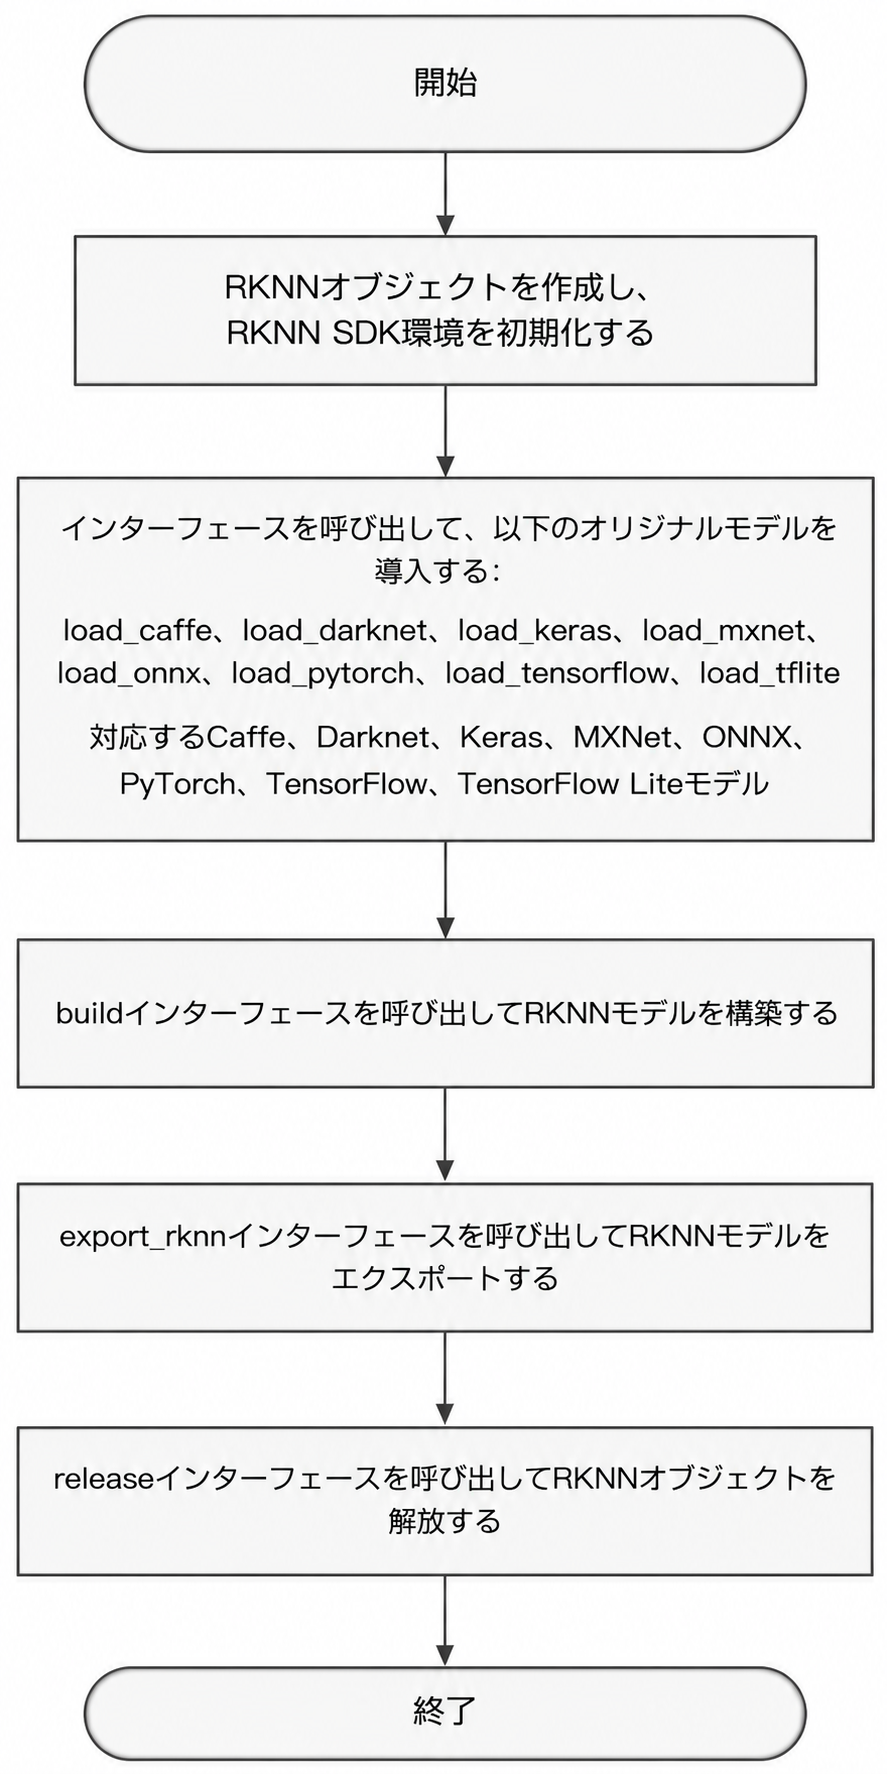
Figure 5-5 RKNN model conversion process
5.2.1. Entering the Docker Environment for the Model Conversion Tool
Run the following command to mount the working directory into the Docker image. In this example, /data/project/sales/csun/rv1126b/jp/AI/demo/Tutorial is used as the workspace and mapped to /test inside the container. The USB device path is also mounted with /dev/bus/usb:/dev/bus/usb.
docker run -t -i --privileged -v /dev/bus/usb:/dev/bus/usb -v /data/project/sales/csun/rv1126b/jp/AI/demo/Tutorial:/test rknn-toolkit2:2.3.2-cp38 /bin/bashAfter successful execution, the result is displayed as follows.

Figure 5-6 Entering the Docker environment for model conversion
5.2.2. Model Conversion Demo Directory Description
The model conversion demo consists of resnet50_model_convert and quant_dataset. resnet50_model_convert contains the conversion scripts, while quant_dataset contains the data required for quantized model conversion.
tar -jxvf resnet50_model_convert.tar.bz2unzip quant_dataset.zip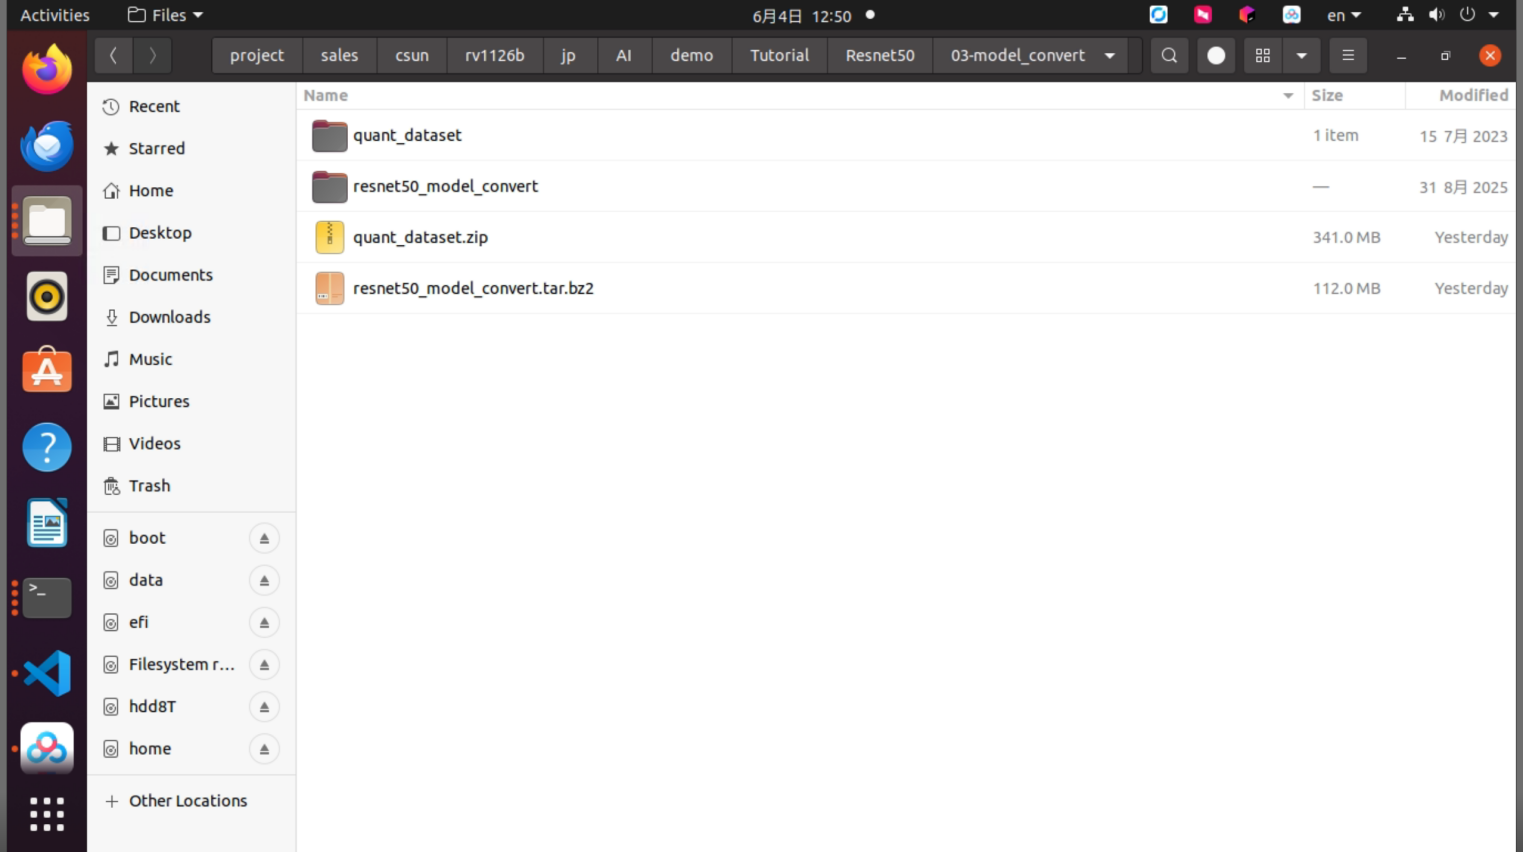
Figure 5-7 Extracted model conversion demo directory
The resnet50_model_convert folder contains the following files.
10class_ResNet50.onnx: model file for testinggen_list.py: Python script for generating the quantization image file listrknn_convert.py: Python script for model conversion
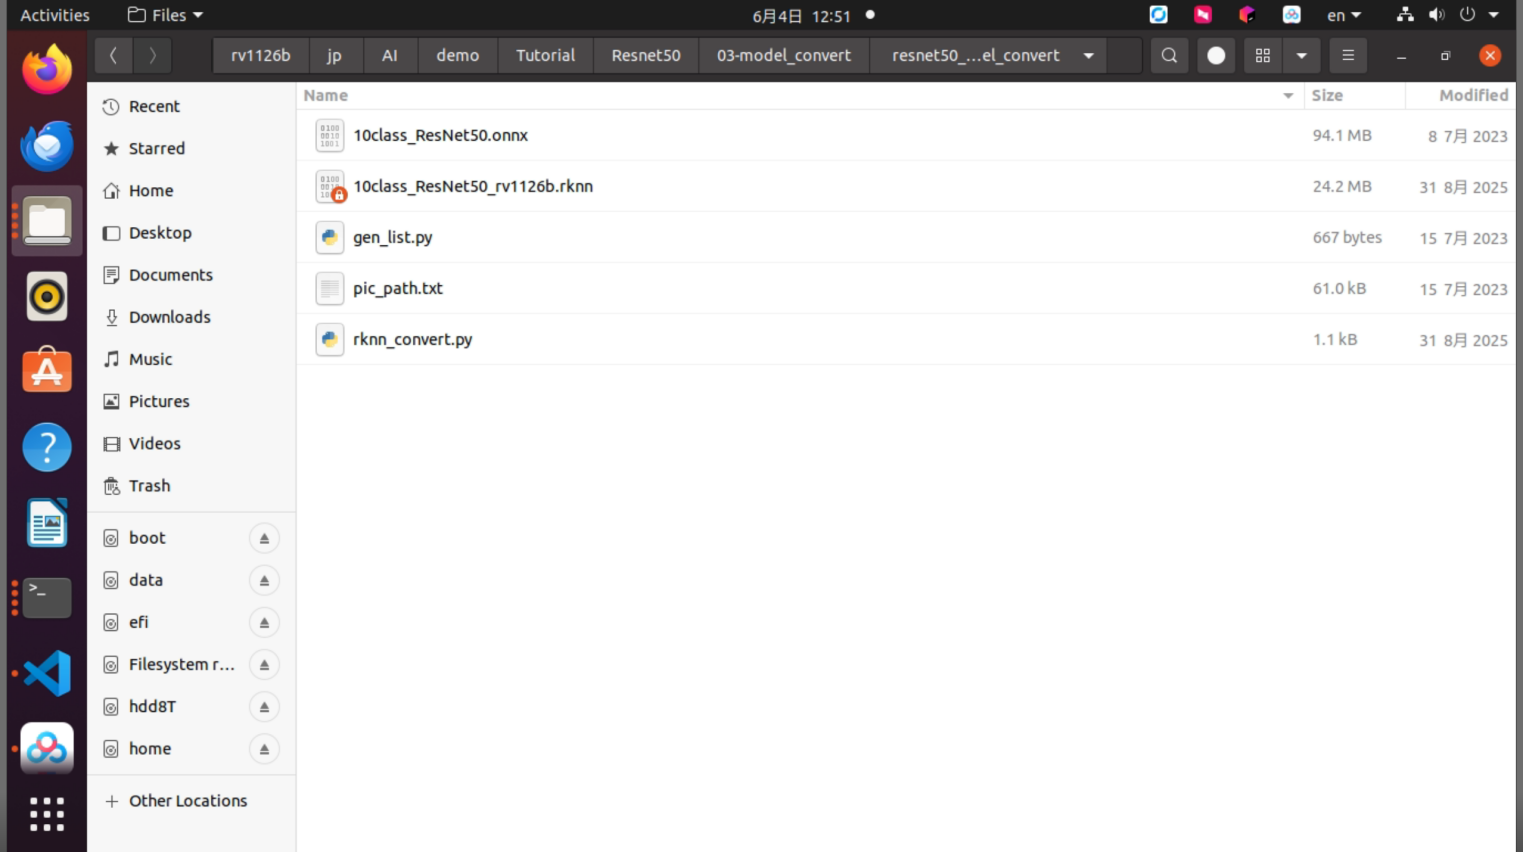
Figure 5-8 Contents of the resnet50_model_convert folder
5.2.3. Generating the Quantization Image List
Switch to the Docker environment and enter the model conversion working directory.
cd /test/Resnet50/03-model_convert/resnet50_model_convert
Figure 5-9 Model conversion working directory
Run gen_list.py to generate the quantization image list.
python gen_list.py
Figure 5-10 Quantization image list generation command
The generated quantization image list is stored in the folder shown below.
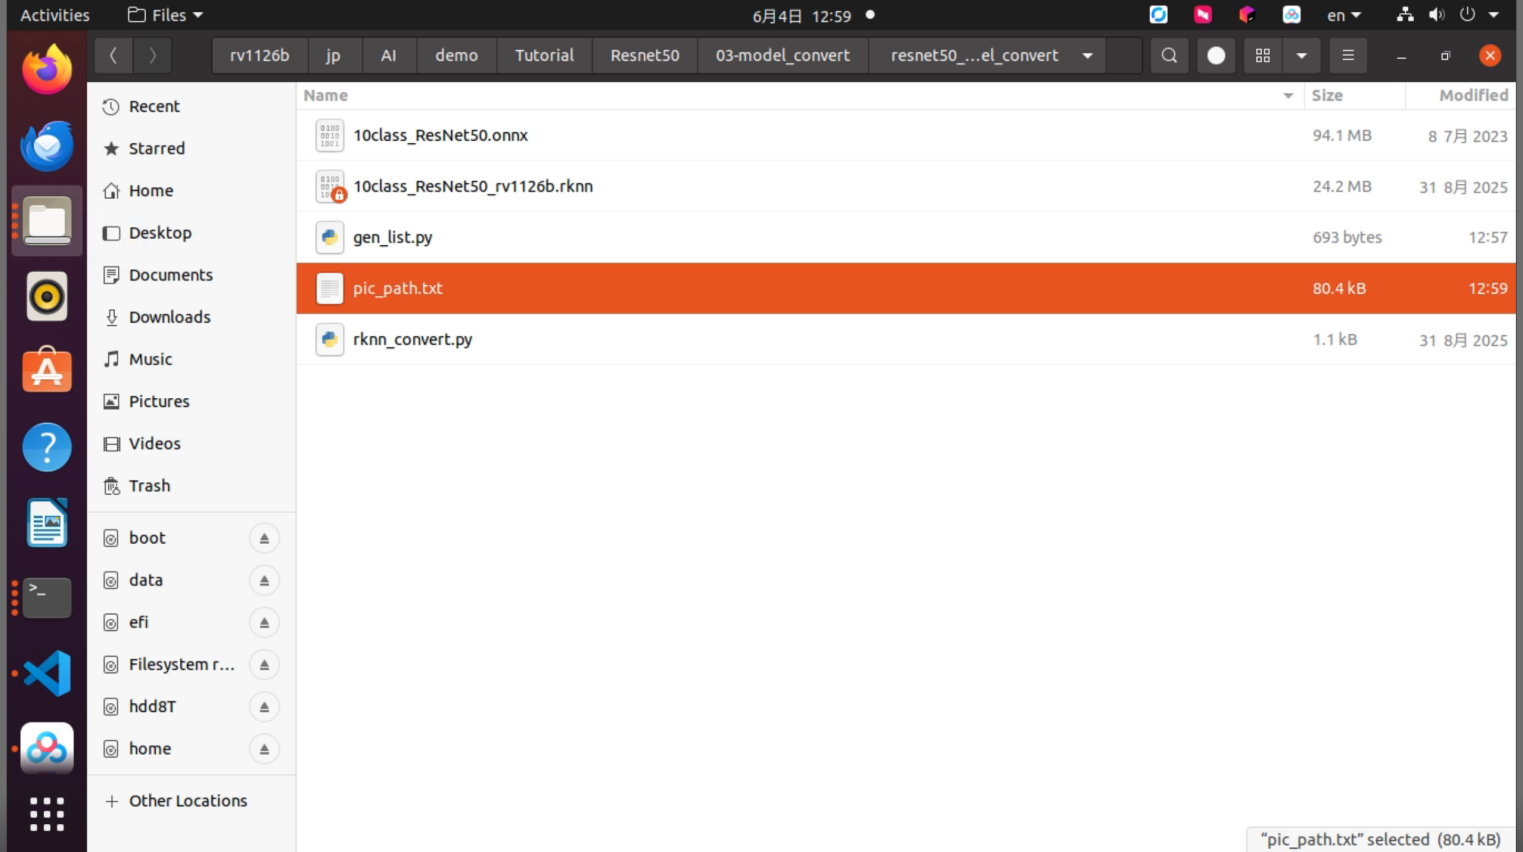
Figure 5-11 Generated quantization image list
5.2.4. Converting the ONNX Model to an RKNN Model
rknn_convert.py performs INT8 quantization by default. The script example is shown below.
import osimport urllibimport tracebackimport timeimport sysimport numpy as npimport cv2from rknn.api import RKNN
ONNX_MODEL = '10class_ResNet50.onnx'RKNN_MODEL = './10class_ResNet50_rv1126b.rknn'DATASET = './pic_path.txt'QUANTIZE_ON = True
if __name__ == '__main__':    # Create RKNN object    rknn = RKNN(verbose=False)
    if not os.path.exists(ONNX_MODEL):        print('model not exist')        exit(-1)
    # pre-process config    print('--> Config model')    rknn.config(        mean_values=[[123.67, 116.28, 103.53]],        std_values=[[58.395, 57.12, 57.375]],        target_platform='rv1126b'    )    print('done')
    # Load ONNX model    print('--> Loading model')    ret = rknn.load_onnx(model=ONNX_MODEL)    if ret != 0:        print('Load failed!')        exit(ret)    print('done')
    # Build model    print('--> Building model')    ret = rknn.build(do_quantization=QUANTIZE_ON, dataset=DATASET)    if ret != 0:        print('Build resnet failed!')        exit(ret)    print('done')
    # Export RKNN model    print('--> Export RKNN model')    ret = rknn.export_rknn(RKNN_MODEL)    if ret != 0:        print('Export resnet failed!')        exit(ret)    print('done')
    rknn.release()
Place the ONNX model 10class_ResNet50.onnx in the resnet50_model_convert directory, and use rknn_convert.py to perform model conversion.
python rknn_convert.py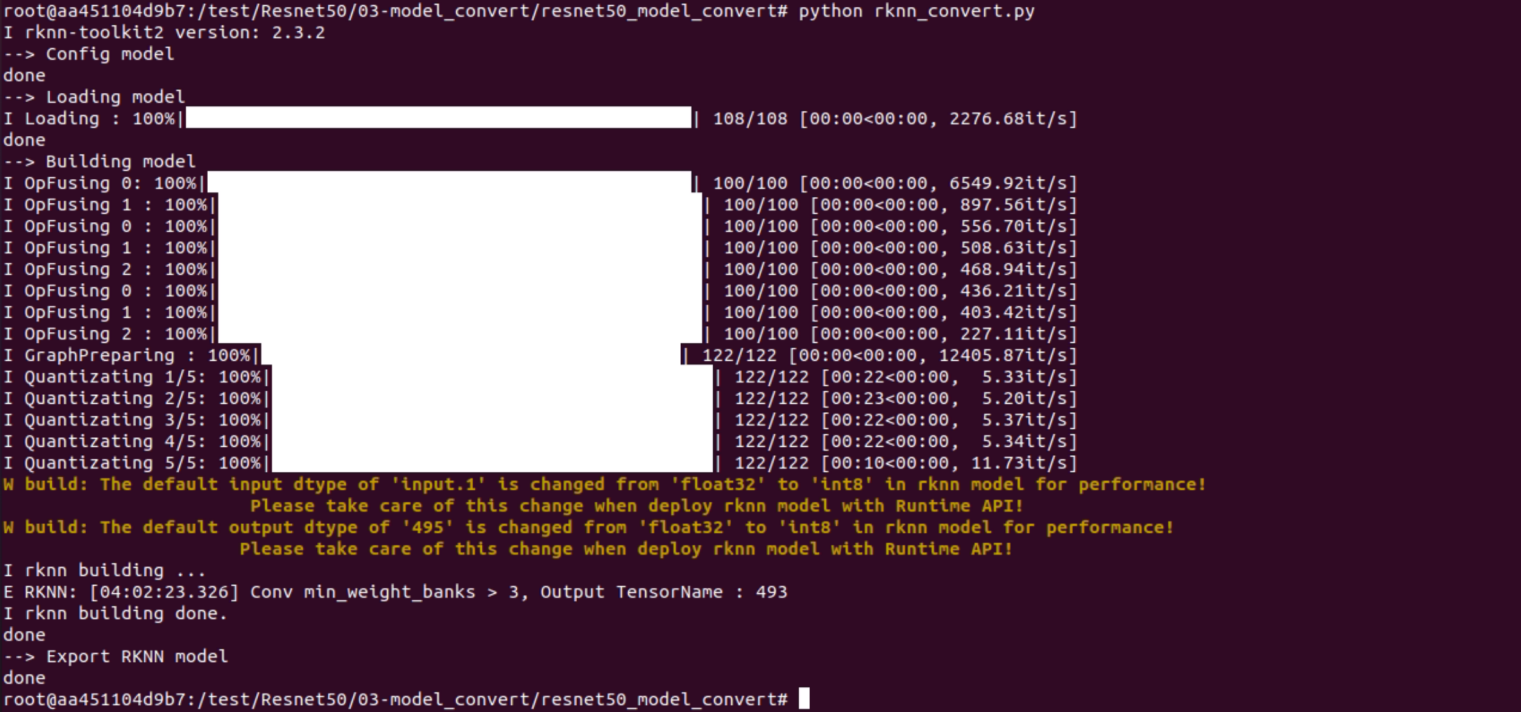
Figure 5-12 rknn_convert.py execution result
The generated model is shown below. This model can be executed in the rknn-toolkit environment and on the RV1126B board.
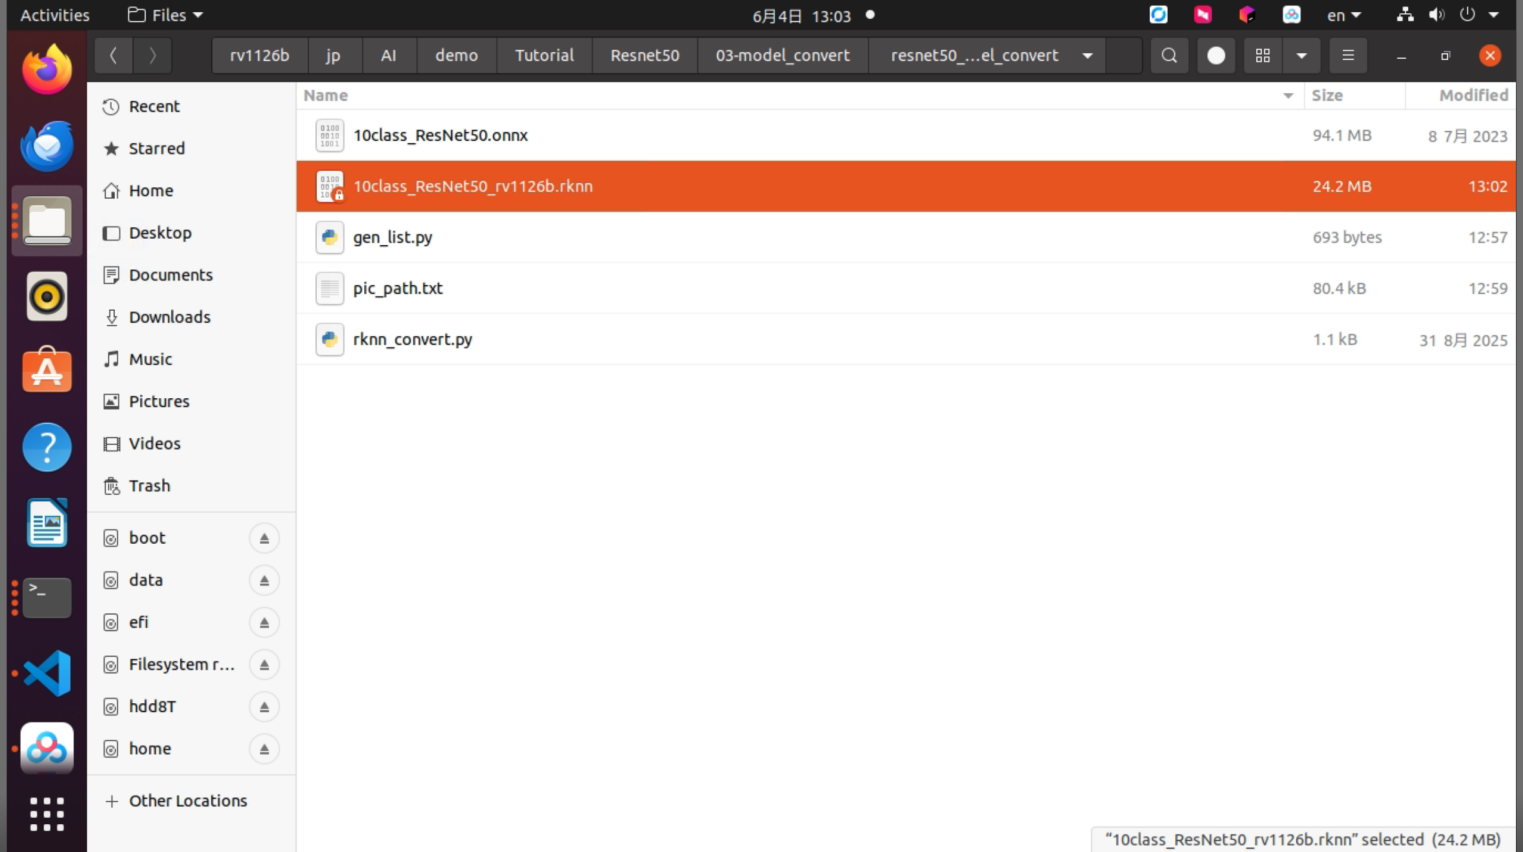
Figure 5-13 Generated RKNN model file
6. Deploying ResNet50 Image Classification
6.1. Deployment Example Description
This section describes how to deploy the ResNet50 model to the RV1126B board. The sample model used here was trained only briefly, and its accuracy is not guaranteed.
6.2. Preparation
6.2.1. Hardware Preparation
Prepare the RV1126B board, a Type-C data cable, and an Ethernet cable. Use MobaXterm to log in to the RV1126B board through SSH. For details, refer to the Getting Started Guide.
Connect using an Ethernet cable.
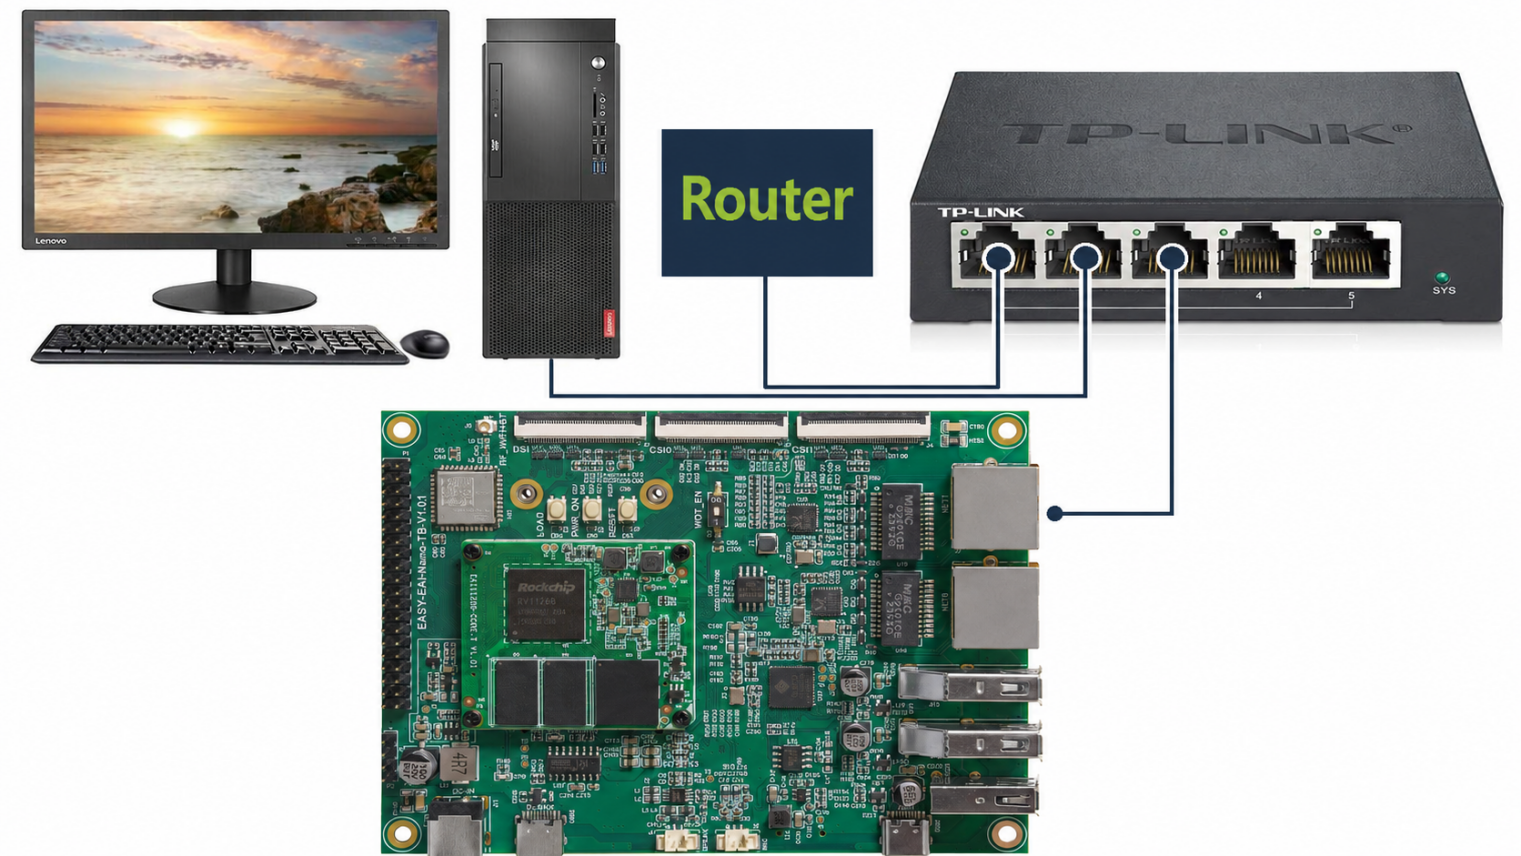
Figure 6-1 RV1126B Ethernet connection
Connect using a serial cable (Type-C).
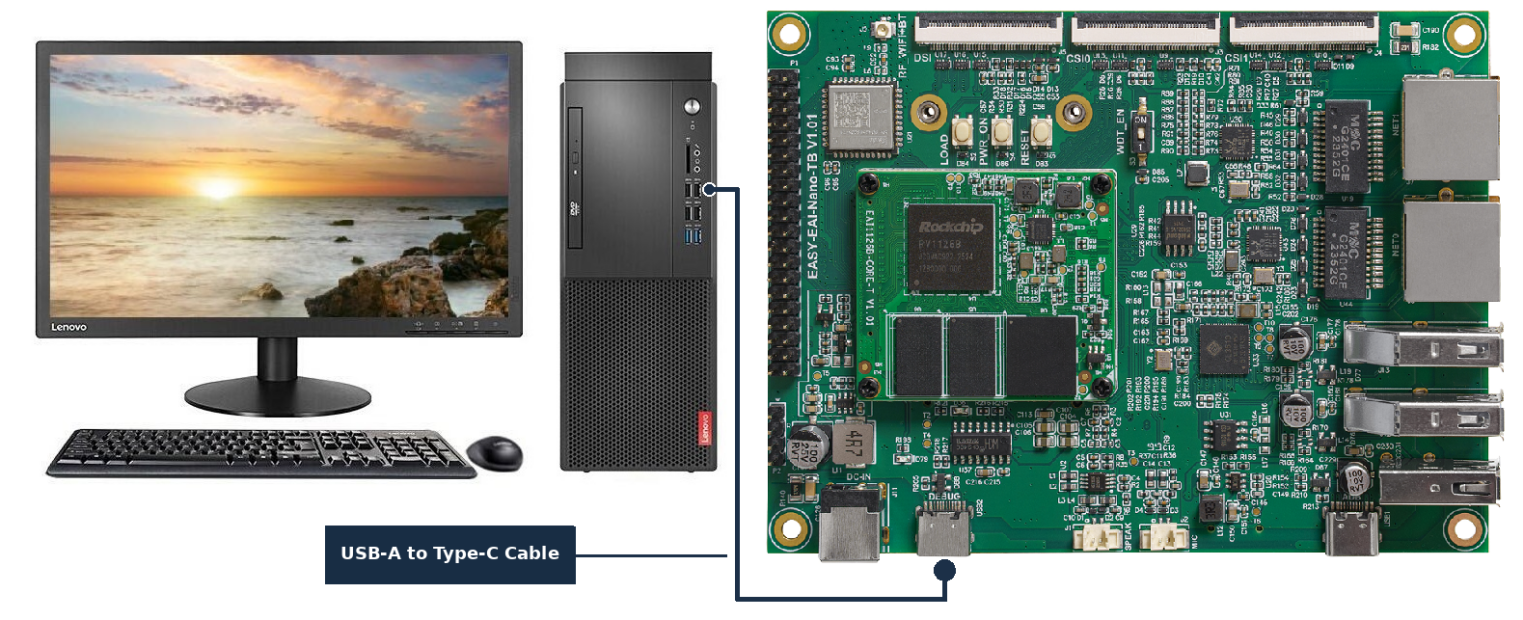
Figure 6-2 RV1126B Type-C serial connection
6.2.2. Preparing the Development Environment
If you are reading this document for the first time, refer to the Getting Started Guide and follow the described steps to build the compilation environment.
On the Ubuntu system on the PC side, run the run.sh script to enter the RV1126B compilation environment. The procedure is as follows.
cd ~/develop_environment./run.sh 2204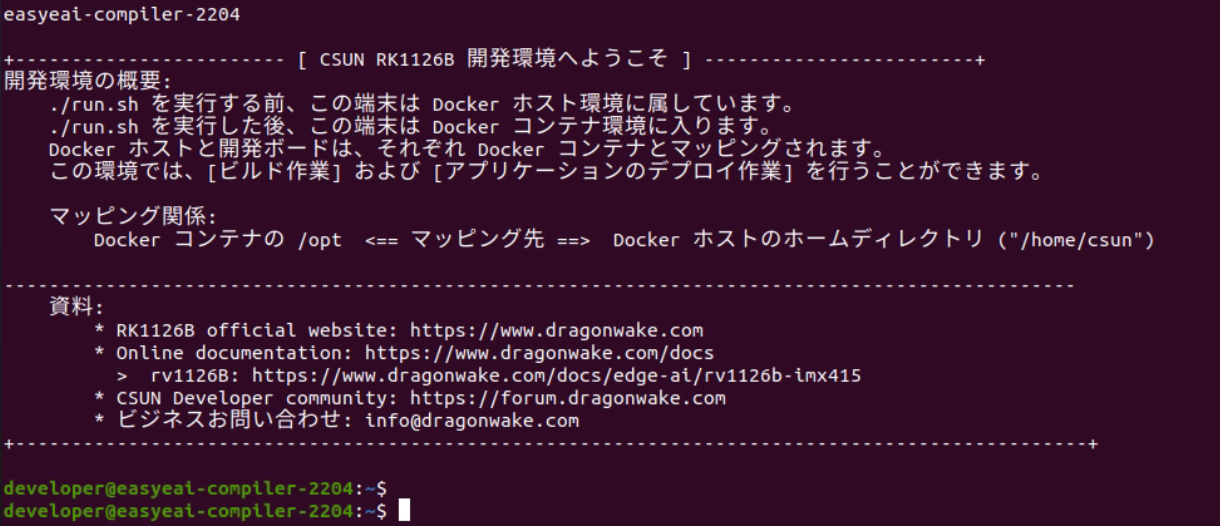
Figure 6-3 Starting the RV1126B Docker development environment
6.3. Building the Sample Program
After moving the downloaded package into the RV1126B Docker development environment, run the following command to extract it.
tar -xvf resnet50_classification_C_demo.tar.bz2The extracted directory is shown below.
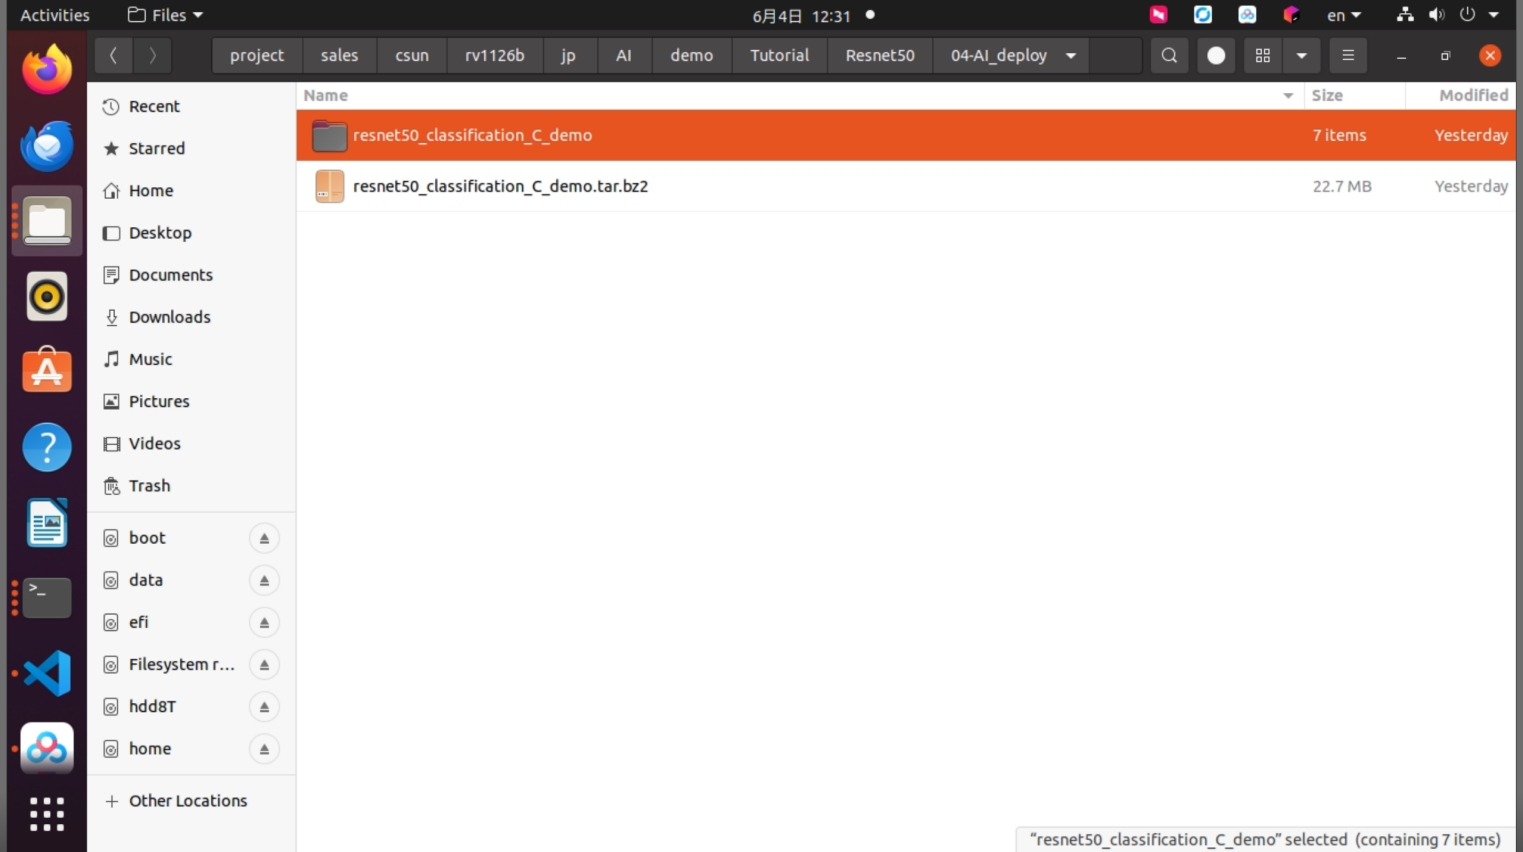
Figure 6-4 Extracted ResNet50 deployment demo directory
In the RV1126B Docker development environment, enter the extracted sample program directory and build it. The specific commands are as follows.
sudo mount -t nfs -o vers=3,proto=tcp,mountproto=tcp,nolock,retrans=5,timeo=5 192.168.11.85:/ /mntcd /opt/linuxshare/work/rv1126b/jp/AI/demo/Tutorial/Resnet50/04-AI_deploy/resnet50_classification_C_demo/./build.sh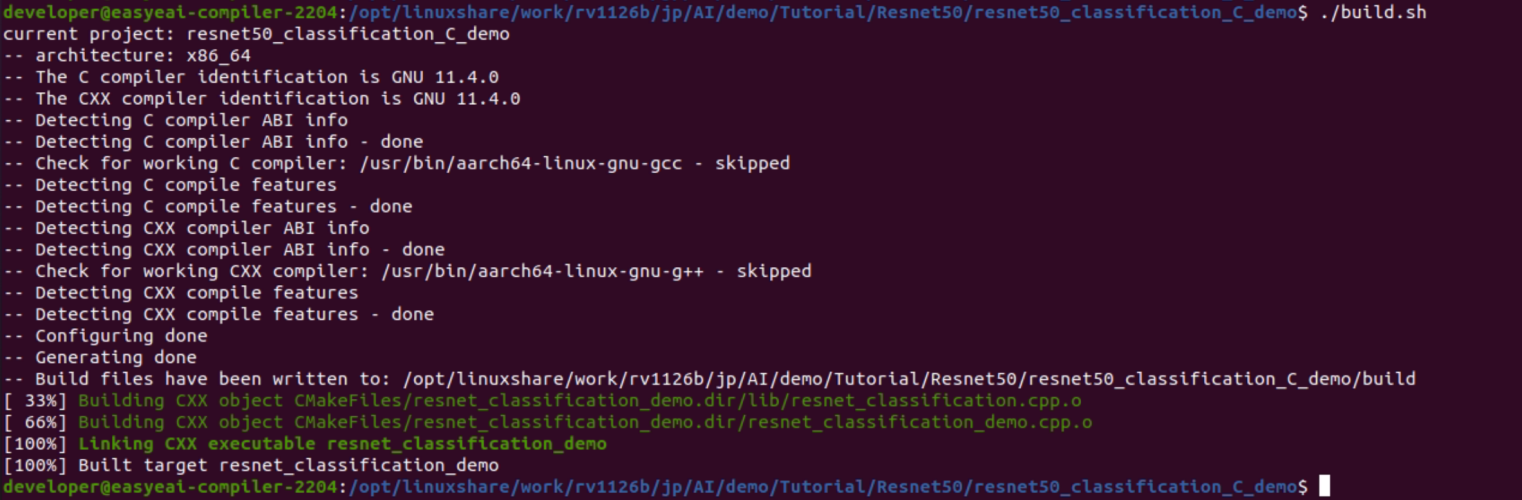
Figure 6-5 ResNet50 demo program build output
After the compilation succeeds, copy the executable program directory resnet_classification_demo_release/ to the /userdata directory on the RV1126B board.
cp resnet_classification_demo_release/ /mnt/userdata/ -rf6.4. Running ResNet50 Image Classification on the Development Board
Enter the board-side shell through serial debugging or SSH debugging, and move to the deployment directory of the sample program.
cd /userdata/resnet_classification_demo_release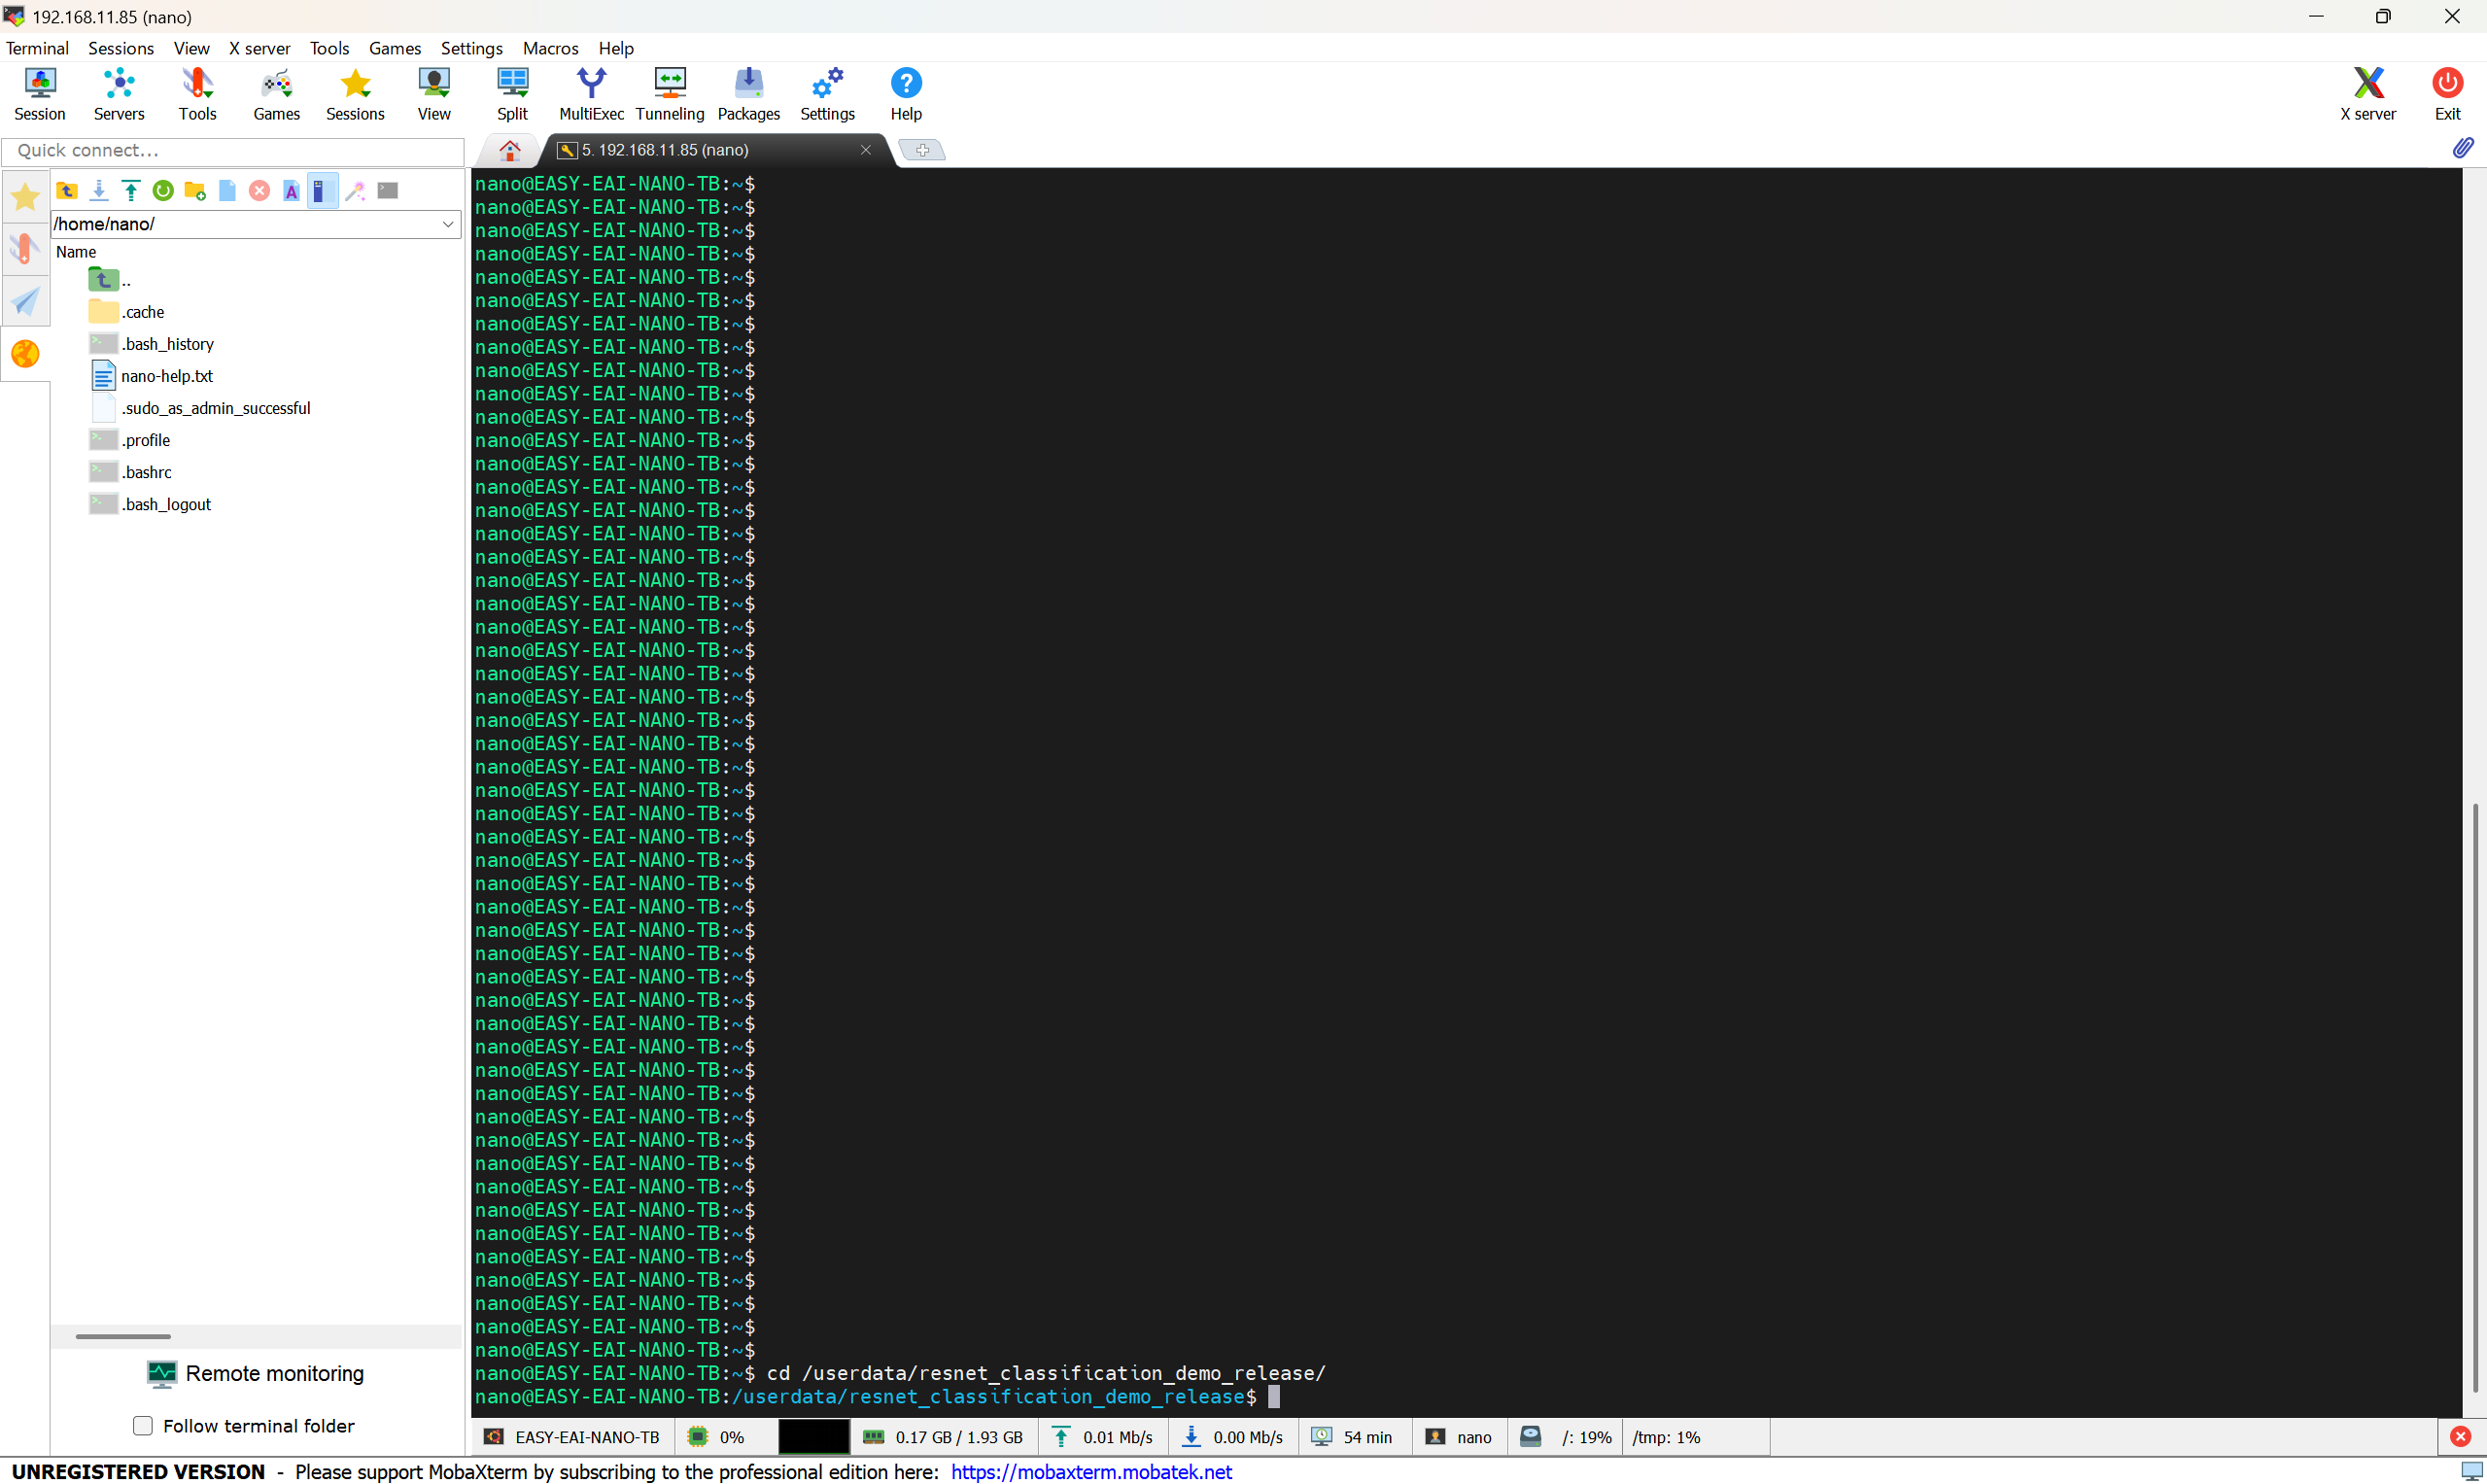
Figure 6-6 ResNet50 demo directory on the development board
Run the sample program with the following commands.
chmod 777 resnet_classification_demo./resnet_classification_demoThe execution result is shown below. The algorithm execution time is about 18 ms.
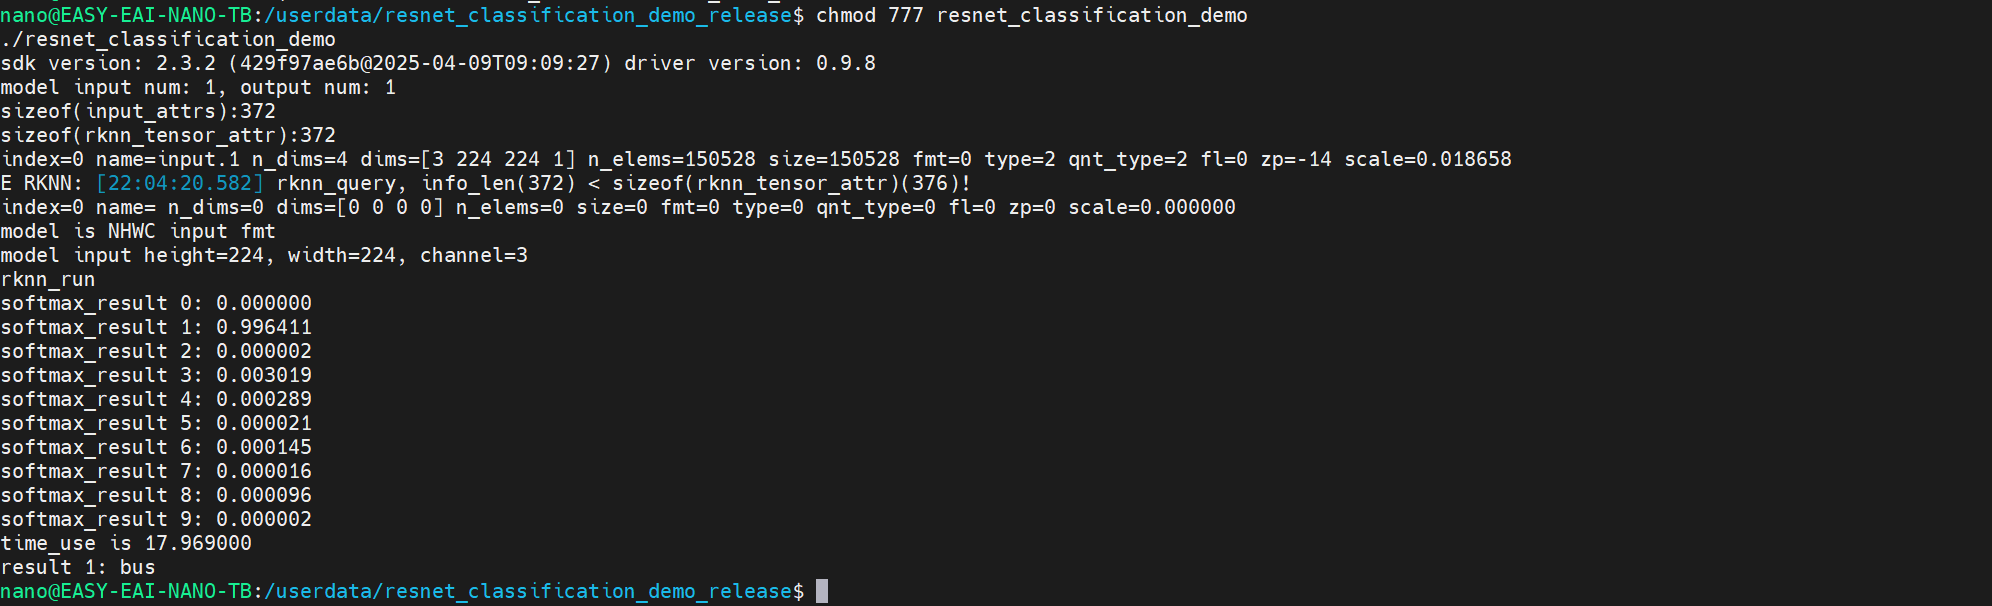
Figure 6-7 ResNet50 demo execution result
The ResNet50 image classification sample has now been successfully executed on the board.