
How to Change the Boot Logo
1.1. Preparing the Logo Files
1.1.1 Description of Logo Files
The EASY EAI nano-TB firmware has two logos: one for display during the uboot phase and one for display during the kernel phase.
Detailed requirements for the logo files:
| Item | Description |
|---|---|
| File format | Bitmap format (*.bmp) |
| File logo.bmp | Corresponds to the logo content for the uboot phase (must be named logo.bmp) |
| File logo_kernel.bmp | Corresponds to the logo content for the kernel phase |
| Screen resolution | 5-inch screen (720*1280); 8-inch screen (800*1280); 10-inch screen (800*1280) |
| Larger than screen resolution | Not supported (screen display can no longer be controlled by the application) |
| Same as screen resolution | Fits the entire screen exactly |
| Smaller than screen resolution | Placed at the center of the screen. This method is recommended when the background is black |
| Bit depth | 1-bit (not supported), 4-bit (not supported), 8-bit (supported), 24-bit (supported) |
1.1.2 Logo Creation Procedure
Create the logo files using the “Paint” software on a PC.
1.2. Description of Logo Update Operations
1.2.1 Installing the Logo Update Tool Package
💡 Note: If you have already installed the logo update tool, skip this section and go directly to “2.2 Board-side Logo Update”.
Enter the board environment via serial debugging or SSH debugging, and install u-boot-tools and upgrade-logo.
sudo apt-get updatesudo apt-get install u-boot-tools upgrade-logo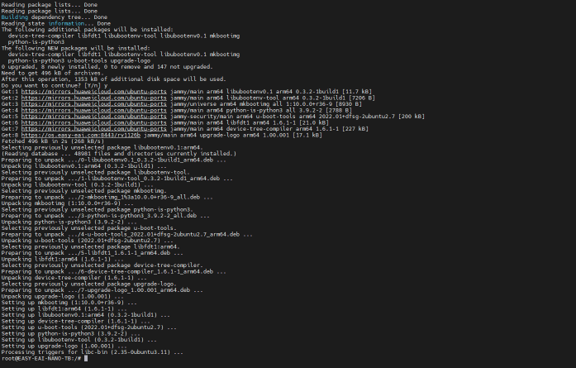
1.2.1 Installing the Logo Update Tool Package Figure 1
1.2.2 Board-side Logo Update
Transfer the modified logo images to the board via scp or similar methods. For example, transfer them to the /userdata directory.

1.2.2 Board-side Logo Update Figure 2

1.2.2 Board-side Logo Update Figure 3
Run the following commands in the board environment to directly update the boot logo:
cd /userdataupgrade-logo.sh logo.bmp logo_kernel.bmp && sync
1.2. 2 Board-side Logo Update Figure 4
After the commands are executed, the new logo will be displayed the next time the system starts.
1.3. Updating the Logo in the Kernel Image
Using the same method as above, transfer boot.img to the board (for example, to /userdata/) via scp. Then, run the following commands in the board environment to write the boot logo directly into boot.img:
cd /userdataupgrade-logo.sh logo.bmp logo_kernel.bmp boot.img