
人员检测算法执行指南
1. 人员检测概述
人员检测是一种基于深度学习的人员定位与检测方法,广泛应用于安防、生产安全以及其他场景。它是边界入侵检测、越界检测、人群聚集检测、徘徊检测、跌倒检测等多种算法的基础。
该人员检测算法在数据集上的性能如下。
| 人员检测算法 | mAP@0.5 |
|---|---|
| PERSON | 0.79 |
RV1126B 开发板上的执行效率如下。
| 算法类型 | 执行效率 |
|---|---|
| PERSON | 67ms |
2. 快速开始
首次阅读本文档时,请参考《入门指南/开发编译环境准备与更新》,并按照相关步骤构建编译环境。在 PC 侧 Ubuntu 系统中执行 run 脚本,进入 Docker 开发环境。
cd ~/linuxshare/work/rv1126b/jp/embedded/images/develop_environment./run.sh 2204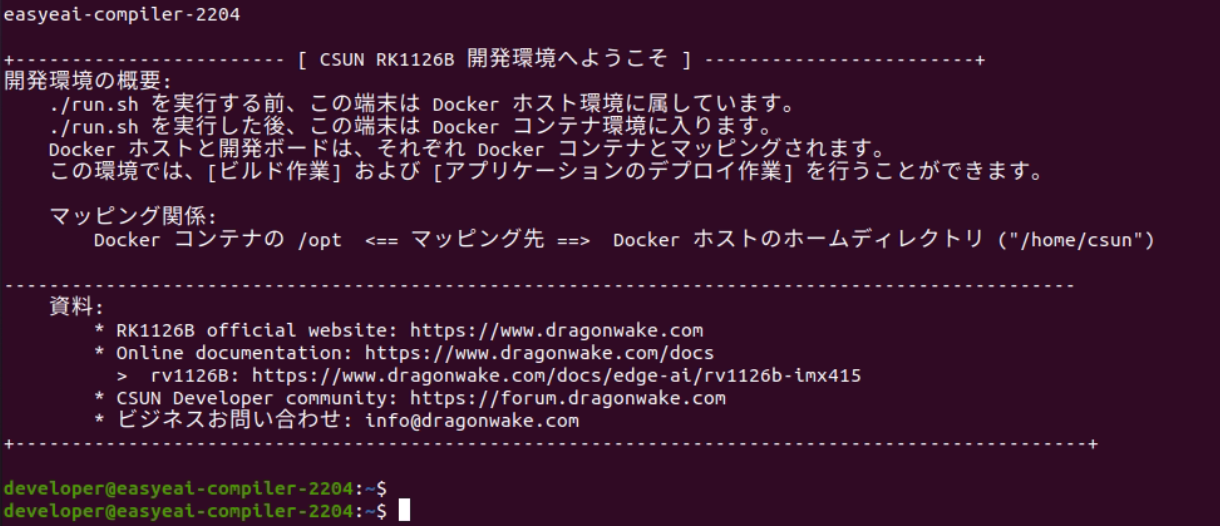
图 2-1
2.1 获取源代码
在 Docker 开发环境中,创建用于保存源代码仓库的管理目录。使用 git 工具将远程仓库克隆到管理目录中。
cd /opt/linuxshare/work/rv1126b/jp/AI/demo/ai-algorithmgit clone https://github.com/csunltd/rv1126b-ai-toolkit.git2.2 模型配置
运行算法 Demo 时,需要先下载人员检测算法模型。请将下载的人员检测算法模型复制到 Release/ 目录。
https://dl.dragonwake.com/download/rv1126b/AI/demo/03_person_detect.zip
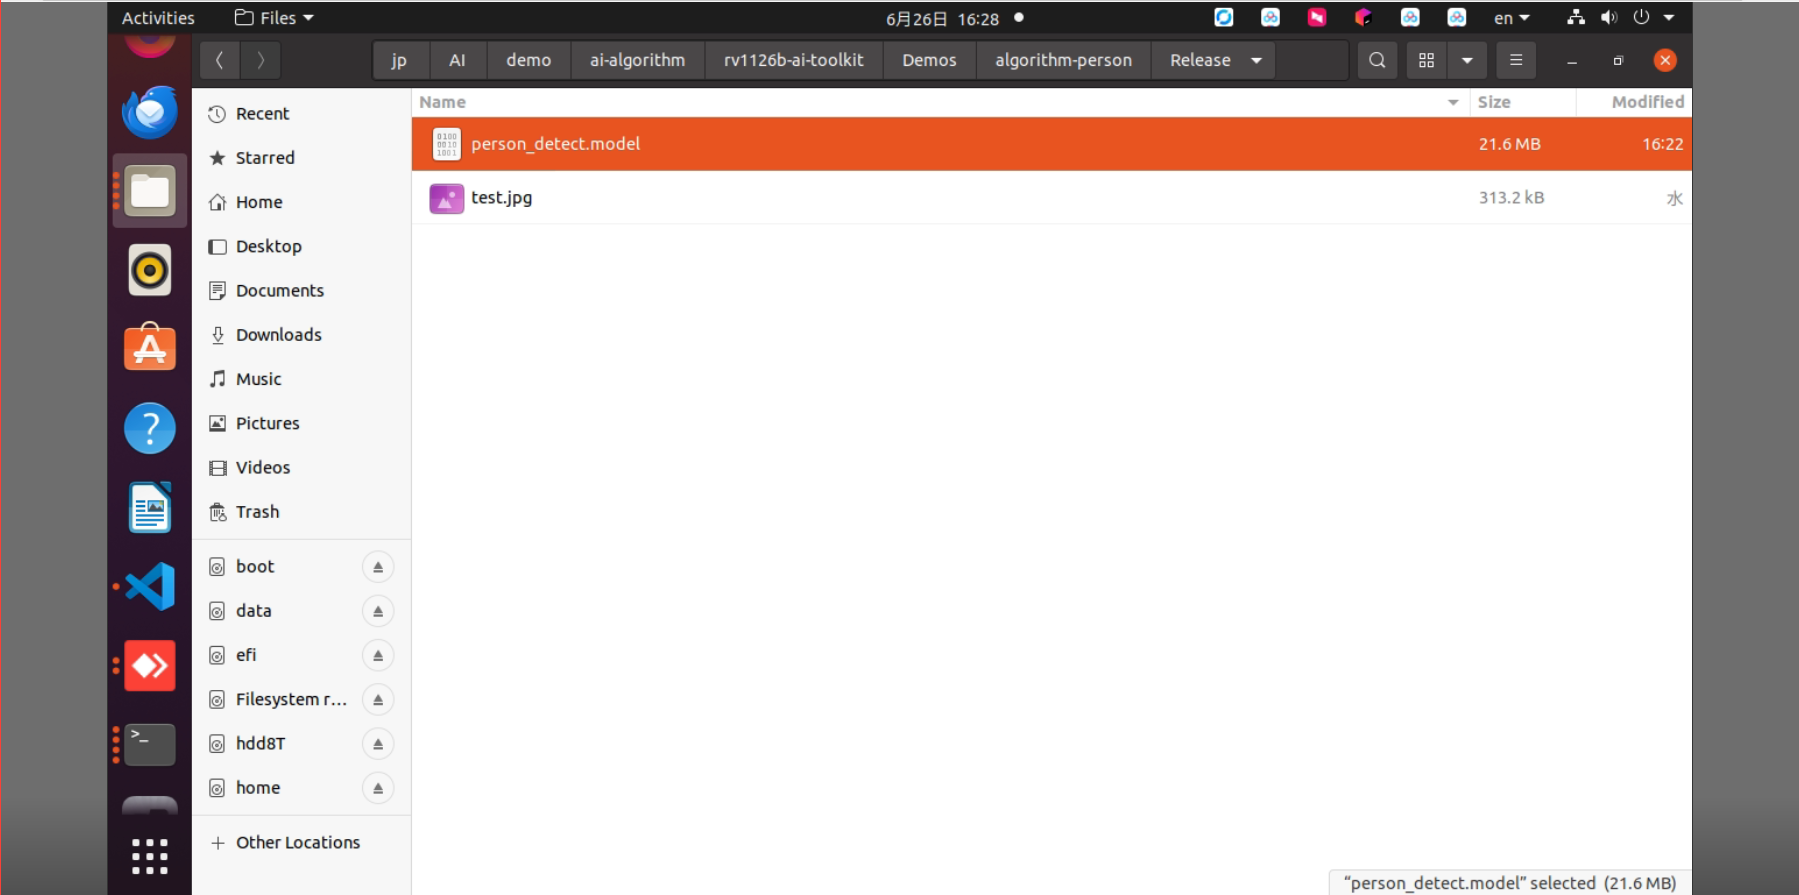
图 2-2
2.3 示例构建
进入示例所在目录并执行构建。由于依赖库位于开发板侧,交叉编译过程中需要保持 /mnt 挂载。
cd rv1126b-ai-toolkit/Demos/algorithm-person_detect/./build.sh cpressudo mount -t nfs -o vers=3,proto=tcp,mountproto=tcp,nolock,retrans=5,timeo=5 192.168.10.85:/ /mnt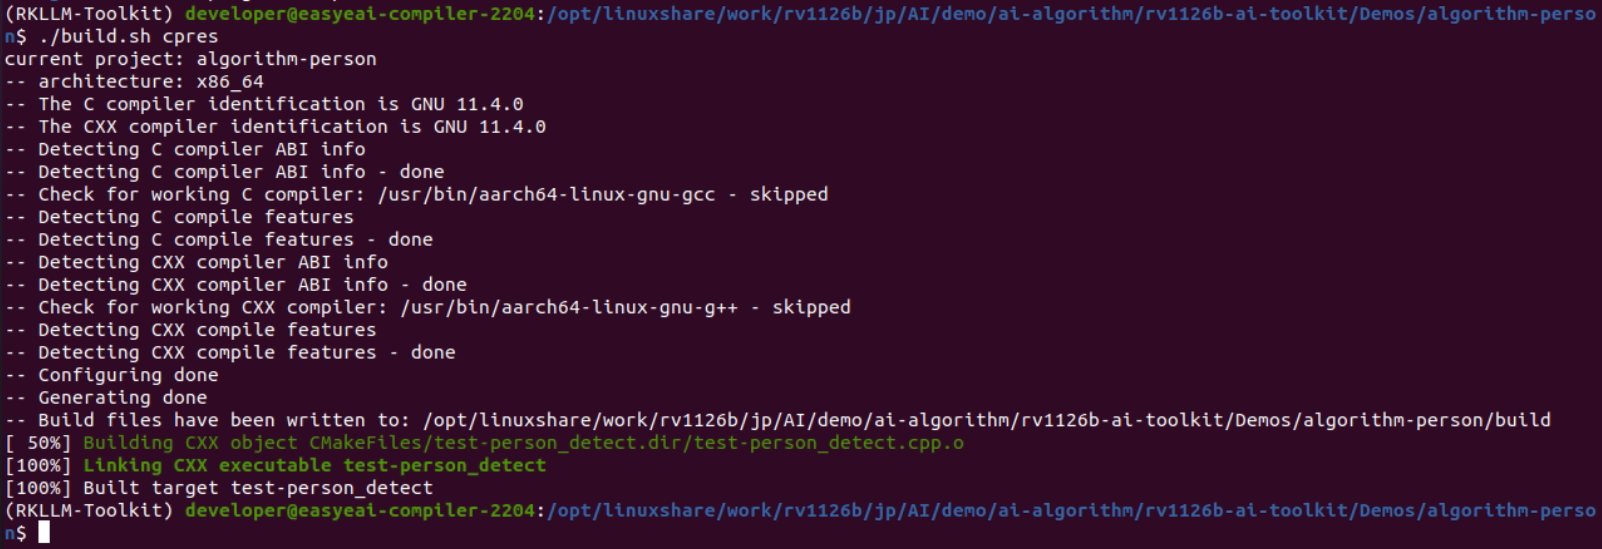
图 2-3
2.4 示例执行与结果
将编译完成的文件复制到开发板,通过串口调试或 SSH 调试登录开发板并执行示例。可在 Docker 开发环境中获取结果图像。
cp Release/* /mnt/userdata/Demo/algorithm-person/cd /userdata/Demo/algorithm-person/./test-person_detect person_detect.model test.jpg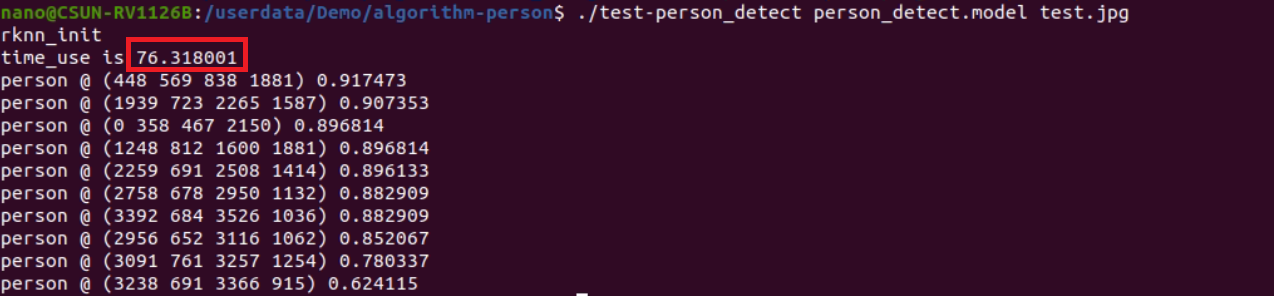
cp /mnt/userdata/Demo/algorithm-person/result.jpg ./Release/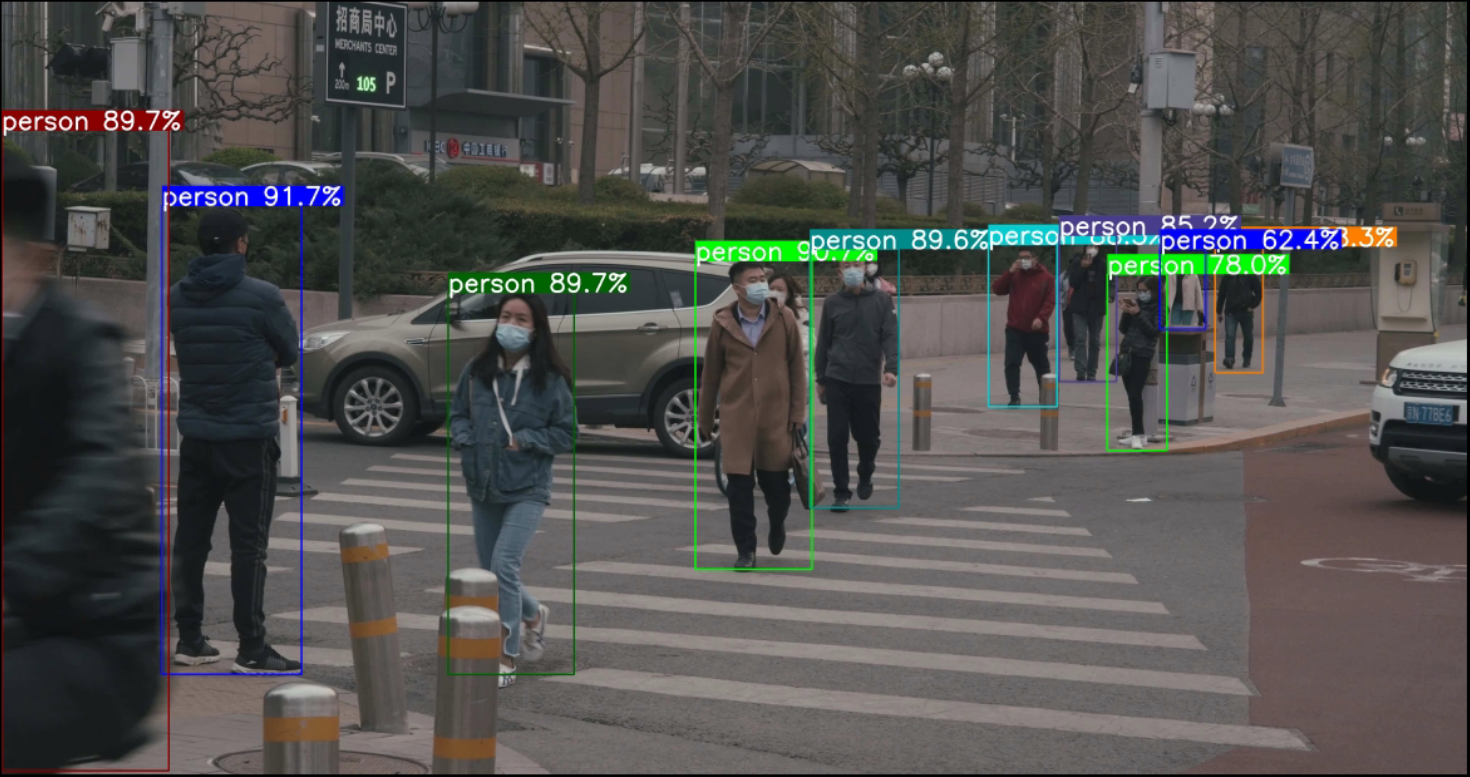
图 2-4
3. 人员检测 API 说明
3.1 链接方法
如果需要在本地项目中直接调用 EASY EAI API 库,请添加以下库文件和头文件。
| 项目 | 说明 |
|---|---|
| 头文件目录 | easyeai-api/algorithm/person_detect |
| 库文件目录 | easyeai-api/algorithm/person_detect |
| 库链接参数 | -lperson_detect |
3.2 人员检测初始化函数
函数原型如下。
int person_detect_init(rknn_context *ctx, const char *path);| 项目 | 说明 |
|---|---|
| 函数名 | person_detect_init() |
| 头文件 | person_detect.h |
| 输入参数 | ctx: rknn_context handle |
| 输入参数 | path: algorithm model path |
| 返回值 | 成功时返回值:0 / 失败时返回值:-1 |
| 说明 | 无 |
3.3 人员检测执行函数
函数原型如下。
int person_detect_run(rknn_context ctx, cv::Mat input_image, person_detect_result_group_t *detect_result_group);| 项目 | 说明 |
|---|---|
| 函数名 | person_detect_run() |
| 头文件 | person_detect.h |
| 输入参数 | ctx: rknn_context handle |
| 输入参数 | input_image: cv::Mat input image |
| 输出参数 | detect_result_group: personnel detection result group |
| 返回值 | 成功时返回值:0 / 失败时返回值:-1 |
| 说明 | 无 |
3.4 人员检测释放函数
函数原型如下。
int person_detect_release(rknn_context ctx);| 项目 | 说明 |
|---|---|
| 函数名 | person_detect_release() |
| 头文件 | person_detect.h |
| 输入参数 | ctx: rknn_context handle |
| 返回值 | 成功时返回值:0 / 失败时返回值:-1 |
| 说明 | 无 |
4. 人员检测算法示例
示例目录为 Demos/algorithm-person/test-person_detect.cpp。处理流程如下。
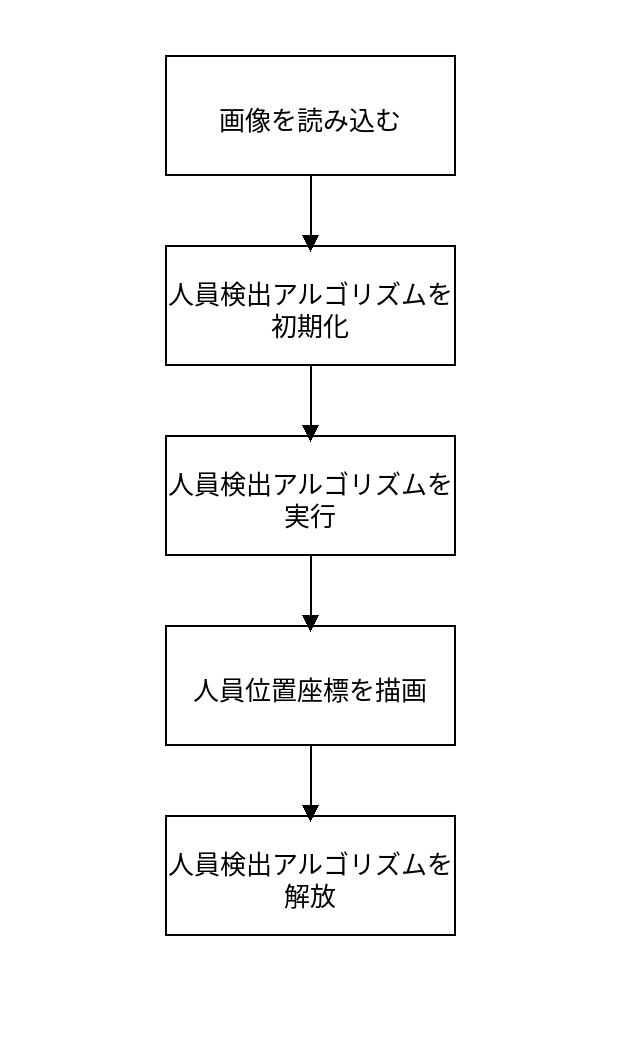
图 4-1
参考示例如下。
#include <opencv2/opencv.hpp>#include <stdio.h>#include <sys/time.h>#include"person_detect.h"
using namespace cv;using namespace std;
static Scalar colorArray[10]={    Scalar(255, 0, 0, 255),    Scalar(0, 255, 0, 255),    Scalar(0,0,139,255),    Scalar(0,100,0,255),    Scalar(139,139,0,255),    Scalar(209,206,0,255),    Scalar(0,127,255,255),    Scalar(139,61,72,255),    Scalar(0,255,0,255),    Scalar(255,0,0,255),};
int plot_one_box(Mat src, int x1, int x2, int y1, int y2, char *label, char colour){    int tl = round(0.002 * (src.rows + src.cols) / 2) + 1;    rectangle(src, cv::Point(x1, y1), cv::Point(x2, y2), colorArray[(unsigned char)colour], 3);
    int tf = max(tl -1, 1);
    int base_line = 0;    cv::Size t_size = getTextSize(label, FONT_HERSHEY_SIMPLEX, (float)tl/3, tf, &base_line);    int x3 = x1 + t_size.width;    int y3 = y1 - t_size.height - 3;
    rectangle(src, cv::Point(x1, y1), cv::Point(x3, y3), colorArray[(unsigned char)colour], -1);    putText(src, label, cv::Point(x1, y1 - 2), FONT_HERSHEY_SIMPLEX, (float)tl/3, cv::Scalar(255, 255, 255, 255), tf, 8);    return 0;}
int main(int argc, char **argv){  if (argc != 3)    {        printf("%s <model_path> <image_path>\n", argv[0]);        return -1;    }
    const char *model_path = argv[1];    const char *image_path = argv[2];
  /* パラメータ初期化 */  detect_result_group_t detect_result_group;
  /* アルゴリズムモデル初期化 */  rknn_context ctx;  person_detect_init(&ctx, model_path);
  /* アルゴリズム実行 */  cv::Mat src;  src = cv::imread(image_path, 1);
  struct timeval start;  struct timeval end;  float time_use=0;
  gettimeofday(&start,NULL);
  person_detect_run(ctx, src, &detect_result_group);
  gettimeofday(&end,NULL);  time_use=(end.tv_sec-start.tv_sec)*1000000+(end.tv_usec-start.tv_usec);//マイクロ秒  printf("time_use is %f\n",time_use/1000);
  /* アルゴリズム結果を画像上に描画して保存します */  // Draw Objects  char text[256];  for (int i = 0; i < detect_result_group.count; i++)  {
    detect_result_t* det_result = &(detect_result_group.results[i]);    if( det_result->prop < 0.4)    {      continue;    }
    sprintf(text, "%s %.1f%%", det_result->name, det_result->prop * 100);    printf("%s @ (%d %d %d %d) %f\n", det_result->name, det_result->box.left, det_result->box.top,         det_result->box.right, det_result->box.bottom, det_result->prop);    int x1 = det_result->box.left;    int y1 = det_result->box.top;    int x2 = det_result->box.right;    int y2 = det_result->box.bottom;    /*    rectangle(src, cv::Point(x1, y1), cv::Point(x2, y2), cv::Scalar(255, 0, 0, 255), 3);    putText(src, text, cv::Point(x1, y1 + 12), cv::FONT_HERSHEY_SIMPLEX, 0.5, cv::Scalar(0, 0, 0));    */    plot_one_box(src, x1, x2, y1, y2, text, i%10);  }
  cv::imwrite("result.jpg", src);

  /* アルゴリズムモデルのリソースを解放します */  person_detect_release(ctx);
  return 0;}