
人体キーポイント認識
修正履歴
| NO | バージョン | 修正内容 | 修正日 |
|---|---|---|---|
| 1 | Ver1.0 | 新規作成 | 2026/06/29 |
この文書の情報は、文書を改善するため、事前の通知なく変更されることがあります。最新版は弊社ホームページからご参照ください。
株式会社日昇テクノロジーの書面による許可のない複製は、いかなる形態においても厳重に禁じられています。
1. 人体キーポイント認識概要
人体キーポイント認識は、ディープラーニングに基づいて人物の位置検出と姿勢推定を行うモデルです。スポーツ解析、動物行動モニタリング、ロボットなどの分野で広く利用され、機械が物理的な動作をリアルタイムに理解するために使用されます。本アルゴリズムは、実行効率が高く、リアルタイム性に優れています。
本アルゴリズムデータセットでの性能は次のとおりです:
| 人体キーポイント認識アルゴリズム | mAP pose@0.5 |
| Person Pose-S | 86.3 |
| Person Pose-M | 89.3 |
CSUN RV1126B基板での実行効率:
| アルゴリズム種別 | 実行効率 |
| Person Pose-S | 59ms |
| Person Pose-M | 108ms |
17個の人体キーポイントインデックス定義:
| インデックス | 定義 |
| 0 | 鼻 |
| 1 | 左目 |
| 2 | 右目 |
| 3 | 左耳 |
| 4 | 右耳 |
| 5 | 左肩 |
| 6 | 右肩 |
| 7 | 左肘 |
| 8 | 右肘 |
| 9 | 左手首 |
| 10 | 右手首 |
| 11 | 左股関節 |
| 12 | 右股関節 |
| 13 | 左膝 |
| 14 | 右膝 |
| 15 | 左足首 |
| 16 | 右足首 |
2. クイックスタート
2.1 開発環境の準備
本ドキュメントを初めてお読みになる場合は、『入門ガイド/開発コンパイル環境の準備と更新』を参照し、関連する手順に従ってコンパイル環境をデプロイしてください。
PC側のUbuntuシステムで run スクリプトを実行し、Docker開発環境に入ります。手順は次のとおりです。
cd ~/linuxshare/work/rv1126b/jp/embedded/images/develop_environment./run.sh 2204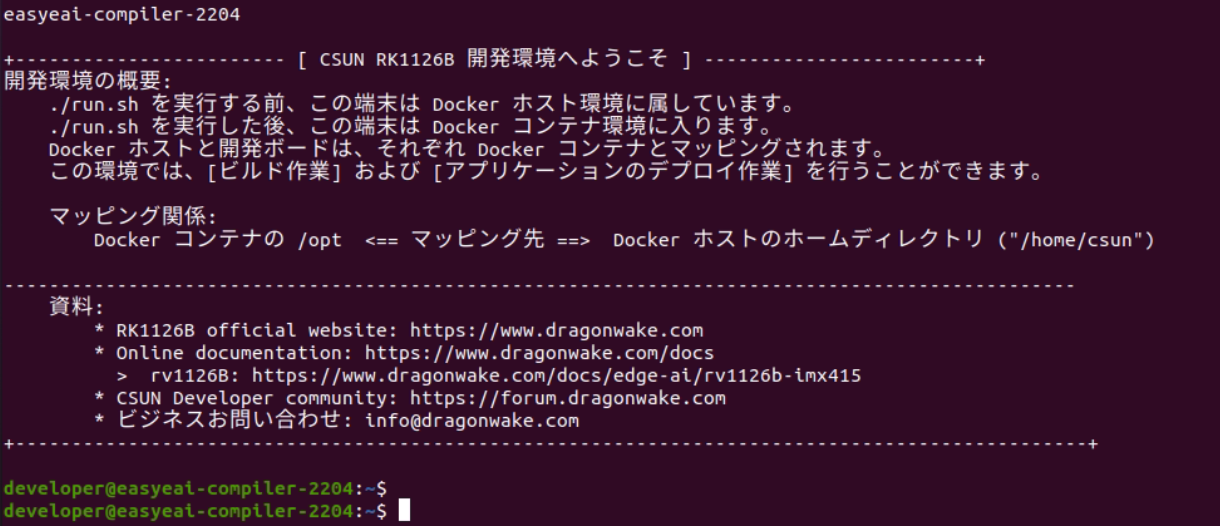
図2-1 Docker開発環境の起動
2.2 ソースコードのダウンロード
Docker開発環境で、ソースコードリポジトリを保存する管理ディレクトリを作成します。
cd /opt/linuxshare/work/rv1126b/jp/AI/demo/ai-algorithmgitツールを使用して、管理ディレクトリ内にリモートリポジトリをクローンします。
git clone https://github.com/csunltd/rv1126b-ai-toolkit.git※GitHubのWebページからダウンロードする場合でも、リポジトリ全体をダウンロードしてください。本サンプルに対応するディレクトリだけを単独でダウンロードしないでください。
※すでにダウンロードした場合、飛ばしてください。
2.3 モデルデプロイ
アルゴリズムDemoを実行するには、まず人体キーポイント認識アルゴリズムモデルをダウンロードする必要があります。
ダウンロードリンク:
https://dl.dragonwake.com/download/rv1126b/AI/demo/10_person_pose.zip
その後、ダウンロードした人体キーポイント認識アルゴリズムモデルを Release/ ディレクトリへコピーしてください。
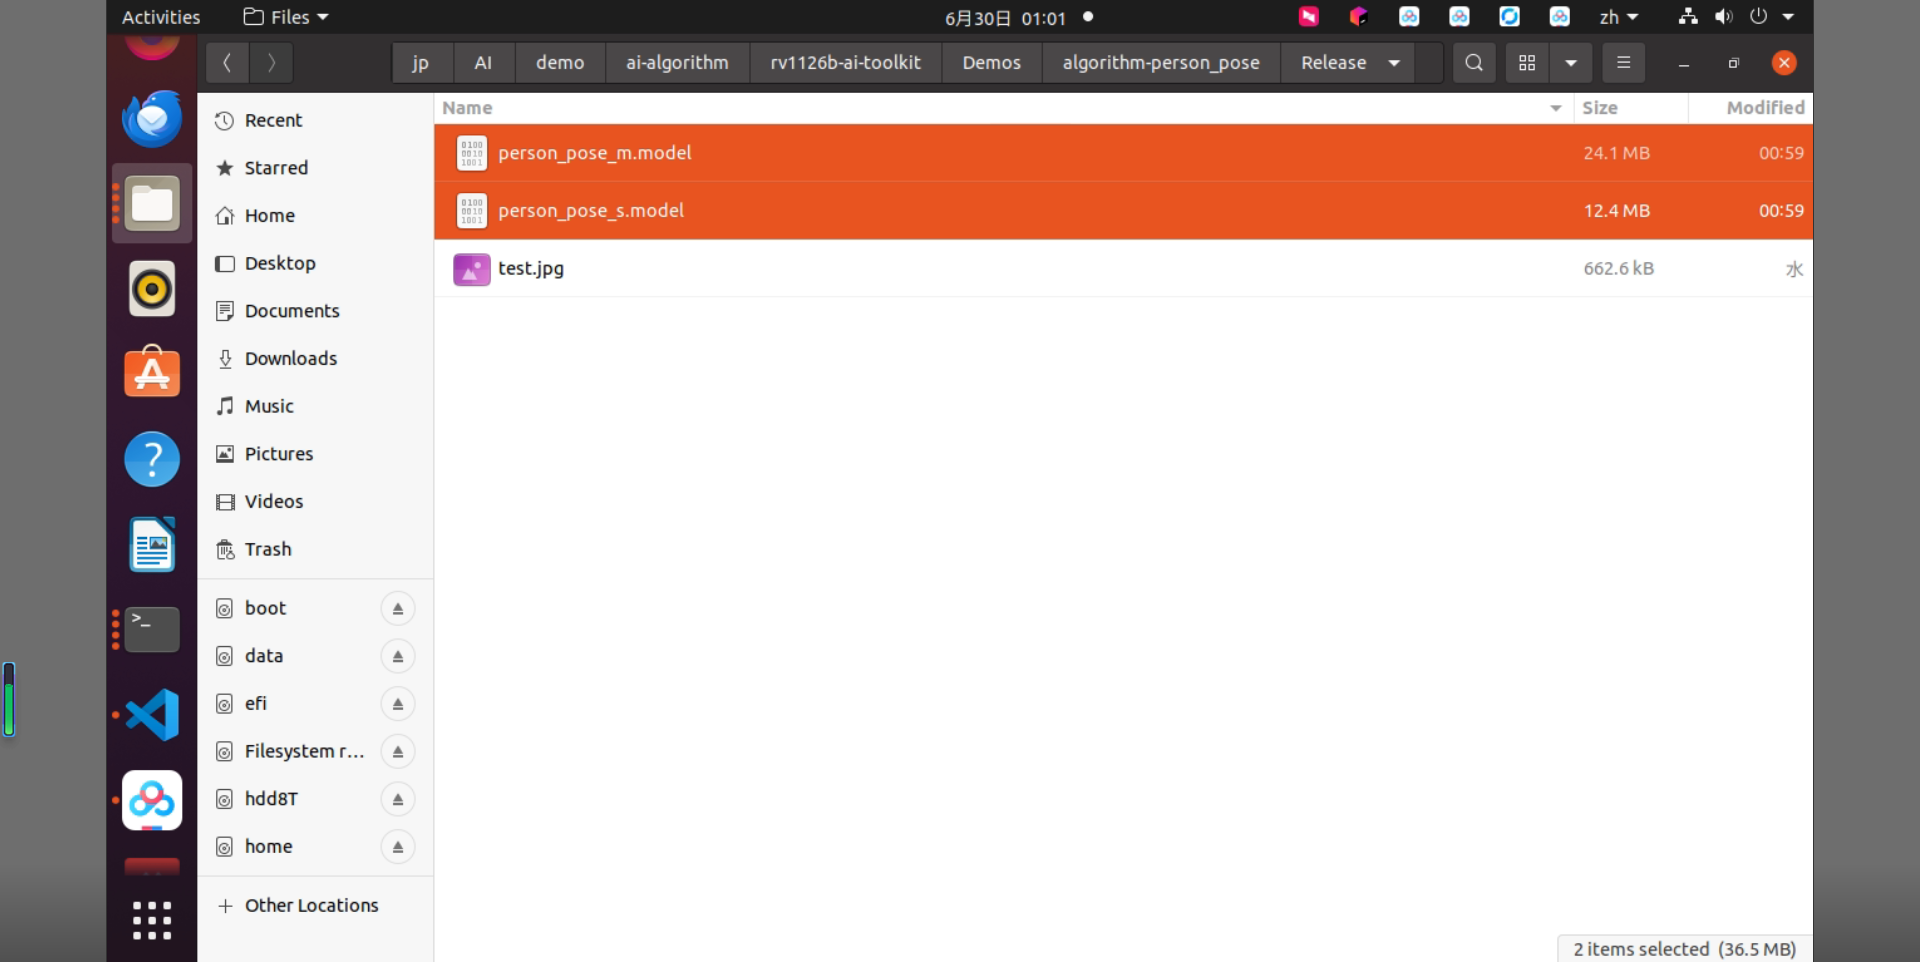
図2-2 Releaseディレクトリ内のファイル配置
2.4 サンプルのビルド
サンプルがあるディレクトリに移動してビルドを実行します。具体的なコマンドは次のとおりです。
cd rv1126b-ai-toolkit/Demos/algorithm-person_pose/./build.sh cpres* 依存ライブラリは開発ボード上に配置されているため、クロスコンパイル中は /mnt のマウントを保持する必要があります。
sudo mount -t nfs -o vers=3,proto=tcp,mountproto=tcp,nolock,retrans=5,timeo=5 192.168.10.85:/ /mnt* build.sh スクリプトに cpres パラメータを指定すると、Release/ ディレクトリ内のすべてのリソースが開発ボードへコピーされます。
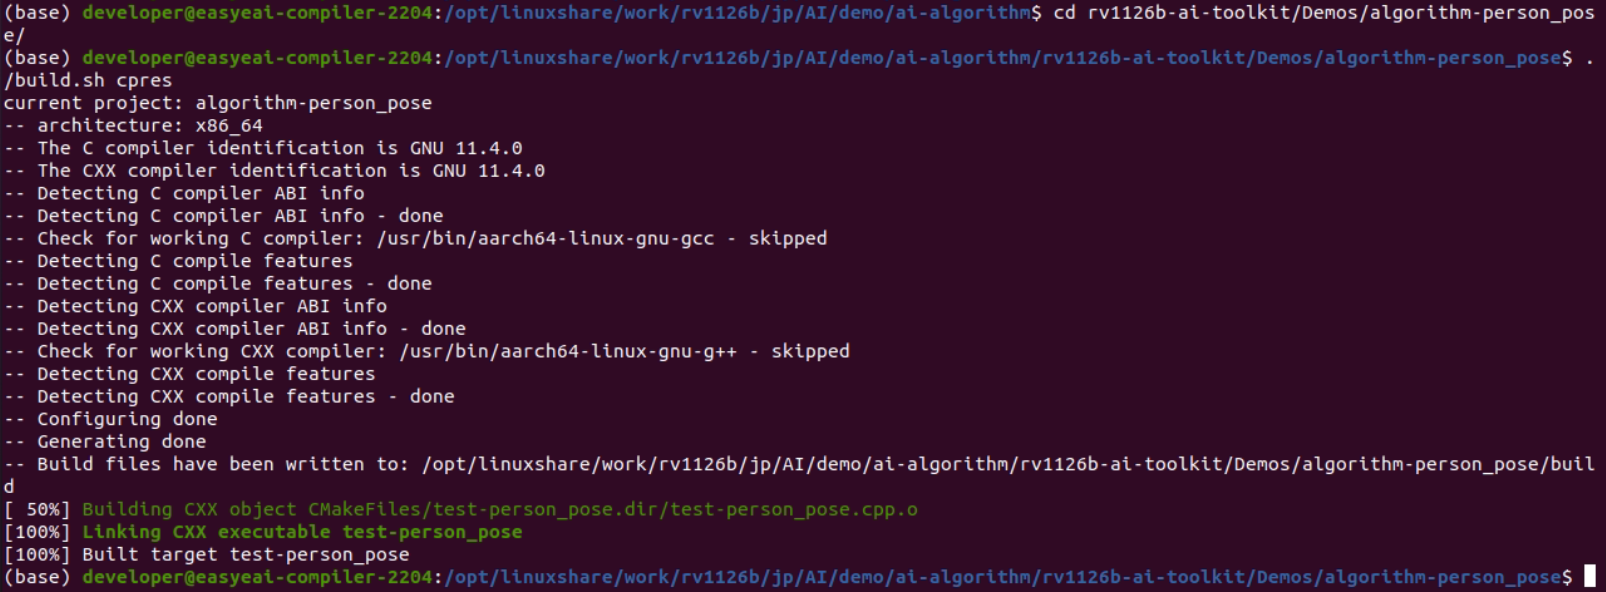
図2-3 サンプルビルド結果
2.5 サンプル実行および結果
コンパイル済みのものを基板にコピーします。
cp Release/\* /mnt/userdata/Demo/algorithm-person_pose/※./build.sh cpresでコンパイルした場合、自動的にコピーされます。
シリアルデバッグまたはSSHデバッグで開発ボードのバックエンドに入り、次のようにサンプルのデプロイ先へ移動します。
cd /userdata/Demo/algorithm-person_pose/サンプルを実行するコマンドは次のとおりです。
./test-person_pose person_pose_m.model test.jpg
図2-4 サンプル実行結果
Docker開発環境でテスト結果写真を基板からコピーしましょう。
cp /mnt/userdata/Demo/algorithm-person_pose/result.jpg .
図2-5 結果画像のコピーコマンド
認識結果は下図通りです。
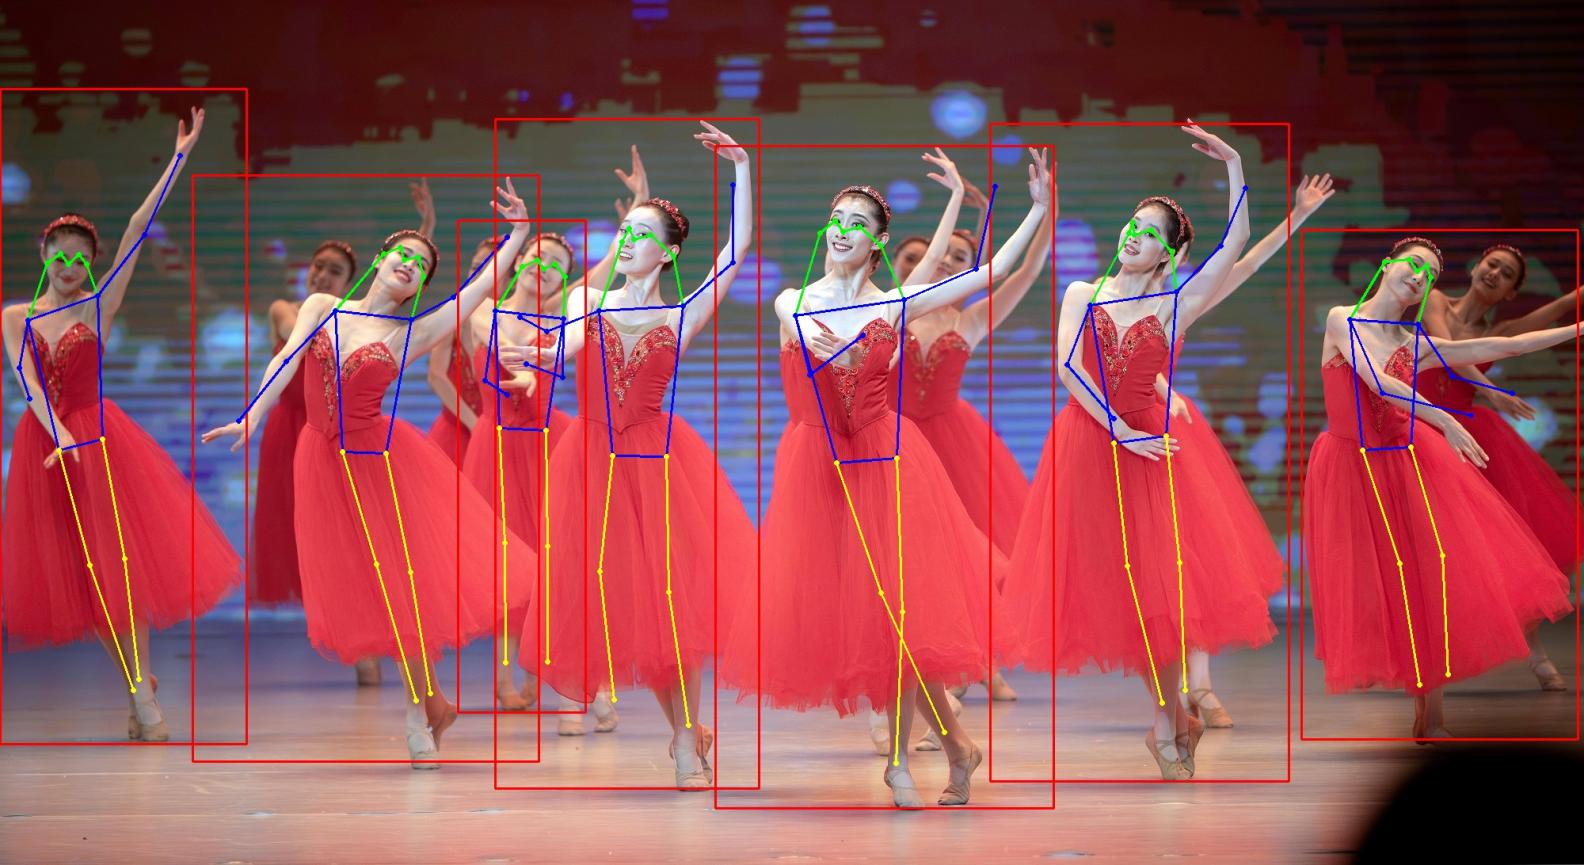
図2-6 人体キーポイント認識結果画像
APIの詳細説明およびAPI呼び出し(本サンプルのソースコード)については、以下を参照してください。
3. 人体キーポイント認識API説明
3.1 参照方法
お客様がローカルプロジェクトからEASY EAI APIライブラリを直接呼び出せるように、本プロジェクトでリンクする必必要がありますがあるライブラリおよびヘッダファイルなどを以下に示します。ユーザーはそのまま追加できます。
| 項目 | 説明 |
| ヘッダファイルディレクトリ | easyeai-api/algorithm/person_pose |
| ライブラリファイルディレクトリ | easyeai-api/algorithm/person_pose |
| ライブラリリンクパラメータ | -lperson_pose |
3.2 人体キーポイント認識初期化関数
人体キーポイント認識初期化関数原型次のとおりです。
int person_pose_init(const char \*c, person_pose_context_t \*p_person_pose, int cls_num)詳細は次のとおりです。
| 関数名: person_pose_init() | |
| ヘッダファイル | person_pose.h |
| 入力パラメータ | p_model_path:アルゴリズムモデルのパス |
| 入力パラメータ | p_person_pose:アルゴリズムハンドル |
| 入力パラメータ | cls_num:クラス数 |
| 戻り値 | 成功時の戻り値:0 |
| 失敗時の戻り値:-1 | |
| 注意事項 | なし |
3.3 人体キーポイント認識実行関数
人体キーポイント認識実行関数person_pose_run原型次のとおりです。
std::vector\<person_pose_result_t\> person_pose_run(cv::Mat image, person_pose_context_t \*p_person_pose, float nms_threshold, float conf_threshold);詳細は次のとおりです。
| 関数名:person_pose_run() | |
| ヘッダファイル | person_pose.h |
| 入力パラメータ | image:画像データ入力(cv::MatはOpenCVの型) |
| 入力パラメータ | p_person_pose:アルゴリズムハンドル |
| 入力パラメータ | nms_threshold:NMSしきい値 |
| 入力パラメータ | conf_threshold:信頼度しきい値 |
| 戻り値 | std::vector<person_pose_result_t>:person pose検出結果 |
| 注意事項 | なし |
3.4 人体キーポイント認識解放関数
人体キーポイント認識解放関数原型次のとおりです。
int person_pose_release(person_pose_context_t\* p_person_pose)詳細は次のとおりです。
| 関数名:person_pose_release() | |
| ヘッダファイル | person_pose.h |
| 入力パラメータ | p_person_pose:アルゴリズムハンドル |
| 戻り値 | 成功時の戻り値:0 |
| 失敗時の戻り値:-1 | |
| 注意事項 | なし |
4. 人体キーポイント認識サンプル
サンプルディレクトリとしてDemos/algorithm-person_pose/test-person_pose.cpp、操作フロー如以下。
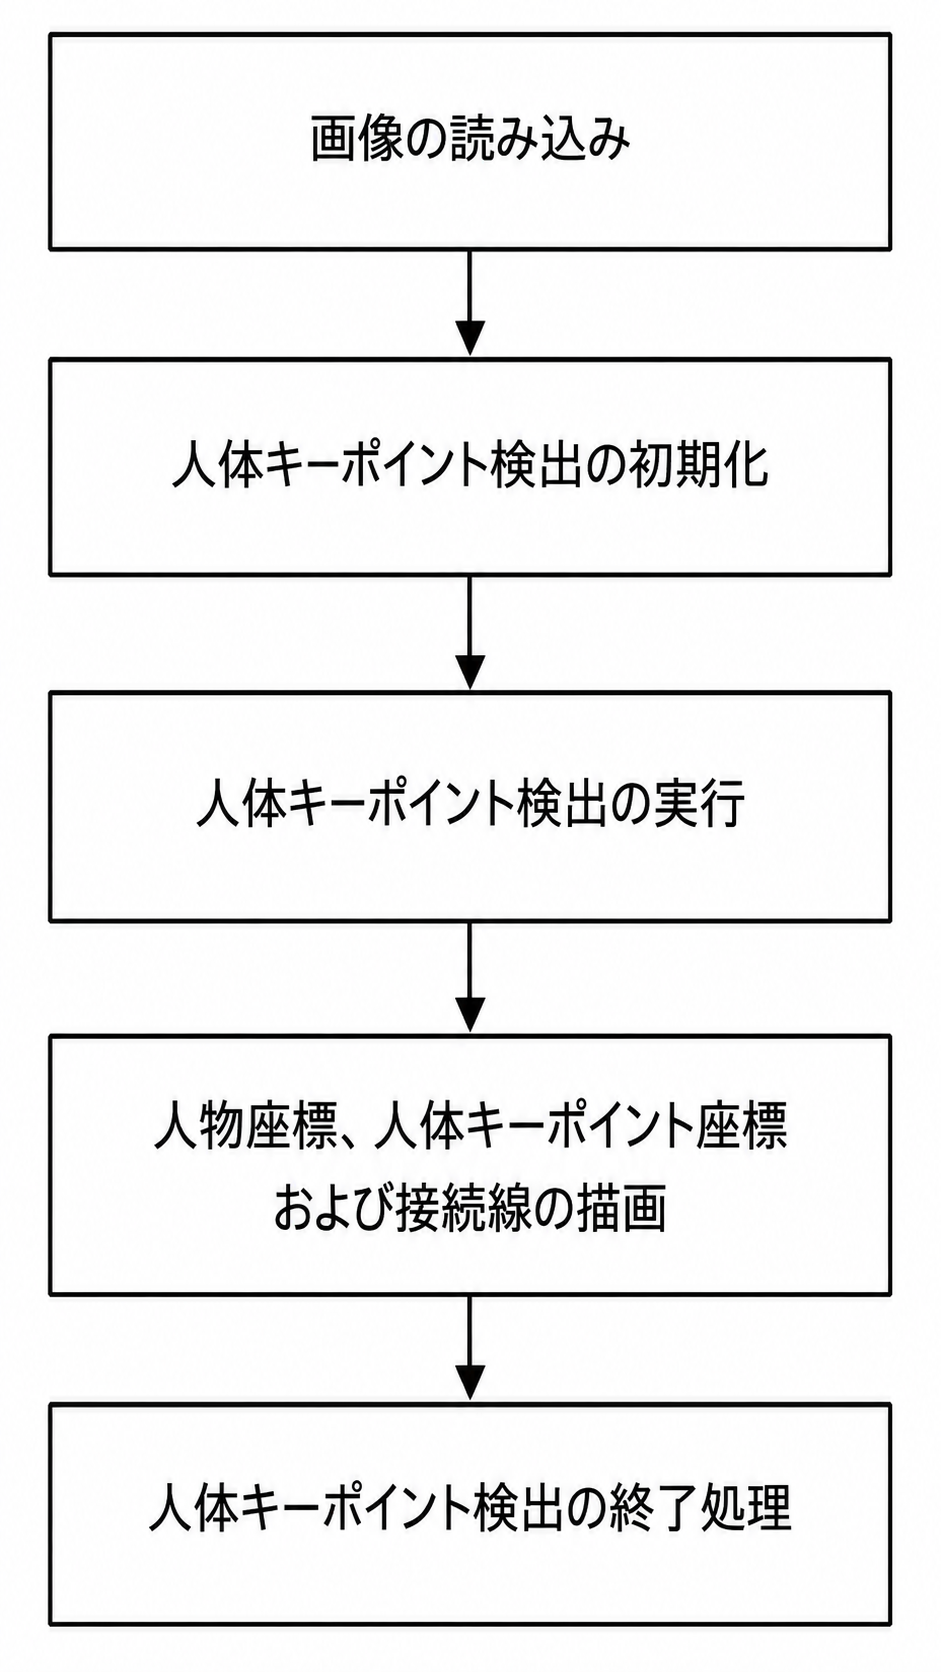
図4-1 人体キーポイント認識アルゴリズム処理フロー
参考サンプルは次のとおりです。
#include <stdint.h>#include <stdio.h>#include <stdlib.h>#include <string.h>
#include "person_pose.h"#include <opencv2/opencv.hpp>

// 線を描画しますcv::Mat draw_line(cv::Mat image, float *key1, float *key2, cv::Scalar color){  if (key1[2] > 0.1 && key2[2] > 0.1) {    cv::Point pt1(key1[0], key1[1]);    cv::Point pt2(key2[0], key2[1]);    cv::circle(image, pt1, 2, color, 2);    cv::circle(image, pt2, 2, color, 2);    cv::line(image, pt1, pt2, color, 2);  }
  return image;}

// 結果を描画します:// 0 鼻、1 左目、2 右目、3 左耳、4 右耳、5 左肩、6 右肩、7 左肘、8 右肘、9 左手首、10 右手首、11 左股関節、12 右股関節、13 左膝、14 右膝、15 左足首、16 右足首cv::Mat draw_image(cv::Mat image, std::vector<person_pose_result_t> results){  long unsigned int i =0;  for (i = 0; i < results.size(); i++) {    // 顔部分を描画します    image = draw_line(image, results[i].keypoints[0], results[i].keypoints[1], CV_RGB(0, 255, 0));    image = draw_line(image, results[i].keypoints[0], results[i].keypoints[2], CV_RGB(0, 255, 0));    image = draw_line(image, results[i].keypoints[1], results[i].keypoints[3], CV_RGB(0, 255, 0));    image = draw_line(image, results[i].keypoints[2], results[i].keypoints[4], CV_RGB(0, 255, 0));    image = draw_line(image, results[i].keypoints[3], results[i].keypoints[5], CV_RGB(0, 255, 0));    image = draw_line(image, results[i].keypoints[4], results[i].keypoints[6], CV_RGB(0, 255, 0));
    // 上半身を描画します    image = draw_line(image, results[i].keypoints[5], results[i].keypoints[6], CV_RGB(0, 0, 255));    image = draw_line(image, results[i].keypoints[5], results[i].keypoints[7], CV_RGB(0, 0, 255));    image = draw_line(image, results[i].keypoints[7], results[i].keypoints[9], CV_RGB(0, 0, 255));    image = draw_line(image, results[i].keypoints[6], results[i].keypoints[8], CV_RGB(0, 0, 255));    image = draw_line(image, results[i].keypoints[8], results[i].keypoints[10], CV_RGB(0, 0, 255));    image = draw_line(image, results[i].keypoints[5], results[i].keypoints[11], CV_RGB(0, 0, 255));    image = draw_line(image, results[i].keypoints[6], results[i].keypoints[12], CV_RGB(0, 0, 255));    image = draw_line(image, results[i].keypoints[11], results[i].keypoints[12], CV_RGB(0, 0, 255));
    // 下半身を描画します    image = draw_line(image, results[i].keypoints[11], results[i].keypoints[13], CV_RGB(255, 255, 0));    image = draw_line(image, results[i].keypoints[13], results[i].keypoints[15], CV_RGB(255, 255, 0));    image = draw_line(image, results[i].keypoints[12], results[i].keypoints[14], CV_RGB(255, 255, 0));    image = draw_line(image, results[i].keypoints[14], results[i].keypoints[16], CV_RGB(255, 255, 0));
    cv::Rect rect(results[i].left, results[i].top, (results[i].right - results[i].left), (results[i].bottom - results[i].top));    cv::rectangle(image, rect, CV_RGB(255, 0, 0), 2);  }
  return image;}
/// メイン関数int main(int argc, char **argv){    if (argc != 3) {        printf("%s <model_path> <image_path>\n", argv[0]);        return -1;    }

    const char *p_model_path = argv[1];    const char *p_img_path = argv[2];  printf("Model path = %s, image path = %s\n\n", p_model_path, p_img_path);  cv::Mat image = cv::imread(p_img_path);
  printf("Image size = (%d, %d)\n", image.rows, image.cols);    int ret;  person_pose_context_t yolo11_pose;    memset(&yolo11_pose, 0, sizeof(yolo11_pose));
  person_pose_init(p_model_path, &yolo11_pose, 1);

  double start_time = static_cast<double>(cv::getTickCount());  std::vector<person_pose_result_t> results = person_pose_run(image, &yolo11_pose, 0.35, 0.35);
  double end_time = static_cast<double>(cv::getTickCount());  double time_elapsed = (end_time - start_time) / cv::getTickFrequency() * 1000;  std::cout << "person pose run time: " << time_elapsed << " ms" << std::endl;
  // 結果を描画します  image = draw_image(image, results);
  cv::imwrite("result.jpg", image);  printf("Detect size = %ld\n", results.size());
    ret = person_pose_release(&yolo11_pose);
    return ret;}